Some fall crochet patterns are beautiful but demand complicated shaping, dozens of rounds, frequent stitch counting, or techniques that can feel intimidating when you are still building confidence.
This pumpkin is different.
You begin by crocheting one ordinary rectangle. There is no magic ring, no complicated increase sequence, and no need to crochet a three-dimensional body in continuous rounds. Once the rectangle is finished, a few simple assembly steps transform it into a soft, deeply ribbed autumn pumpkin.
The basic process is surprisingly satisfying:
Crochet a rectangle → join it into a tube → gather one end → add stuffing → gather the second end → sculpt the center → add a stem.
For this original tutorial, we will use half double crochet worked through the back loop only, usually abbreviated as hdc BLO. Working repeatedly into one loop creates raised vertical ribs that help the finished pumpkin look textured and dimensional.
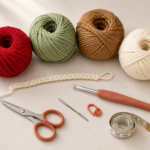
The sample uses muted burnt-terracotta yarn with a dark olive-brown stem, but the same pattern can work beautifully in cream, mustard, rust, sage, pumpkin orange, oatmeal, charcoal, or even dusty pink.
This is the kind of fall project that works almost anywhere: on a mantel, bookshelf, dining table, entryway console, Thanksgiving centerpiece, teacher’s desk, or seasonal gift basket.
What You’ll Learn
By completing this beginner fall crochet pumpkin, you will practice how to:
- Make a foundation chain.
- Work half double crochet.
- Identify the back loop of a stitch.
- Create crochet ribbing.
- Count rows consistently.
- Keep rectangular edges straight.
- Join two crochet edges.
- Sew a running stitch.
- Cinch a circular opening.
- Stuff crochet fabric evenly.
- Sculpt a three-dimensional pumpkin.
- Make a small crochet stem.
- Weave in yarn ends securely.
- Adjust the pumpkin’s height and circumference.
Materials You’ll Need
For one medium pumpkin approximately 4.5 inches wide and 3 inches high, gather:
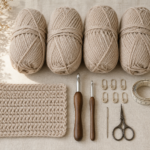
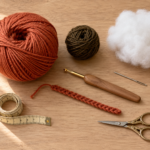
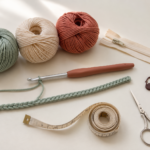
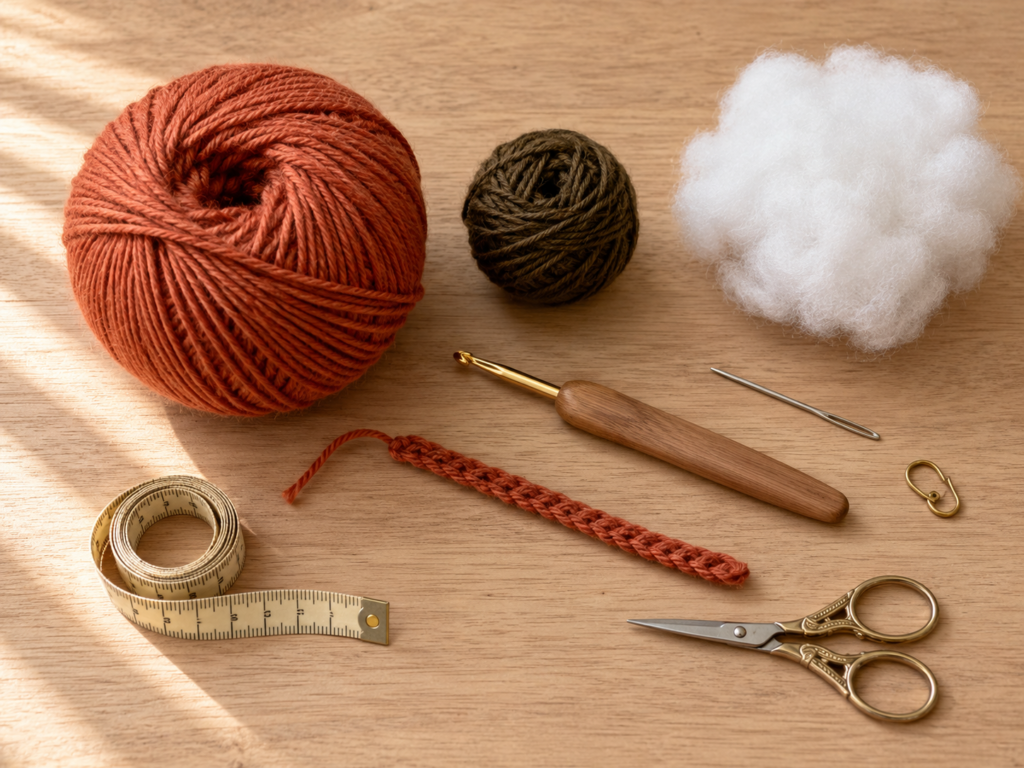
- Approximately 70–90 yards / 64–82 meters of medium worsted-weight yarn for the body.
- Small amount of dark brown or olive-brown yarn for the stem.
- 5 mm / H-8 crochet hook.
- Polyester fiberfill.
- Blunt tapestry needle.
- Scissors.
- Stitch marker, optional.
- Flexible measuring tape.
The Craft Yarn Council classifies worsted and Aran yarns within the medium yarn-weight category. Yarn category alone does not guarantee that two yarns will behave identically, however, so texture, fiber, gauge, and fabric density should also be considered when substituting yarn.
Finished Size
Using worsted-weight yarn and a 5 mm hook, the sample is designed to finish at approximately:
Width: 4–4.5 inches / 10–11.5 cm
Height excluding stem: 2.75–3.25 inches / 7–8 cm
Your dimensions may differ slightly depending on:
- Yarn thickness.
- Fiber content.
- Hook size.
- Personal tension.
- Amount of stuffing.
- How tightly you sculpt the center.
Exact gauge is not essential for a decorative pumpkin, but the fabric should be dense enough that stuffing does not show prominently between stitches.
Gauge and Tension
Approximate sample gauge:
14 hdc BLO stitches × 11 rows = 4 inches / 10 cm
Gauge is flexible for this project.
The more important goal is to create a fabric that is:
- Soft enough to gather.
- Dense enough to contain stuffing.
- Firm enough to retain visible vertical ribs.
Very loose fabric may show fiberfill.
Extremely tight fabric can be difficult to gather and may make the pumpkin stiff.
Crochet Abbreviations Used
This tutorial uses U.S. crochet terminology:
- ch = chain.
- hdc = half double crochet.
- sl st = slip stitch.
- st/sts = stitch/stitches.
- rep = repeat.
- BLO = back loop only.
- RS = right side.
- WS = wrong side.
These abbreviations follow standard terminology listed by the Craft Yarn Council.
U.S./U.K. terminology note
This pattern is written in U.S. terms.
A U.S. half double crochet is called a half treble crochet in standard U.K. terminology.
Before You Start
How to make a half double crochet
To make one hdc:
- Yarn over.
- Insert your hook into the designated stitch.
- Yarn over.
- Pull up a loop.
You now have three loops on your hook.
- Yarn over again.
- Pull through all three loops.
How to identify the back loop
Look at the top of a crochet stitch.
You will see two loops forming a small V.
When the work is facing you:
- The loop closest to you is the front loop.
- The loop farther away is the back loop.
For this pumpkin, most stitches are worked only through that farther back loop.
This leaves the front loop unused, creating the raised line that becomes the ribbing.
How to count rows
Each raised ridge helps you visually track the rows.
For the sample, complete 28 total rows.
Using a row counter, paper tally, or phone note can prevent accidentally making 27 or 29 rows.
One-row differences may not ruin the pumpkin, but consistent counts produce predictable proportions.
How to keep edges straight
The first and last stitches are easy to miss.
After every row, count:
18 stitches.
Do not work into the turning chain unless explicitly instructed.
How to avoid curling
A little curling in ribbed crochet is normal.
Severe curling usually comes from very tight tension.
Try:
- Relaxing your grip.
- Making the turning chain loosely.
- Going up to a 5.5 mm hook when necessary.
- Gently stretching the finished rectangle before assembly.
You do not need to block the rectangle perfectly flat because it will ultimately be stuffed.
How to choose fall colors
Classic autumn choices include:
- Burnt orange.
- Rust.
- Mustard.
- Oatmeal.
- Olive green.
- Cinnamon brown.
- Deep burgundy.
For a more modern neutral look:
- Ivory.
- Taupe.
- Mushroom.
- Charcoal.
- Sage.
- Dusty terracotta.
The same pattern can become a coordinated pumpkin collection simply by changing yarn colors.
Step-by-Step Crochet Tutorial
Step 1: Make the Foundation Chain
Leave a yarn tail approximately 24–30 inches long before making your slip knot. This tail can later help with assembly.
With burnt-terracotta worsted-weight yarn and a 5 mm hook:
Ch 19.
Do not pull your chains excessively tight.
The foundation chain determines the approximate vertical height of the pumpkin fabric before stuffing and shaping.
Row 1
Beginning in the second chain from the hook:
Hdc in each chain across.
Stitch count: 18 hdc.
Ch 1 and turn.
The turning chain does not count as a stitch.
Beginner tip:
Count the foundation chains twice before beginning Row 1. Correcting a chain-count problem now is much easier than after completing several rows.
Common mistake to avoid:
Do not count the loop already on your crochet hook as a chain.
Step 2: Crochet the Ribbed Rectangle
Row 2
Hdc BLO in each of the 18 stitches across.
Ch 1 and turn.
Rows 3–28
Repeat Row 2:
Hdc BLO in each of the 18 stitches across. Ch 1 and turn.
After Row 28, your fabric should resemble a ribbed rectangle.
The long dimension will eventually wrap around the pumpkin’s circumference. The shorter dimension runs vertically from the bottom center toward the top center.
Before assembly, check:
- 18 stitches per row.
- 28 total rows.
- Similar tension throughout.
- Strong visible ribs.
- No obvious missing stitches at either edge.
Beginner tip:
Pause every five rows and count your stitches. Do not wait until the final row to discover that your rectangle has gradually narrowed.
Common mistake to avoid:
Accidentally switching between BLO and both loops.
Look at the surface regularly. The raised ridges should remain consistent.
Step 3: Join the Rectangle into a Tube
After completing Row 28, do not immediately cut the working yarn.
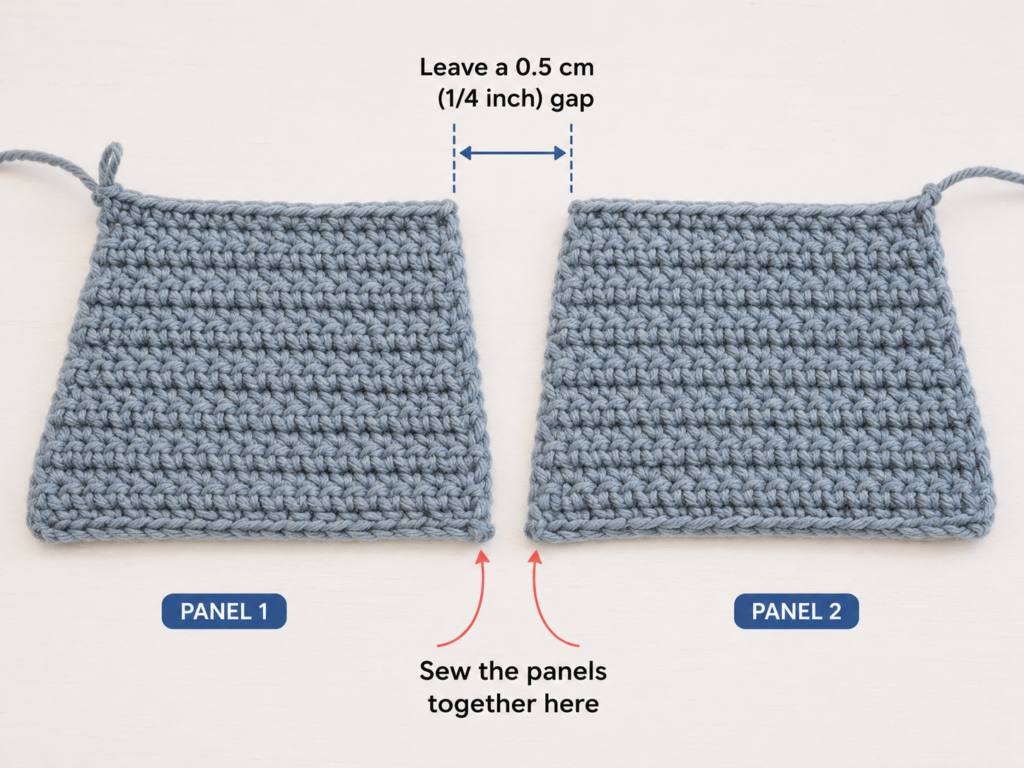
Bring the two short edges together.
The raised ribbing should run vertically from one circular opening to the other once the seam is complete.
With the wrong side facing outward, align the first and final rows.
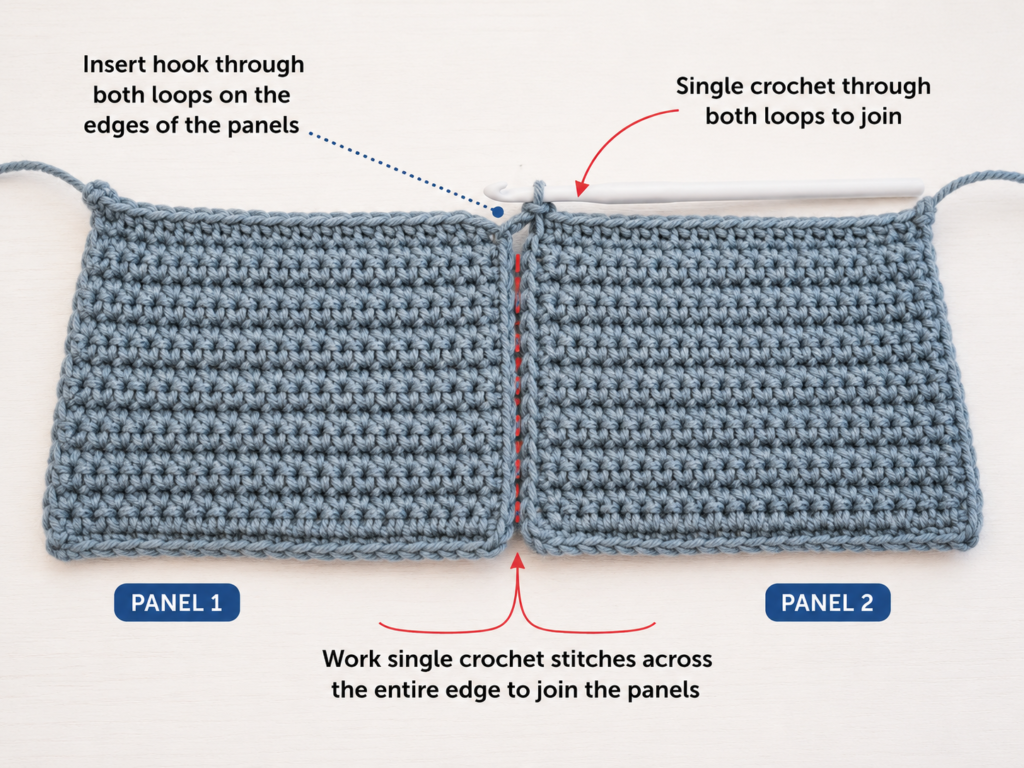
You can join them with either:
- Loose slip stitches using your crochet hook.
- A whip stitch using a tapestry needle.
For the crochet method:
- Insert the hook through corresponding edge loops on both layers.
- Yarn over.
- Pull through both fabric edges and the loop already on your hook.
- Continue evenly from one end to the other.
Avoid making the seam extremely tight.
When finished, fasten off, leaving a long yarn tail.
Turn the tube so the preferred side faces outward.
Beginner tip:
Before committing to the seam, check the direction of your ribs. They should run vertically around the future pumpkin.
Common mistake to avoid:
Pulling every slip stitch very tightly.
A tight seam may pucker and become more visible after stuffing.
Step 4: Sew and Cinch the Bottom
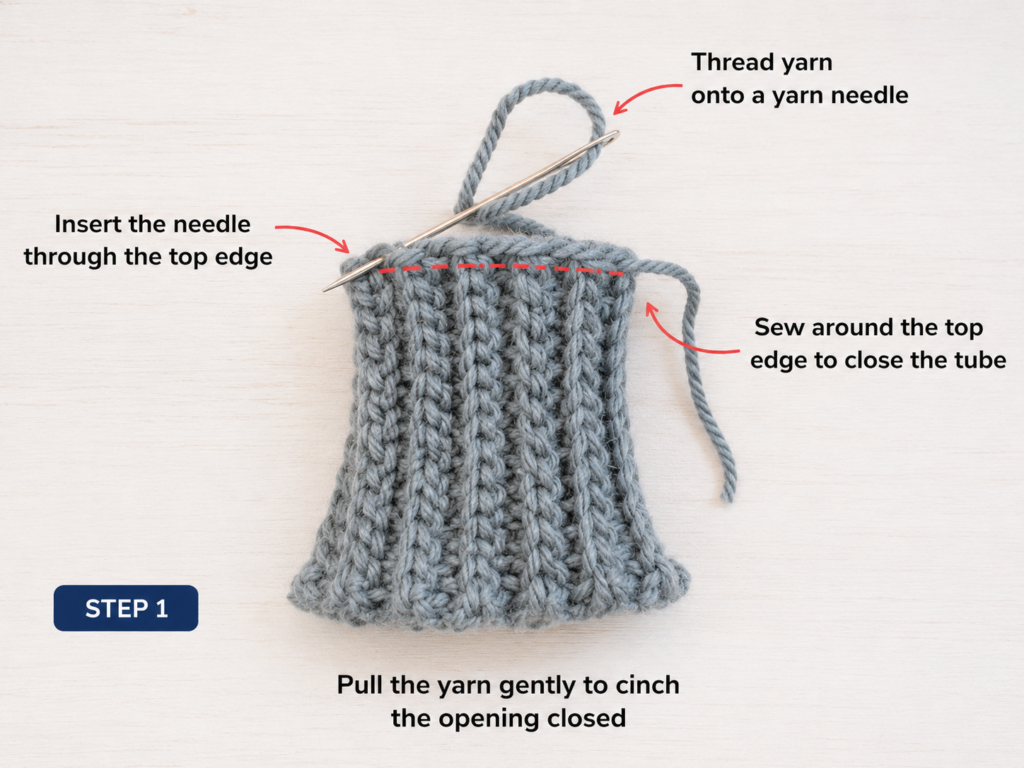
Thread one long terracotta yarn tail onto your tapestry needle.
Choose one circular opening to become the bottom.
Beginning near the seam, sew a simple running stitch around the entire edge.
Work approximately every 1/4–1/2 inch.
Your needle should move:
- Into the fabric.
- Out of the fabric.
- Into the next section.
- Out again.
Continue around the full circumference.
Now pull the yarn gradually.
The opening should begin gathering like a drawstring bag.
Do not yank the yarn suddenly. Slow pressure reduces the chance of breaking it.
Once the hole is almost completely closed:
- Pull firmly.
- Sew across the small remaining center opening several times.
- Secure the yarn.
- Do not leave a bulky knot on the outer surface.
Beginner tip:
Use a yarn tail long enough to sew comfortably. A short tail is much harder to pull through a gathered opening.
Common mistake to avoid:
Making huge gaps between running stitches.
Large gaps create uneven folds and can leave a noticeable opening.
Step 5: Stuff the Pumpkin Evenly
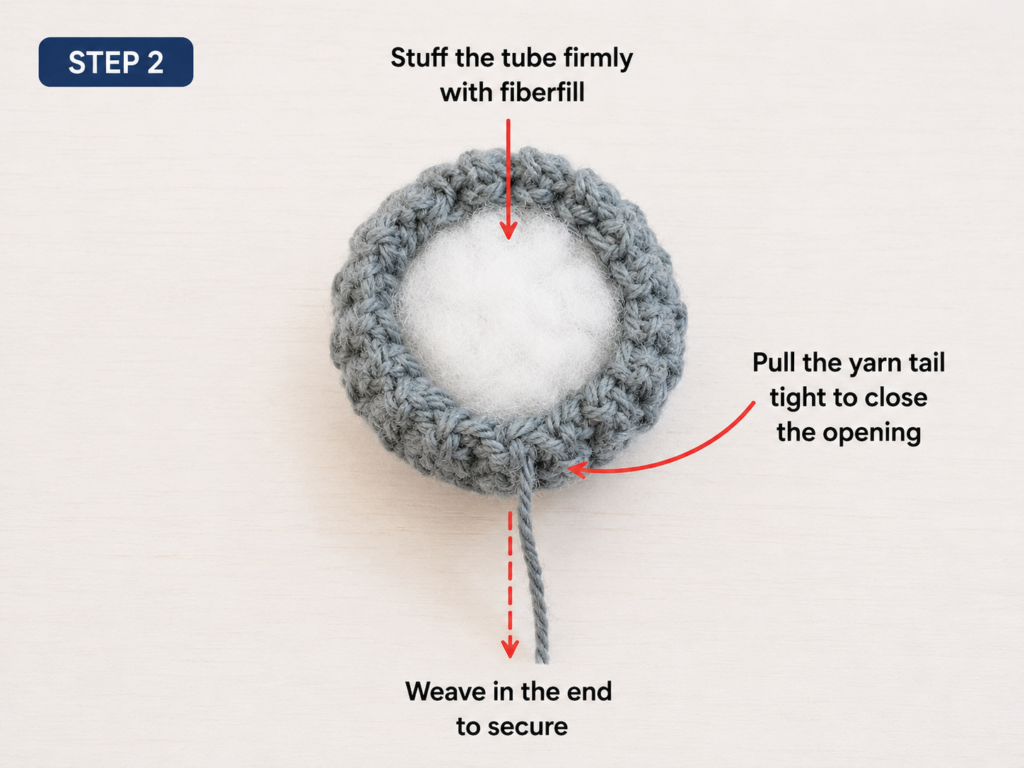
Turn the work so the finished surface faces outward if you have not done so already.
Begin adding polyester fiberfill.
Use small portions rather than forcing one huge clump into the center.
Distribute stuffing toward:
- The bottom.
- The sides.
- The area near the seam.
- The center.
Rotate the pumpkin while working.
The goal is a full, softly rounded shape.
Do not overstuff to the point that:
- Large gaps appear between stitches.
- The ribs disappear.
- The fabric becomes hard.
- The top cannot be closed comfortably.
A useful test is to squeeze the pumpkin lightly.
It should recover its shape while remaining soft.
Beginner tip:
Add less stuffing than you think you need at first. You can always add more before closing the top.
Common mistake to avoid:
Leaving the sides hollow while placing all fiberfill in the middle.
This can create a lumpy or tall cylindrical pumpkin instead of a rounded shape.
Step 6: Close the Top Opening
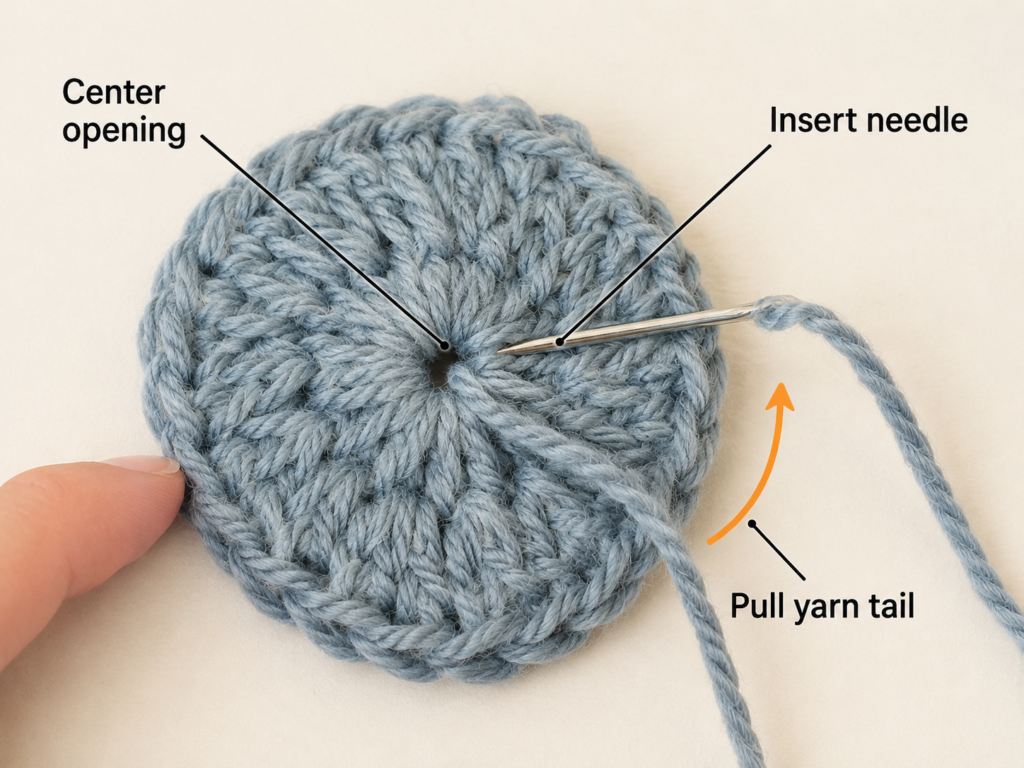
Thread the second long yarn tail onto your tapestry needle.
Use the same running-stitch method around the upper opening.
Do not pull it fully closed immediately.
First gather the opening until only a small gap remains.
Check the stuffing.
Ask yourself:
- Is the pumpkin full enough?
- Are there obvious hollow areas?
- Is one side flatter than the other?
- Is the seam excessively visible?
Add or redistribute fiberfill now.
Once satisfied, pull the upper opening closed.
Secure the center by sewing through several opposing edge stitches.
Do not cut the yarn yet—you will use a long strand to sculpt the pumpkin in the next step.
Beginner tip:
Before closing permanently, place the pumpkin on the table. This helps reveal whether it leans heavily to one side.
Common mistake to avoid:
Cutting the long yarn tail immediately after closing the top.
Keep it available for center shaping.
Step 7: Create the Pumpkin’s Center Indentation
This is the step that changes a soft crochet ball into a more recognizable pumpkin.
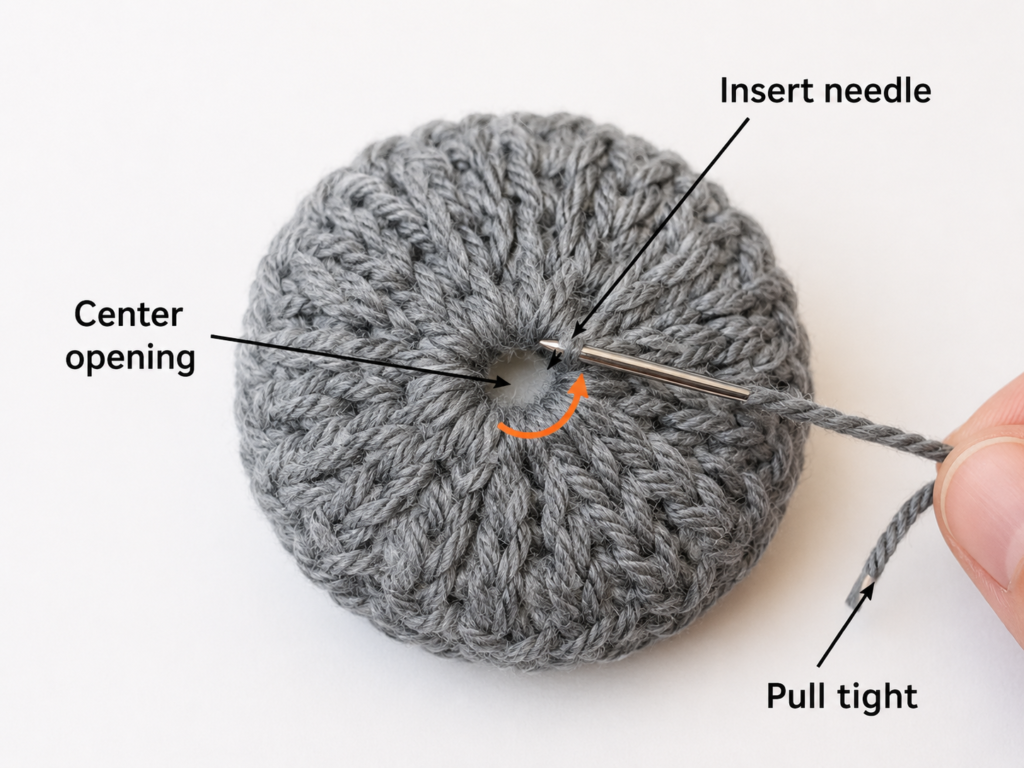
Use a long tapestry needle threaded with a strong length of matching yarn.
Insert the needle through the gathered center at the top.
Push it vertically through the entire pumpkin until it exits at the bottom center.
Pull the yarn firmly but gradually.
The top and bottom centers should draw slightly toward one another.
Now pass the needle back from bottom to top.
Repeat once or twice until you like the shape.
Avoid pulling so strongly that the pumpkin collapses.
Secure the yarn inside the top indentation, where the stem will later help conceal the fastening point.
Beginner tip:
Rotate the pumpkin after each pass. Check the silhouette from every side before tightening again.
Common mistake to avoid:
Pulling the yarn so tightly that the pumpkin becomes flat.
A gentle central indentation is enough.
Step 8: Crochet a Small Stem
You can use a natural twig or cinnamon stick for a rustic effect, but this tutorial keeps the project completely crocheted.
With dark olive-brown yarn and the same 5 mm hook:
Ch 3.
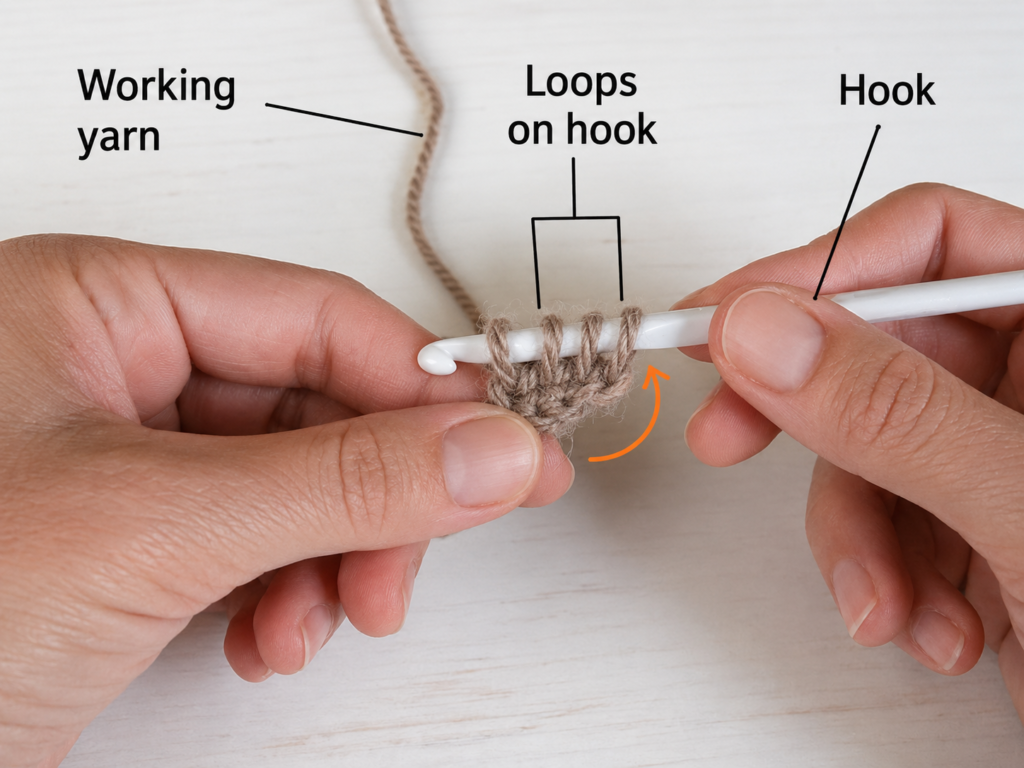
Insert the hook into the second chain from the hook and pull up a loop.
Insert the hook into the next chain and pull up another loop.
You now have three loops on the hook.
To continue the small cord:
- Carefully slide the last two loops off the hook while holding them securely.
- Yarn over and pull through the remaining loop.
- Return the next loop to the hook.
- Yarn over and pull through it.
- Return the final loop.
- Yarn over and pull through.
Repeat this sequence for approximately 4–5 short cord rows, or until the stem measures roughly 1 inch.
Finish by placing all three loops on the hook, yarning over, and pulling through all three.
Fasten off with a long sewing tail.
Beginner tip:
The two removed loops can unravel easily. Pinch them securely between your fingers.
Common mistake to avoid:
Do not make the stem excessively long for a small pumpkin. A compact stem keeps the proportions balanced.
Step 9: Attach the Stem
Position the stem inside the upper indentation.
Thread its sewing tail through your tapestry needle.
Sew through:
- The base of the stem.
- Several sturdy stitches surrounding the top center.
- The stem base again.
Repeat until secure.
Try not to pull so hard that the stem tilts dramatically.
Weave the remaining tail inside the pumpkin body.
The stem should feel stable when touched gently.
Pattern Notes or Stitch Notes
Turning-chain rules
The ch 1 at the end of each row is used only to gain height before turning.
It does not count as a stitch.
Each row contains:
18 hdc stitches.
Stitch count
- Foundation: Ch 19.
- Row 1: 18 hdc.
- Rows 2–28: 18 hdc BLO.
The stitch count remains constant throughout the rectangle.
Repeat pattern
The main body repeat is simply:
Hdc BLO in every stitch across. Ch 1 and turn.
Repeat until 28 total rows are complete.
Row notes
The pumpkin is crocheted completely flat.
No body rounds are required.
The three-dimensional form is created during assembly.
Right side and wrong side
Choose whichever surface you prefer as the visible right side.
When making the side seam, keep the less attractive surface facing outward temporarily, then turn the tube so your preferred texture faces outward before stuffing.
Size adjustment notes
The pumpkin’s two principal dimensions come from different parts of the rectangle:
- Number of stitches controls approximate pumpkin height.
- Number of rows controls approximate circumference.
For a shorter pumpkin, use fewer starting chains.
For a wider pumpkin, crochet more rows.
A practical larger version might use:
- Ch 23.
- 22 hdc per row.
- Approximately 34–38 rows.
A small version might use:
- Ch 15.
- 14 hdc per row.
- Approximately 22–24 rows.
Always keep enough rectangle length to wrap comfortably into a tube.
Common Beginner Mistakes
1. The rectangle gradually becomes narrower
Likely cause: Missing the first or last stitch of a row.
Fix: Count all 18 stitches after every row until you can recognize the edge stitches confidently.
2. The ribbing suddenly changes appearance
Likely cause: You accidentally crocheted through both loops or the front loop.
Fix: Check the top V of each stitch and work only through the loop farthest from you.
3. The side seam looks bulky
Likely cause: Joining too tightly or catching too much fabric with every stitch.
Fix: Use relaxed slip stitches and align corresponding edges carefully.
4. The bottom will not close completely
Likely cause: Running stitches were spaced too far apart.
Fix: Sew another smaller gathering round closer to the center opening and cinch again.
5. Stuffing shows through the stitches
Likely cause: Loose tension or excessive stuffing.
Fix: Remove a little fiberfill. For the next pumpkin, use a slightly smaller hook.
6. The pumpkin is tall and cylindrical
Likely cause: The rectangle is too short around its circumference, or the stuffing is concentrated in the vertical center.
Fix: Redistribute stuffing toward the sides. For future pumpkins, increase the row count.
7. The pumpkin looks flat
Likely cause: Too little stuffing or overly aggressive center sculpting.
Fix: Add more fiberfill before closing, or reduce the center tension.
8. The ribs disappear after stuffing
Likely cause: Overstuffing.
Fix: Remove some fiberfill and massage the fabric gently until the ribs reappear.
How to Customize This Crochet Project
Change the yarn
You can make this pumpkin with:
- Acrylic.
- Cotton.
- Wool.
- Wool blends.
- Chenille.
- Chunky yarn.
- Super bulky yarn.
The Craft Yarn Council’s weight system categorizes yarn by thickness, but yarns within one category are not automatically interchangeable; gauge and fabric characteristics can still vary.
Create a neutral pumpkin collection
Try:
- Cream.
- Oatmeal.
- Mushroom.
- Taupe.
- Warm gray.
- Charcoal.
Use the same brown stem on every pumpkin to visually connect the collection.
Make a traditional autumn palette
Try:
- Burnt orange.
- Golden mustard.
- Deep rust.
- Olive green.
- Burgundy.
- Cinnamon.
A group of three different colors works particularly well as a mantel arrangement or table centerpiece.
Make a farmhouse version
Use cream or oatmeal yarn.
Add:
- A natural twig stem.
- Jute bow.
- Wooden bead.
- Small crocheted leaf.
Avoid overdecorating a small pumpkin; one or two details are usually enough.
Add a crochet leaf
A small green leaf can be sewn beside the stem.
For a simple version:
- Ch 7.
- Beginning in the second chain from the hook, work sc, hdc, dc, dc, hdc, sc.
- Fasten off with a long tail.
- Sew beside the stem.
Change the texture
Once comfortable with the construction method, experiment with:
- Single crochet BLO.
- Half double crochet BLO.
- Double crochet BLO.
- Alternating textured rows.
- Front-post/back-post ribbing.
Different stitches produce different densities and silhouettes.
Make several sizes
A three-pumpkin display might include:
Small: 14 stitches × 22 rows.
Medium: 18 stitches × 28 rows.
Large: 22 stitches × 36 rows.
These are starting suggestions rather than fixed guarantees because actual dimensions depend on yarn, hook, gauge, and stuffing.
Gift ideas and use cases
Crochet pumpkins work well as:
- Hostess gifts.
- Thanksgiving décor.
- Teacher gifts.
- Fall market inventory.
- Mantel decorations.
- Shelf styling.
- Dining-table accents.
- Autumn wreath embellishments.
- Seasonal photo props.
- Handmade gift-basket additions.
Finishing Instructions
Fastening off
After completing a stitch section:
- Cut the yarn, leaving the required sewing length.
- Pull the cut end completely through the remaining loop.
- Tighten gently.
For assembly pieces, leave longer tails than usual.
Weaving in ends
Use a tapestry needle.
Pass each yarn tail beneath several stitches on the wrong side or hidden interior area.
Change direction at least once.
Trim only after the tail feels secure.
Blocking
Heavy blocking is unnecessary because the pumpkin is stuffed.
Before assembly, you may gently stretch the completed rectangle by hand to even the ribs.
For stubborn curling, light blocking can help, provided the method is suitable for your yarn fiber.
Shaping
After completing the center indentation:
- Roll the pumpkin gently between your palms.
- Massage stuffing toward flat areas.
- Adjust individual ribs with your fingertips.
- Check the pumpkin from the front, sides, and top.
Small handmade irregularities are normal.
Washing and care
Follow the care instructions printed on the yarn label used for your particular pumpkin. The Craft Yarn Council notes that care symbols on yarn labels indicate appropriate washing, drying, ironing, bleaching, and professional-cleaning methods for items made from that yarn.
For decorative stuffed pumpkins, spot cleaning is often easier than frequent full washing.
Keep the original yarn label with your project notes so you remember the correct fiber and care method.
Quick Printable-Style Summary
Project: Easy Ribbed Fall Crochet Pumpkin
Skill level: Beginner to Easy
Finished size: Approximately 4–4.5 inches wide × 3 inches high
Yarn: Medium/worsted-weight yarn
Hook: 5 mm / H-8
Body color: Muted burnt terracotta
Stem color: Dark olive brown
Main stitches: Chain, half double crochet, back loop only half double crochet, slip stitch
Starting chain
Ch 19.
Row 1
Hdc in second chain from hook and every remaining chain.
18 sts.
Rows 2–28
Ch 1 and turn.
Hdc BLO in each of 18 sts.
Repeat through Row 28.
Assembly
- Fold the rectangle so short edges meet.
- Join short edges to create a tube.
- Sew a running stitch around the lower opening.
- Cinch tightly closed.
- Add fiberfill evenly.
- Sew around the upper opening.
- Cinch closed.
- Pass a long tapestry needle through the pumpkin center.
- Pull gently to create the indentation.
- Crochet and attach the stem.
Finishing
Weave in all ends, redistribute stuffing, shape gently, and follow your yarn label’s specific care instructions.
FAQ
Is a crochet pumpkin a good beginner fall crochet pattern?
Yes. A rectangle-based pumpkin avoids complicated body increases and decreases. This version mainly requires foundation chains, half double crochet, back-loop-only stitches, simple seaming, gathering, stuffing, and basic sewing.
Why is my crochet pumpkin too tall?
The starting-chain length affects the approximate height.
For a shorter pumpkin, use fewer chains.
The row count affects the circumference, so adding rows can also create a broader appearance.
Can I make this crochet pumpkin without a magic ring?
Yes. This pattern does not use a magic ring at all. The body begins as a flat rectangle.
What yarn is best for crochet pumpkins?
Worsted-weight acrylic, cotton, wool, and wool blends can all work. Choose a yarn with enough stitch definition to show the ribbed texture.
Changing the fiber or thickness can alter size, structure, softness, and gauge.
Can I use chunky yarn?
Yes.
Use a hook appropriate for the chosen yarn and expect a significantly larger pumpkin.
You may also need fewer stitches and rows, depending on your target dimensions.
Why can I see stuffing between the stitches?
Your tension may be too loose, your hook may be too large, or the pumpkin may be overstuffed.
Try removing some fiberfill first.
For your next pumpkin, test a slightly smaller hook.
Can I use a real twig or cinnamon stick as the stem?
For a purely decorative pumpkin, a small clean twig or cinnamon stick can create a rustic look. Make sure it is securely attached and keep small or detachable components away from young children and pets.
Conclusion
Among fall crochet patterns, a ribbed pumpkin is especially satisfying because the construction is much simpler than the finished shape suggests.
You are not trying to manage complicated three-dimensional rounds.
You begin with one rectangle.
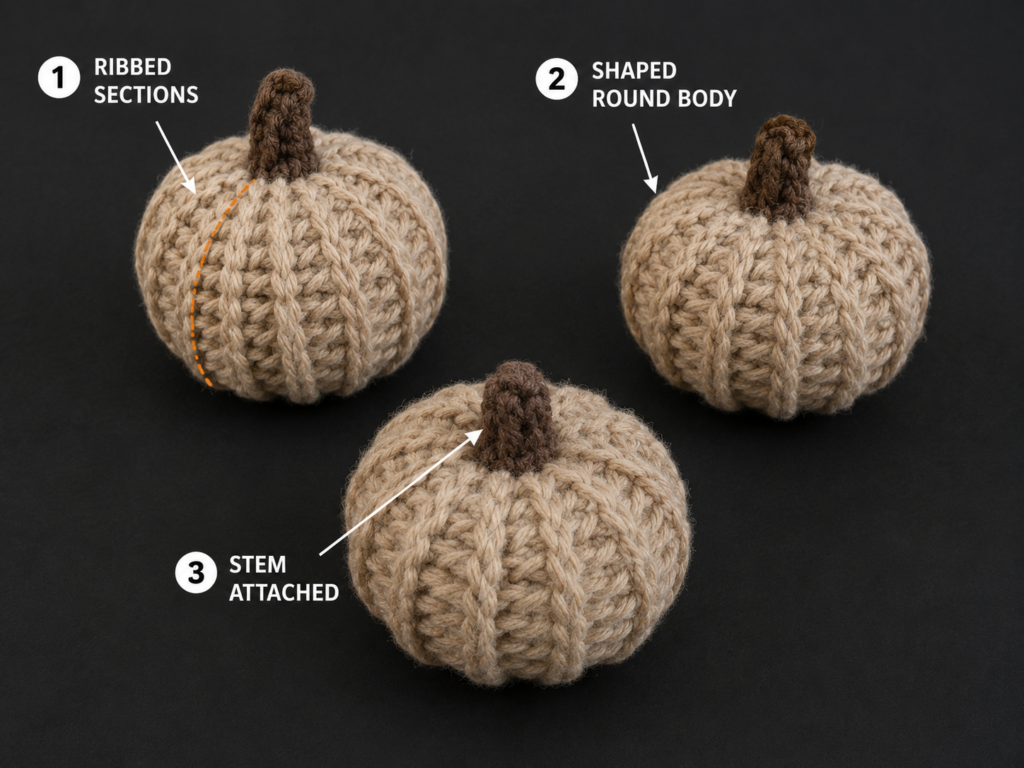
The ribbing creates the texture. The seam creates the tube. Two gathering stitches close the openings. Stuffing creates volume. One long pass through the center creates the recognizable pumpkin indentation.
That simplicity also makes the pattern easy to customize.
Make one terracotta pumpkin for a bookshelf. Crochet three neutral pumpkins for a mantel. Use chunky yarn for a dramatic centerpiece, or make several small versions as teacher gifts and autumn market items.
The first pumpkin teaches the construction.
The second usually feels much faster.
By the third, you can start experimenting with colors, yarn weights, stems, leaves, and different dimensions to create your own handmade fall pumpkin patch.