A crochet vest is one of the most satisfying wearable projects to make because it looks impressive, but the construction can be much simpler than a full sweater. You do not need sleeves, sleeve shaping, cuffs, or complicated underarm joins. For a beginner who is ready to move beyond scarves, dishcloths, and small accessories, a vest is a practical first garment.
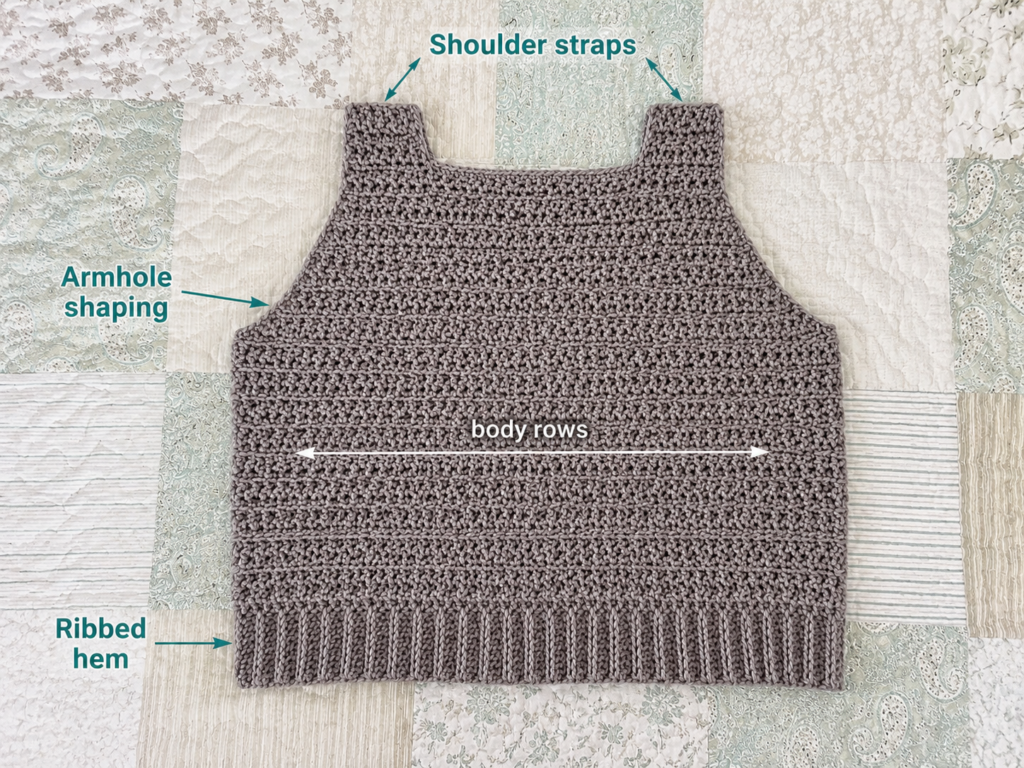
This tutorial teaches a simple boxy crochet vest made from two rectangular panels. You will crochet a bottom ribbing strip, work the body upward in half double crochet, make a matching second panel, seam the shoulders and sides, and finish the neckline and armholes with a clean edging or optional attached ribbing.
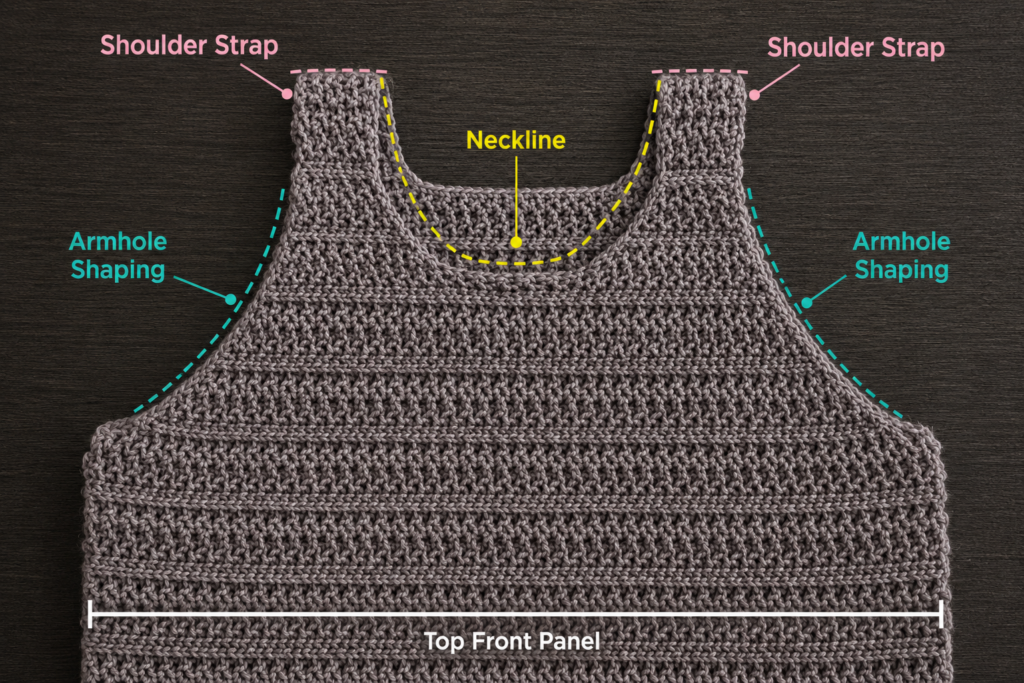
The reference source used for the image plan is a more textured crochet sweater vest that is worked flat in front and back panels, seamed, and finished with ribbing around the neck and armholes. This article keeps that useful garment-construction flow, but simplifies the pattern into a beginner-friendly vest with straight panels and no neckline decreases.
The finished result is a relaxed layering piece you can wear over a T-shirt, fitted turtleneck, button-up shirt, or dress.
What You’ll Learn
- How to choose yarn for a crochet vest.
- How to measure your bust and add ease.
- How to crochet bottom ribbing.
- How to work body stitches evenly into ribbing row ends.
- How to make two matching vest panels.
- How to keep garment edges straight.
- How to seam shoulders and sides.
- How to leave the correct armhole opening.
- How to add simple neckline and armhole finishing.
- How to customize vest length, width, texture, and color.
Materials You’ll Need
For an adult small/medium sample vest with a relaxed fit:
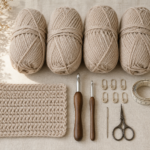
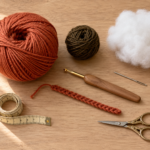
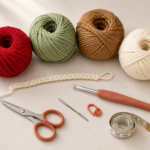
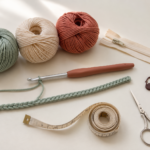
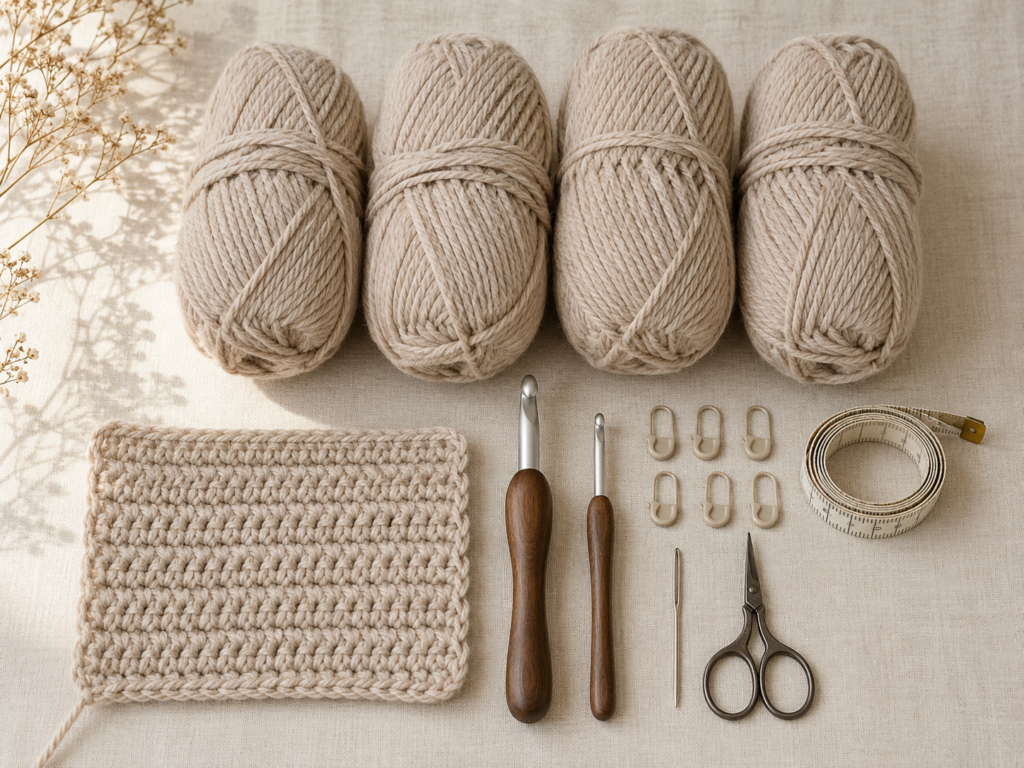
- 650–850 yards medium weight #4 yarn
- 6.0 mm / J crochet hook for the body
- 5.0 mm or 5.5 mm crochet hook for ribbing, optional
- Stitch markers
- Measuring tape
- Tapestry needle
- Scissors
- Blocking mat or towel, optional
- Rustproof pins, optional
The Craft Yarn Council’s standard yarn-weight system classifies DK/light worsted as category 3 and worsted/aran as category 4, which is useful when choosing substitute yarns. (craftyarncouncil.com)
For the easiest first vest, choose a smooth medium-weight yarn in a light or medium color. Very dark yarn can make stitches harder to see, and very fuzzy yarn can hide mistakes.
Finished Size
This tutorial is written as a made-to-measure beginner vest with sample numbers for an adult small/medium.
Sample finished measurements:
- Panel width: 20 inches each
- Finished bust circumference: about 40 inches
- Finished length: about 19 inches
- Armhole depth: about 8 inches
- Neck opening width: about 9–10 inches
The vest should have positive ease, meaning it should be larger than the body measurement. For a relaxed sweater vest, add about 4–6 inches to the full bust measurement.
Example:
- Body bust: 36 inches
- Add ease: 4 inches
- Finished vest bust: 40 inches
- Each panel width: 20 inches
Crochet Abbreviations Used
This pattern uses U.S. crochet terminology:
- ch = chain
- sl st = slip stitch
- sc = single crochet
- hdc = half double crochet
- st/sts = stitch/stitches
- rep = repeat
- BLO = back loop only
- RS = right side
- WS = wrong side
The Craft Yarn Council lists these as standard crochet abbreviations and also explains the U.S./U.K. terminology differences. (craftyarncouncil.com)
Before You Start
Make a gauge swatch
Work a small swatch in the body stitch before starting the vest.
Suggested swatch:
Ch 18.
Row 1: Hdc in the second ch from hook and in each ch across. Ch 1, turn.
Row 2: Hdc BLO in each st across. Ch 1, turn.
Repeat Row 2 until the swatch is at least 5 inches tall.
Measure across the center 4 inches.
Sample gauge for this tutorial:
12 hdc stitches × 9 rows = 4 inches
Gauge does not need to be perfect if you use the made-to-measure method, but it helps you estimate width and yarn usage.
Choose your vest width
Measure around the fullest part of the bust or chest.
Add 4–6 inches of ease.
Divide by 2.
That number is the target width for each panel.
Keep the edges straight
Because this vest uses rectangular panels, straight edges matter.
At the end of every row:
- Make the turning chain.
- Turn the work.
- Place the first stitch into the first actual stitch.
- Count stitches occasionally.
- Do not work into the turning chain unless the pattern tells you to.
Beginner note
This tutorial avoids armhole and neckline decreases. The vest shape comes from two rectangles, shoulder seams, side seams, and openings left unsewn.
Step-by-Step Crochet Tutorial
Step 1: Crochet the Bottom Ribbing for the First Panel
The bottom ribbing gives the vest a sweater-like finish and helps the lower edge look polished.
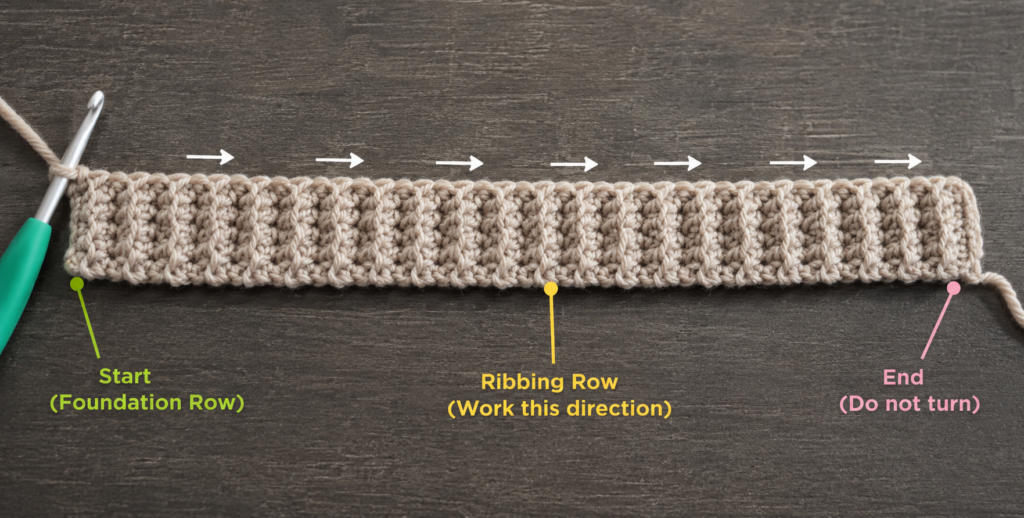
With the smaller hook, ch 9.
Row 1: Hdc in the second ch from the hook and in each ch across. You should have 8 hdc. Ch 1, turn.
Row 2: Hdc BLO in each stitch across. Ch 1, turn.
Repeat Row 2 until the ribbing strip measures your target panel width.
For the sample size, work approximately 60 ribbing rows or until the strip measures about 20 inches relaxed.
Do not stretch the ribbing aggressively while measuring.
Beginner tip: Place a stitch marker every 10 ribbing rows. This makes it easier to count and helps when you later work body stitches evenly into the row ends.
Common mistake to avoid: Making the ribbing much narrower than your target panel width. The body of the vest is built onto this ribbing, so the ribbing establishes the panel width.
Step 2: Work the First Body Row into the Ribbing Edge
Change to the 6.0 mm hook.
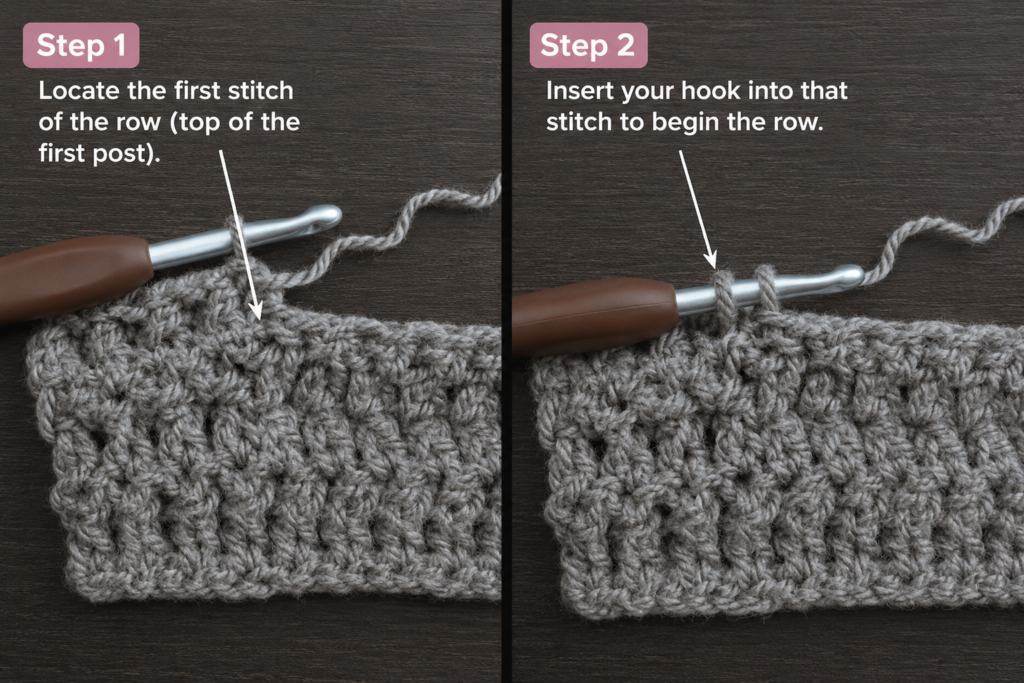
Rotate the ribbing strip so you are working along the long side edge.
Ch 1.
Work 60 hdc evenly along the ribbing edge for the sample size.
This does not mean you must force one stitch into every possible space. Instead, distribute the stitches evenly from one end of the ribbing to the other.
For a made-to-measure size, use your stitch gauge to decide how many body stitches you need.
Example:
- Your gauge is 12 stitches per 4 inches.
- Your panel width is 20 inches.
- 20 ÷ 4 = 5.
- 5 × 12 = 60 body stitches.
Beginner tip: Divide the ribbing into quarters with stitch markers. If you need 60 stitches total, aim for 15 stitches in each quarter.
Common mistake to avoid: Crowding too many stitches into the ribbing edge. If the body row ruffles, you added too many stitches. If it pulls inward, you added too few.
Step 3: Crochet the Main Body Panel
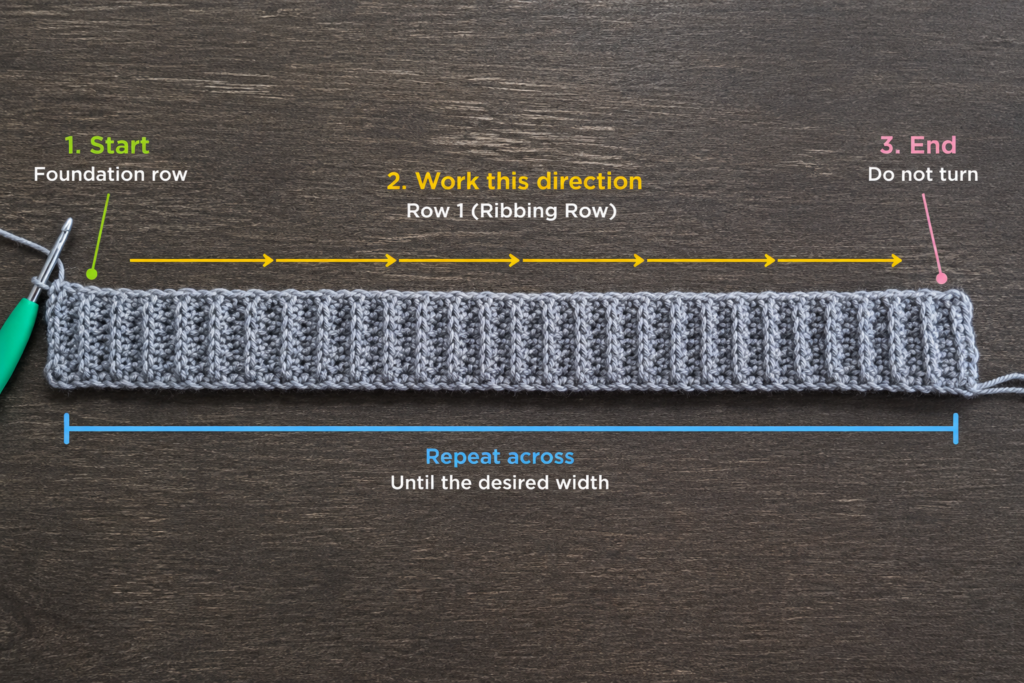
Now continue with the body stitch.
Row 2: Ch 1, turn. Hdc BLO in each stitch across.
Repeat Row 2 until the full panel measures your desired vest length from the bottom edge.
For the sample vest, crochet until the panel measures about 19 inches long.
You should still have 60 stitches in every row.
The fabric will have a subtle horizontal texture from working into the back loops.
Beginner tip: Count your stitches every 4–5 rows. Garments become harder to fix if the edges slowly grow or shrink.
Common mistake to avoid: Accidentally skipping the last stitch. The last stitch can lean toward the edge and become easy to miss. Pull the edge slightly open before placing the final hdc.
Step 4: Make the Second Panel
Repeat Steps 1–3 to make a second identical rectangle.
The two panels should match in:
- Width
- Length
- Stitch count
- Ribbing height
- Body row count
Lay the panels on top of each other before seaming.
If one panel is slightly longer, do not panic. A small difference can often be corrected with blocking. A large difference usually means your row count or tension changed.
Beginner tip: Write down your row count from the first panel before starting the second one.
Common mistake to avoid: Measuring one panel stretched and the other panel relaxed. Always measure both pieces the same way.
Step 5: Mark the Shoulder Seams and Neck Opening
Place the two panels together with right sides facing.
Make sure the bottom ribbing edges line up.
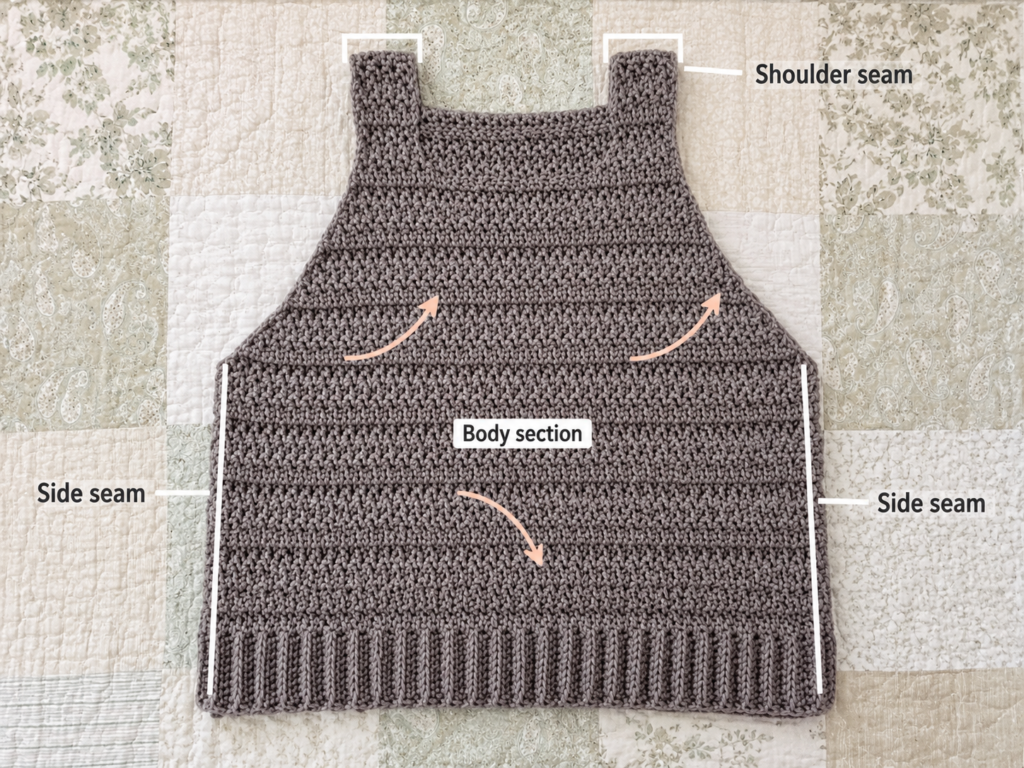
At the top edge, mark the shoulder seams.
For the sample:
- Seam 5 inches from the left outer shoulder edge.
- Leave about 9–10 inches open for the neck.
- Seam 5 inches from the right outer shoulder edge.
This creates a simple boat-neck or square-neck style opening.
Try the panels over your shoulders carefully before sewing if possible.
Beginner tip: Use several stitch markers before sewing. It is easier to adjust markers than remove a seam.
Common mistake to avoid: Making the neck opening too small. Remember that the vest has to pass over the head comfortably.
Step 6: Sew the Shoulder Seams
Thread a tapestry needle with a long length of matching yarn.
Use a whip stitch or mattress stitch to sew the marked shoulder sections.
Keep the stitches firm but not tight.
After sewing the first shoulder, repeat on the second shoulder.
Open the vest and check the neckline.
It should lie flat without pulling.
Beginner tip: Sew through matching rows on both panels. This keeps the seam even.
Common mistake to avoid: Pulling the seam too tightly. Tight seams can make the shoulder area pucker.
Step 7: Mark and Sew the Side Seams
With the vest still inside out, line up the side edges.
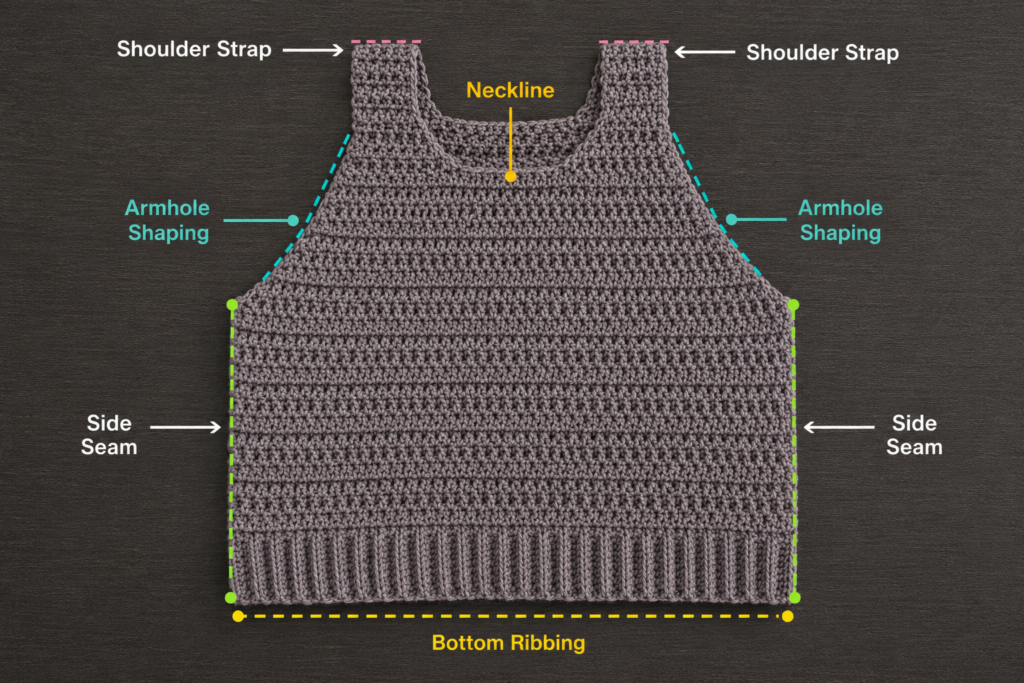
From the bottom edge upward, mark the side seam.
For the sample:
- Sew from the bottom ribbing up about 11 inches.
- Leave about 8 inches open for each armhole.
Try the vest on before sewing if possible.
If the armhole feels tight, leave a deeper opening.
If the vest feels too open at the sides, sew slightly higher.
Sew the side seams using the same method as the shoulders.
Beginner tip: Match the ribbing rows first, then match the top of the side seam.
Common mistake to avoid: Sewing one side higher than the other. Count rows or measure from the bottom edge on both sides.
Step 8: Add a Simple Neckline Edge
Turn the vest right side out.
Join yarn at the back neckline.
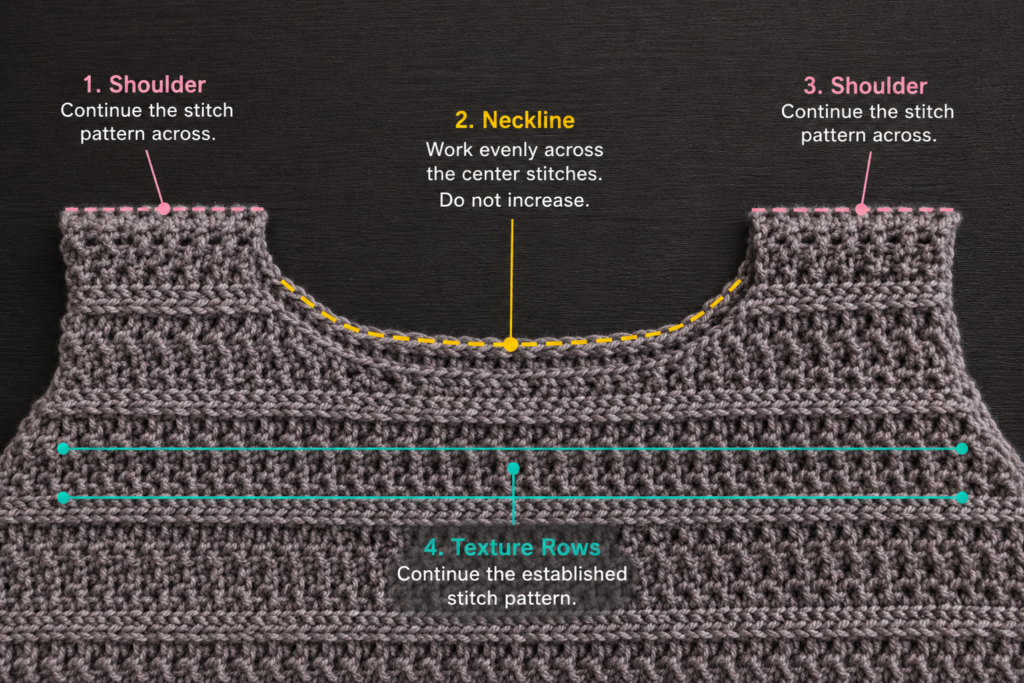
For the easiest finish:
Round 1: Ch 1. Sc evenly around the neckline. Join with a sl st to the first sc.
Round 2: Ch 1. Sc in each stitch around. Join with a sl st.
Fasten off and weave in the end.
The goal is to smooth the neckline, not make it stiff.
Beginner tip: Work fewer stitches around tight corners and more stitches around open spaces.
Common mistake to avoid: Placing too many stitches around the neckline. If the edge ruffles, remove the round and use fewer stitches.
Step 9: Finish the Armholes
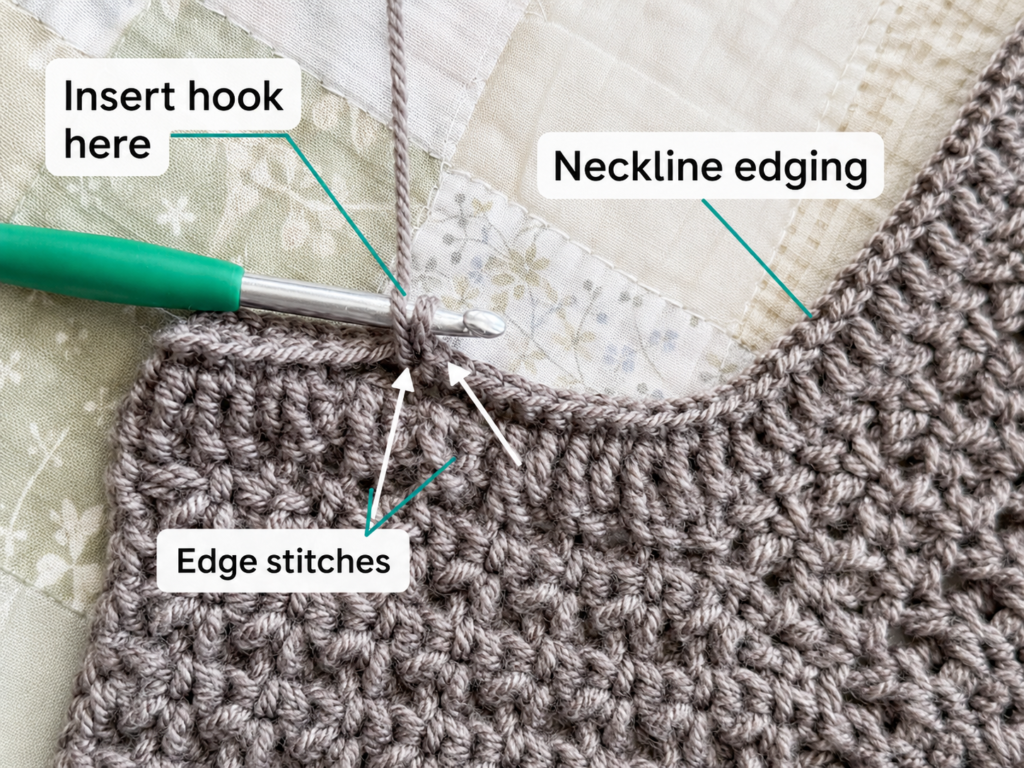
Join yarn at the underarm seam of one armhole.
Round 1: Ch 1. Sc evenly around the armhole. Join with a sl st.
Round 2: Ch 1. Sc in each stitch around. Join with a sl st.
Fasten off.
Repeat for the second armhole.
For a more polished sweater-style finish, use attached ribbing:
Ch 6.
Row 1: Sc in the second ch from hook and across. Sl st into the next two armhole-edge stitches. Turn.
Row 2: Skip the two slip stitches. Sc BLO across the ribbing strip. Ch 1, turn.
Row 3: Sc BLO across. Sl st into the next two armhole-edge stitches. Turn.
Repeat around the armhole.
This attached ribbing method takes longer, but it creates a neat, stretchy edge. The selected source also uses attached ribbing around the neck and armholes after the panels are seamed.
Beginner tip: For your first vest, use the two-round single crochet edge. For your second vest, try the attached ribbing.
Common mistake to avoid: Working edge stitches too close together. Crowded edging can ripple. Spread stitches more evenly if the armhole edge waves.
Pattern Notes or Stitch Notes
Turning chain rules
The ch 1 turning chain does not count as a stitch.
Work the first stitch of each row into the first real stitch.
Stitch count
For the sample body panel:
- Ribbing height: 8 hdc stitches
- Ribbing rows: approximately 60 rows
- Body stitches: 60 hdc per row
- Body length: work until panel measures about 19 inches
Because this is a made-to-measure tutorial, adjust the number of body stitches to match your panel width.
Repeat pattern
Body row repeat:
Ch 1, turn. Hdc BLO in each stitch across.
Row notes
Both panels are worked flat.
The vest is assembled after both panels are complete.
Right side and wrong side
Choose one side of each panel as the right side.
When seaming, place right sides together so the seam sits mostly inside the garment.
Size adjustment notes
To make the vest wider, make the ribbing strip longer and work more body stitches.
To make the vest longer, add more body rows.
To make the armholes deeper, sew shorter side seams.
To make the neck wider, sew shorter shoulder seams.
Common Beginner Mistakes
1. Not adding enough ease
A vest should not match your exact bust measurement. Add 4–6 inches of ease for a comfortable fit.
2. Making the two panels different sizes
Count rows and measure both panels flat. Use the first panel as the template for the second.
3. Losing stitches at the row edges
The last stitch of a row can hide. Count every few rows to make sure the panel width stays consistent.
4. Crocheting too many stitches into the neckline
Too many neckline stitches create ruffling. Use fewer stitches and keep the edge flat.
5. Making armholes too small
Try the vest on before permanently sewing the side seams. It is easier to adjust before weaving in ends.
6. Pulling seams too tightly
Tight seams distort the garment. Sew firmly but allow the crochet fabric to keep its natural stretch.
7. Skipping blocking
Blocking helps the panels relax, straightens edges, and improves the final fit.
How to Customize This Crochet Project
Yarn changes
For a cozy winter vest, use wool or wool-acrylic blend.
For a lighter spring vest, use cotton blend or bamboo blend.
For a faster project, use bulky yarn and a larger hook, but make a gauge swatch first.
Color changes
Try:
- Solid oatmeal.
- Charcoal gray.
- Cream.
- Sage green.
- Rust.
- Stripes.
- Two-tone ribbing.
- Color-blocked front and back panels.
Size changes
Measure the wearer’s bust or chest.
Add ease.
Divide by two.
Make each panel that width.
For length, measure from the shoulder down to where you want the vest to end.
Border options
Use:
- Two rounds of single crochet for the easiest finish.
- Attached ribbing for a sweater-style finish.
- Slip stitch edging for a minimal finish.
- Crab stitch for a decorative edge.
Texture options
Instead of hdc BLO, try:
- Plain hdc.
- Moss stitch.
- Even moss stitch.
- Linked double crochet.
- Back-loop-only single crochet for dense ribbing.
Gift ideas or use cases
This vest works well as:
- A handmade birthday gift.
- A fall layering piece.
- A capsule wardrobe project.
- A first crochet garment.
- A matching parent-and-child vest concept.
- A market-table wearable sample.
Finishing Instructions
Fasten off every yarn tail by pulling the cut yarn through the final loop.
Use a tapestry needle to weave ends into the wrong side of the vest.
For seams, weave tails through the seam line so they disappear into the structure.
Lay the vest flat.
Gently shape:
- Bottom ribbing
- Shoulder seams
- Side seams
- Neckline
- Armholes
Block according to the yarn fiber. Acrylic usually needs gentle steam-blocking with caution, while wool can often be wet-blocked. Always follow the yarn label.
Do not hang a wet crochet vest. Lay it flat to dry so the garment does not stretch.
Quick Printable-Style Summary
Project: Beginner Crochet Vest Pattern
Skill level: Beginner to Easy
Construction: Two rectangular panels, seamed at shoulders and sides
Yarn: Medium weight #4 yarn or DK yarn held to gauge
Hook: 6.0 mm body hook; 5.0–5.5 mm edging hook optional
Stitches: Ch, sl st, sc, hdc, hdc BLO
Gauge: Approximately 12 hdc × 9 rows = 4 inches
Starting method: Bottom ribbing strip
Sample ribbing: Ch 9, hdc across for 8 stitches, repeat hdc BLO rows until ribbing reaches panel width
Body: Work hdc evenly into ribbing edge, then hdc BLO every row until desired length
Panels: Make two identical rectangles
Assembly: Seam shoulders, leave neck opening, seam sides, leave armholes
Finishing: Add sc edging or attached ribbing around neckline and armholes, weave ends, block flat
FAQ
Is a crochet vest pattern good for beginners?
Yes, a simple rectangular-panel vest is a good first wearable. It avoids sleeves and complicated shaping while still teaching garment construction.
What stitch is best for a beginner crochet vest?
Half double crochet is a strong choice because it works up faster than single crochet but creates a denser fabric than double crochet. Working in the back loop only adds texture without making the stitch pattern difficult.
How much yarn do I need for a crochet vest?
Most adult crochet vests need approximately 650–1,200 yards depending on size, yarn weight, stitch pattern, length, and fit. A cropped vest uses less yarn than a long oversized vest.
Can I make this vest without ribbing?
Yes. You can start with a regular foundation chain and work straight body rows. Ribbing gives a more finished sweater look, but it is not required.
How do I make the vest bigger?
Make each panel wider. Measure the bust, add 4–6 inches of ease, then divide by two. That number is your panel width.
How do I make the armholes fit better?
Try the vest on before sewing the side seams. Leave a deeper opening for looser armholes or sew higher for a closer fit.
Should I block a crochet vest?
Yes. Blocking helps straighten panels, relax stitches, flatten seams, and improve the finished drape.
Conclusion
This easy crochet vest pattern is a practical first garment because it uses simple shapes and familiar stitches. The main construction is just two matching panels, but the finished vest looks polished once the shoulders, sides, neckline, and armholes are neatly finished.
The most important steps are measuring carefully, keeping both panels the same size, leaving enough neck and armhole space, and avoiding tight seams. Once you understand this basic construction, you can use the same method to create longer vests, cropped vests, striped vests, oversized sweater vests, or lighter summer layering tops.
Start with one solid color and a smooth yarn for your first version. After that, experiment with texture, stripes, color blocking, or ribbed edges.