A handmade pencil pouch is one of those crochet projects that feels surprisingly satisfying: it is small enough to finish without a huge time commitment, useful enough to carry every day, and simple enough for an adventurous beginner.
In this tutorial, you will make a slim zippered pencil case using mostly single crochet. Instead of crocheting separate front and back panels and sewing them together, you will begin with one foundation chain, crochet around both sides of it, and continue upward in continuous rounds. This creates a neat, structured pouch with no side seams.
The pattern uses a soft sage-green main color with narrow cream and muted terracotta stripes, but the colors are completely customizable. The finished pouch is approximately 8½ inches wide and 3½ inches tall, making it suitable for standard pencils, pens, crochet hooks and other small supplies.
The most important part for beginners is the first round. Once you understand how to crochet along one side of the chain, turn around the end and continue along the unused side, the remainder becomes a relaxing repetition of simple single crochet stitches.
What You’ll Learn
By the end of this tutorial, you will know how to:
- Make a straight foundation chain.
- Identify the back bump of each chain stitch.
- Crochet around both sides of a foundation chain.
- Work continuous rounds without turning.
- Use a stitch marker to track the beginning of each round.
- Maintain the same stitch count for straight pouch walls.
- Change yarn colors cleanly.
- Install a zipper by hand.
- Weave in ends and finish a practical crochet accessory neatly.
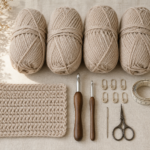
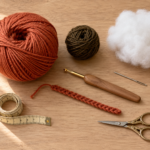
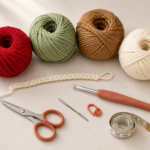
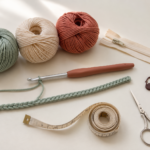
Materials You’ll Need
For one pencil pouch approximately 8½ inches wide by 3½ inches tall:
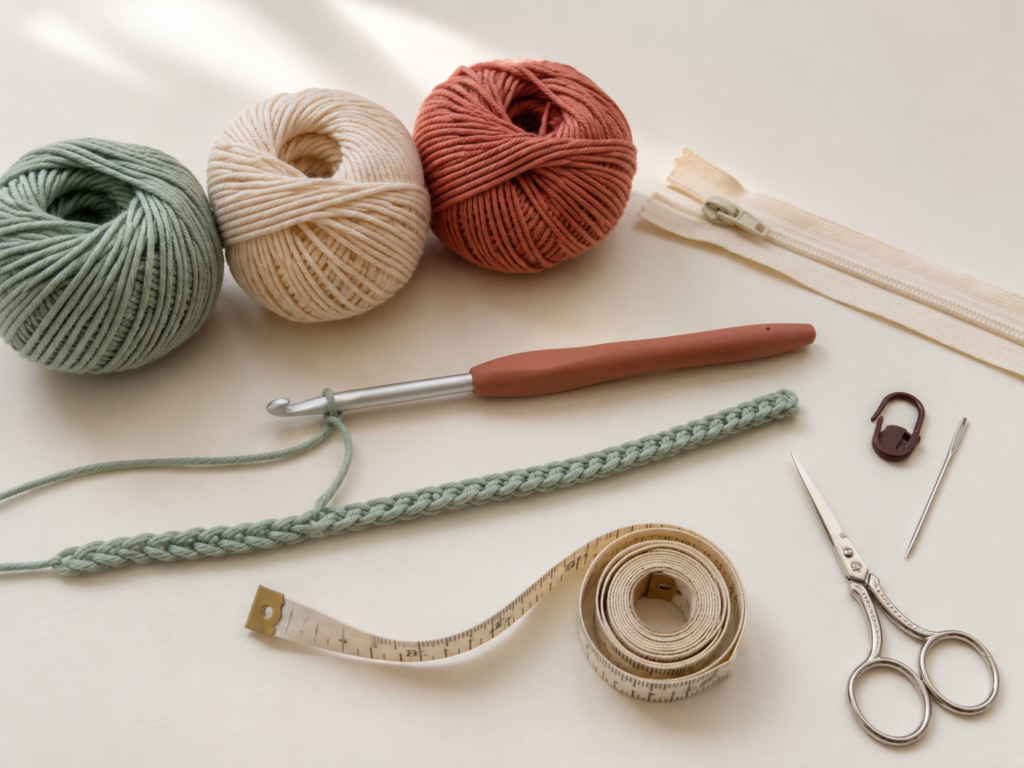
- DK or light-weight cotton yarn: approximately 60–80 g total.
- Color A: soft sage green.
- Color B: warm cream.
- Color C: muted terracotta.
- 3.5 mm crochet hook.
- One 8-inch non-separating zipper, preferably a nylon coil zipper.
- Sharp scissors.
- Yarn needle or tapestry needle.
- Fine hand-sewing needle.
- Sewing thread that matches the zipper or yarn.
- One locking stitch marker.
- Four to six sewing clips or rust-resistant pins.
- Measuring tape.
Cotton is particularly useful for this project because its stitch definition makes counting easier and its relatively low elasticity helps the pouch hold its shape.
The 3.5 mm hook is intentionally small for the selected yarn. A slightly tighter fabric helps prevent pencil tips and small objects from pushing through large spaces between stitches. Hook recommendations vary with yarn weight and individual tension; the Craft Yarn Council provides standardized yarn-weight and hook-reference information for general guidance.
Crochet Abbreviations Used
This pattern uses US crochet terminology.
- ch = chain
- sc = single crochet
- sl st = slip stitch
- st = stitch
- sts = stitches
- rnd = round
- rep = repeat
In UK terminology, the US single crochet stitch is called a double crochet.
The Craft Yarn Council maintains a standardized crochet abbreviation reference for commonly used US crochet terms.
Before You Start
Finished size
Approximately:
- Width: 8½ inches / 21.5 cm
- Height: 3½ inches / 9 cm
Exact measurements depend on your yarn, hook and tension.
Gauge
Target gauge:
20 single crochet stitches × 22 rounds = approximately 4 inches / 10 cm
Gauge is not as critical here as it would be for a fitted garment, but it still affects your finished dimensions. A much looser gauge will create a larger, softer pouch; a tighter gauge will create a smaller, denser one.
How to count your stitches
The top of every single crochet stitch looks like a small V. Count each V as one stitch.
For this pattern, after completing the first round, you should have:
84 stitches around.
You will maintain those 84 stitches throughout the pouch body.
How to keep the pouch walls straight
The most important rule is simple:
Do not accidentally add stitches after the first round.
The first round requires extra stitches at the two short ends so that you can turn around the foundation chain. After that, work one single crochet into every stitch.
If you continue increasing, the pouch will flare outward.
If you skip stitches, it will become narrower.
How to avoid curling or puckering
Keep the foundation chain relaxed. Do not pull it extremely tight.
At the two rounded ends, avoid squeezing your stitches together. After the first round is complete, the base should lie reasonably flat without severe ruffling or cupping.
Beginner note
Place a locking stitch marker into the first stitch of every round and move it upward as you work. This simple habit prevents one of the most common beginner errors: losing track of where a new round starts.
Step-by-Step Crochet Tutorial
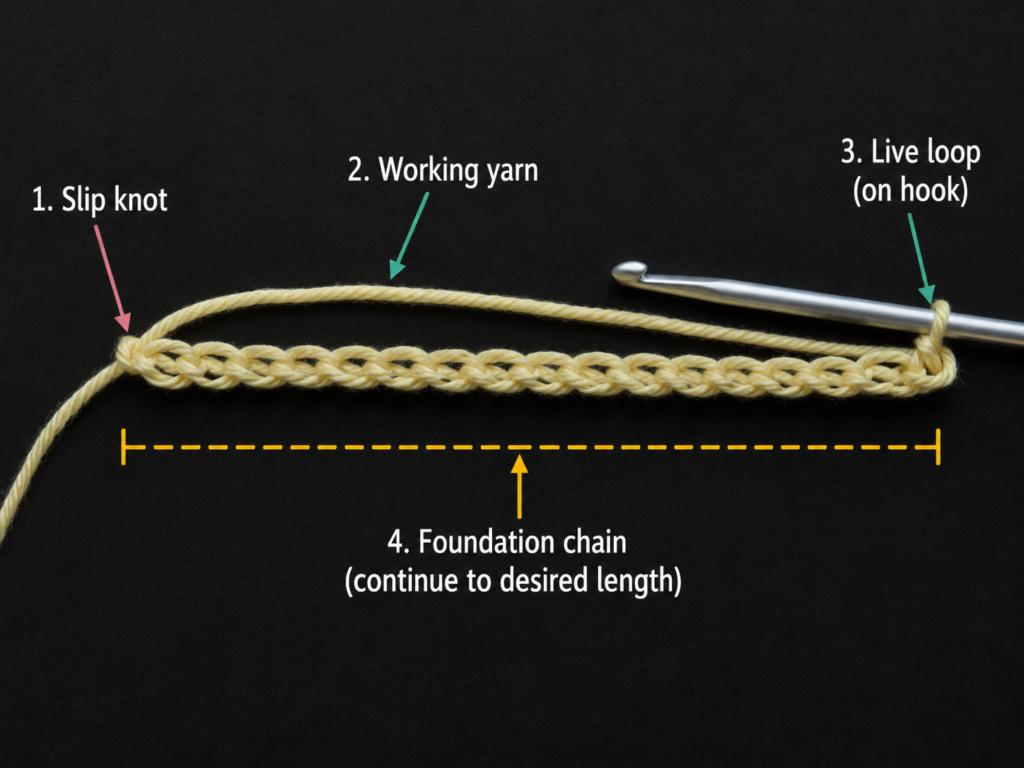
Step 1: Make the Foundation Chain
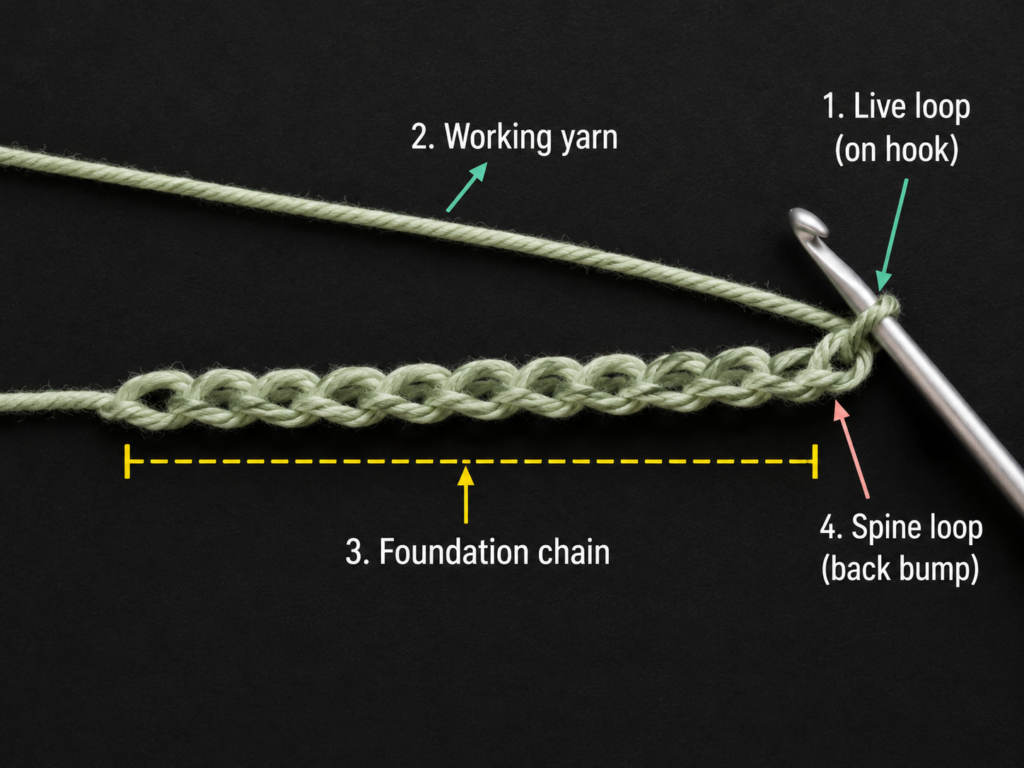
Using Color A, soft sage green, make a slip knot and place it on your 3.5 mm crochet hook.
Chain 42.
Do not count the loop currently sitting on your hook as one of the 42 chains.
Place the chain loosely on your work surface and check that it is not twisted.
Your foundation chain controls the approximate length of the pouch. With the stated yarn, hook and gauge, 42 chains should produce a case suitable for standard pencils.
Beginner tip
Make your chains with relaxed, even tension. A foundation chain that is much tighter than the rest of the crochet can cause the base to curl inward.
Common mistake to avoid
Do not accidentally count the working loop on your hook as a chain stitch.
Step 2: Find the Back Bumps of the Chain
Most beginners naturally look at the front of a foundation chain, where the stitches resemble small Vs.
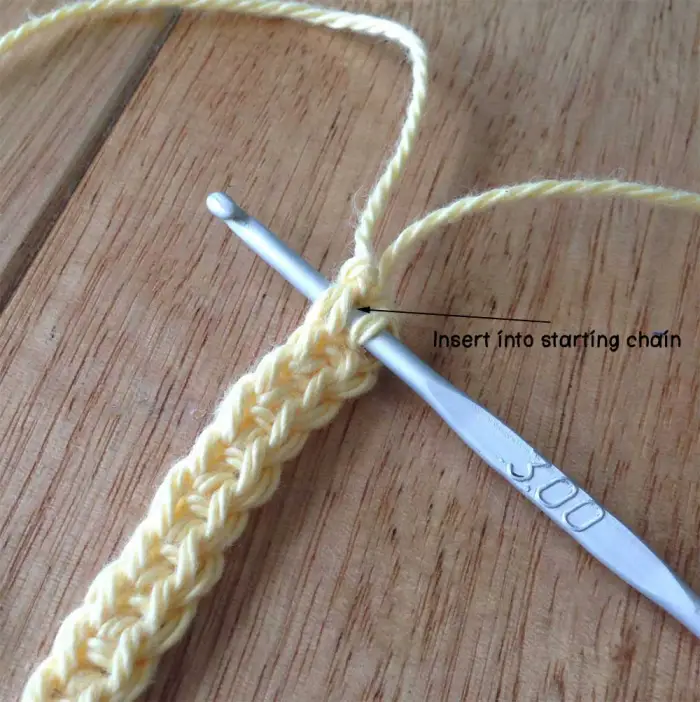
For this project, rotate the chain slightly toward you. Along its back, you should see one raised horizontal bump behind each chain.
Working into these back bumps creates a cleaner-looking lower edge and makes the unused side of the chain easier to identify when you rotate the work.
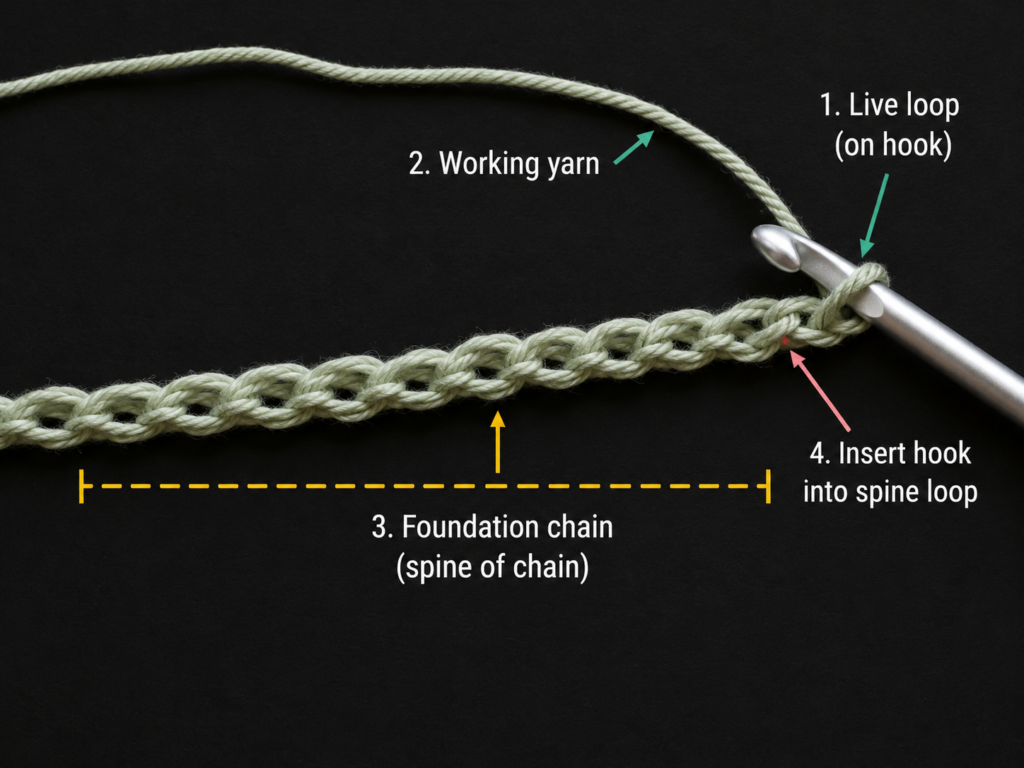
Skip the first chain closest to your hook.
Insert your hook into the back bump of the second chain from the hook.
Yarn over and pull up one loop. You now have two loops on the hook.
Yarn over again and pull through both loops.
You have completed your first single crochet.
Beginner tip
Before continuing across the whole chain, inspect your first few stitches. Make sure you are consistently inserting the hook into one back bump rather than alternating between different parts of the chain.
Common mistake to avoid
Do not tighten your working yarn after every stitch. The hook should slide into the next back bump without force.
Step 3: Single Crochet Across the First Side
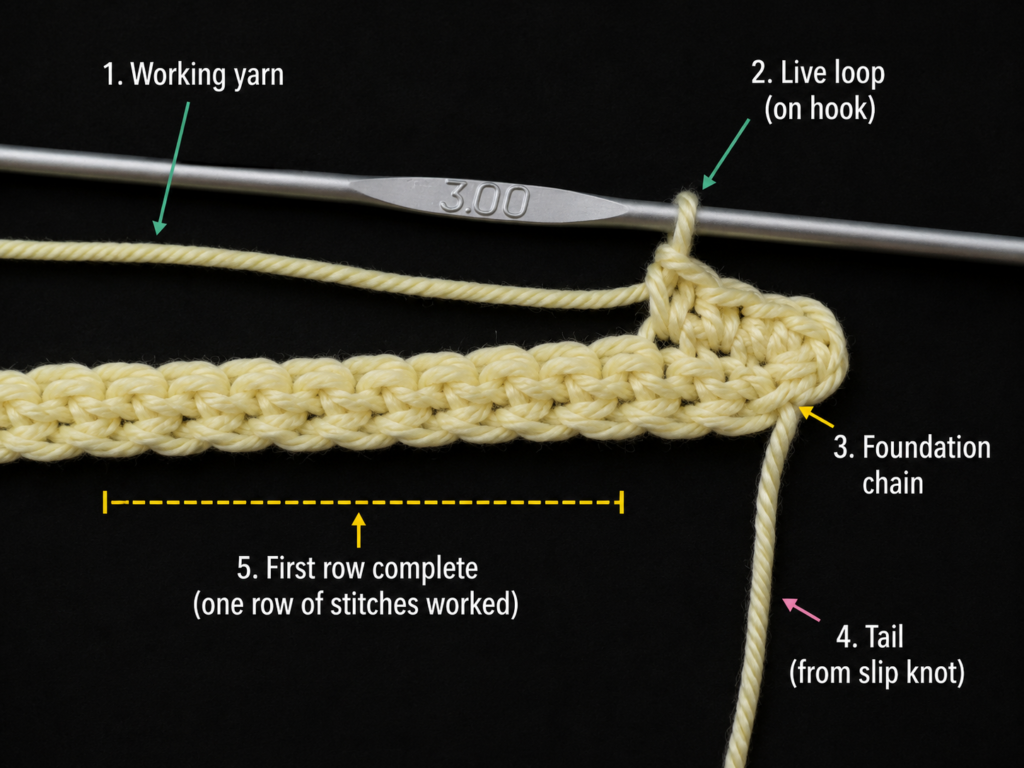
Continue making one single crochet in each back bump across the foundation chain.
At the end of this first pass, you should have:
41 single crochet stitches.
Pause and count before continuing.
That stitch count matters because the opposite side and two rounded ends depend on having the correct foundation.
The piece will look like a long, narrow strip. At this stage, do not turn the work as you would when making a traditional flat rectangle.
You are about to continue around the end.
Beginner tip
Count in groups of ten. Touch each stitch with the tip of your yarn needle or finger as you count.
Common mistake to avoid
Do not make a turning chain at the end of this first side.
Step 4: Crochet Around the End and Along the Opposite Side
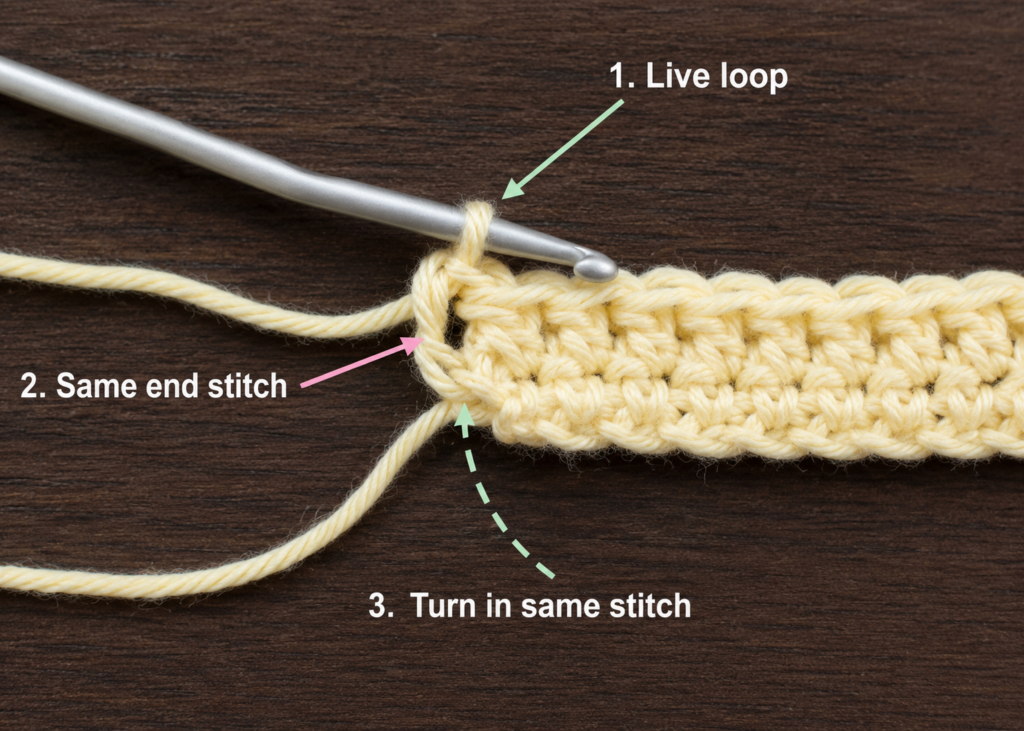
You are now at the last foundation chain.
The final single crochet you made is already sitting in that chain. Work two additional single crochet stitches into the same last chain.
You now have three single crochet stitches sharing that final chain space. These extra stitches allow the work to curve gently around the short end instead of folding sharply.
Rotate the work so the unused side of the original foundation chain faces you.
You should now see a row of unworked loops.
Make one single crochet into each of the next 39 unused foundation loops.
When you reach the opposite end, work two additional single crochet stitches into the first foundation chain, which already contains the first single crochet you made.
You should now have:
84 stitches total around the first round.
Place a stitch marker into the first stitch of the round.
Beginner tip
Count the entire first round before proceeding. It is much easier to fix a missing stitch now than six rounds later.
Common mistake to avoid
Do not crochet into the same foundation loop twice along the long sides. The only places intentionally receiving multiple stitches are the two short ends of Round 1.
Step 5: Begin Working in Continuous Rounds
From this point onward, do not turn.
Do not join each round with a slip stitch.
Instead, crochet directly into the first marked stitch and continue in a spiral.
Rounds 2–6
Work:
1 sc in each of the 84 stitches around.
At the end of each round:
- Remove the stitch marker.
- Work the final stitch of the current round.
- Place the marker into the first stitch of the new round.
- Continue crocheting.
After a few rounds, the pouch walls should begin rising naturally.
The original foundation becomes the bottom of the pencil case.
Beginner tip
Keep the marked beginning of the round facing one side of the pouch. This makes color changes easier to position consistently.
Common mistake to avoid
Do not add more increases at the rounded ends. The increases were only needed in Round 1.
Step 6: Keep the Pouch Straight and Prevent Tight Ends
As the walls become taller, stop every two or three rounds and inspect the pouch.
Ask yourself:
- Are the two long sides remaining approximately parallel?
- Are the short ends smooth rather than puckered?
- Does the bottom lie neatly when you press the pouch flat?
- Do I still have 84 stitches?
Gently stretch the work sideways with your fingers. This helps you spot skipped stitches or accidental increases.
Continue with Color A through Round 6.
Beginner tip
If your work becomes progressively wider, you are probably making accidental increases.
If it becomes progressively narrower, you are probably skipping stitches.
Common mistake to avoid
At the short ends, stitches can become difficult to distinguish because they sit close together. Count carefully instead of inserting the hook wherever there appears to be space.
Step 7: Add the Cream and Terracotta Stripes
Now you can add narrow contrasting stripes.
Use this original color sequence:
- Rounds 1–6: Color A, sage green.
- Rounds 7–8: Color B, warm cream.
- Rounds 9–14: Color A, sage green.
- Rounds 15–16: Color C, muted terracotta.
- Rounds 17–18: Color A, sage green.
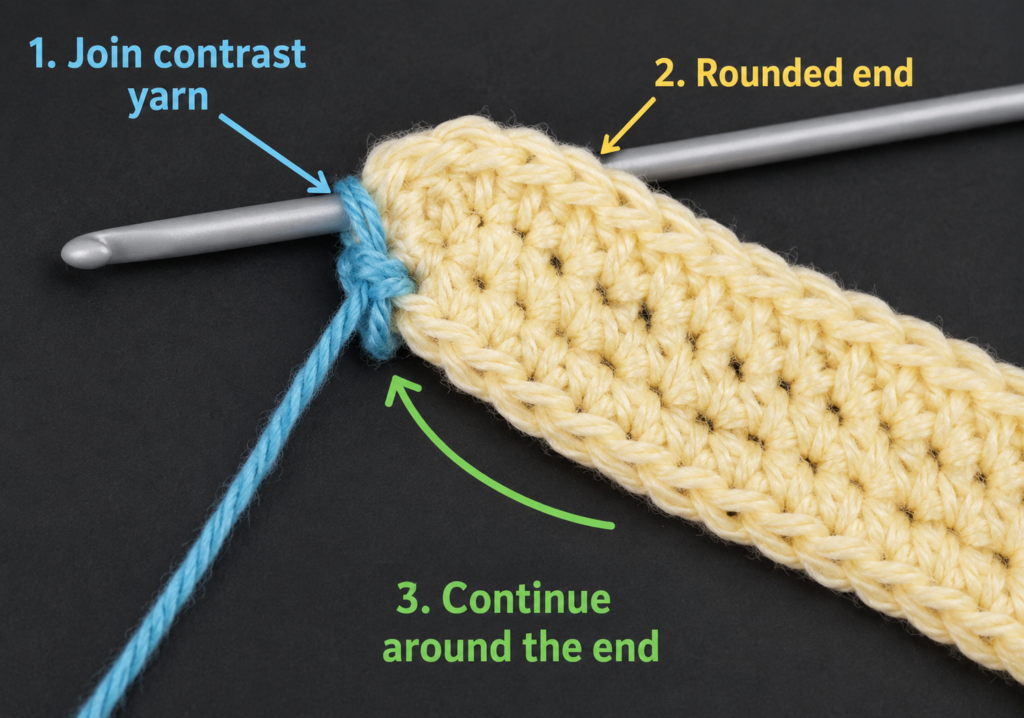
How to change color cleanly
On the last stitch before the new color begins:
- Insert the hook into the stitch.
- Yarn over with the old color.
- Pull up one loop. Two loops remain on the hook.
- Drop the old color.
- Yarn over with the new color.
- Pull the new color through both loops.
The final pull-through completes the previous stitch while preparing the new color for the next stitch.
Continue with the new yarn.
For narrow stripes separated by several rounds, it is usually cleaner to fasten off the unused color and weave in the end rather than carrying multiple strands around the entire pouch.
Beginner tip
Make color changes near the stitch marker so that the small transition point stays in one consistent area.
Common mistake to avoid
Do not tie a bulky knot between the two yarn colors. Knots can create an uncomfortable bump inside the pencil case and may loosen over time.
Step 8: Complete the Crochet Body
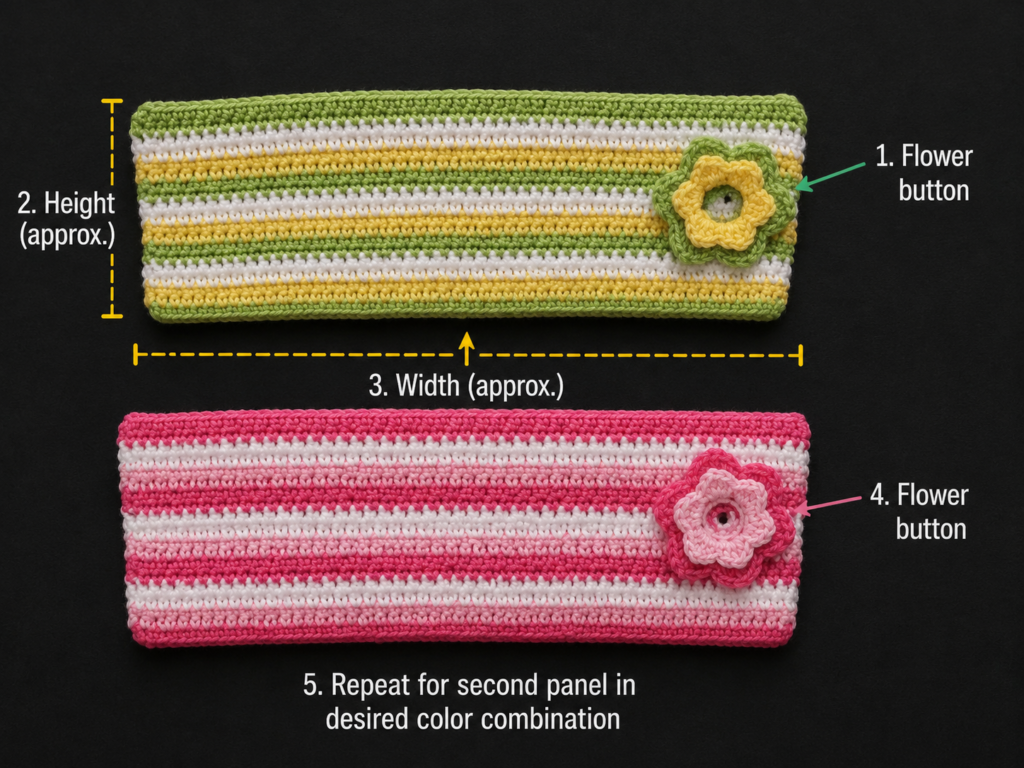
After Round 18, stop and measure the pouch.
You should have approximately:
- 8½ inches across.
- 3½ inches from bottom to top.
Keep the yarn attached temporarily.
Flatten the case gently and inspect the top opening.
The two top edges should be approximately equal in length. The stitch texture should be firm enough to support pencils without stretching excessively.
When satisfied with the size, make one slip stitch in the next stitch to soften the transition at the end of the spiral.
Cut the yarn, leaving a tail approximately six inches long.
Pull the yarn completely through the final loop and tighten gently.
Do not weave in that tail yet if it would interfere with zipper placement. You can secure it after the zipper has been installed.
Beginner tip
Test the pouch by sliding one standard pencil inside before installing the zipper. Confirm that the pouch is long enough and that the pencil does not push sharply against either end.
Common mistake to avoid
Do not pull the final slip stitch extremely tight. A tight final stitch can create a noticeable dip in the top edge.
Step 9: Install the Zipper
This is the only stage that involves hand sewing, but it does not need to be intimidating.
You need:
- The completed crochet pouch.
- One 8-inch zipper.
- Matching sewing thread.
- Hand-sewing needle.
- Sewing clips or pins.
Position the zipper
Open the zipper halfway.
Place it inside the pouch opening with the zipper teeth visible just above the crochet edge.
Center it from left to right. There should be approximately equal space at both ends.
Use sewing clips to hold the first zipper tape against the inside of one crochet edge.
Check the zipper from the outside. The teeth should run in a reasonably straight line.
Sew the first side
Thread the hand-sewing needle and knot the end of the thread.
Beginning near one end, pass the needle through the zipper tape and then through the crochet fabric immediately beneath the top edge.
Use small, even backstitches.
Do not sew through the zipper teeth.
Continue along the full length of the first side.
Secure the thread firmly at the end.
Sew the second side
Align the remaining zipper tape with the opposite crochet edge.
Clip it in place.
Before sewing, close the zipper carefully and inspect the pouch.
Make sure:
- The zipper is centered.
- The two crochet edges meet evenly.
- The pouch is not twisted.
- The zipper opens and closes without resistance.
Open the zipper again and sew the second side with the same small stitches.
Test the zipper several times after finishing.
Beginner tip
Do not place your sewing stitches too close to the zipper teeth. Leave enough clearance for the slider to move freely.
Common mistake to avoid
Never sew the entire second side before testing the zipper alignment. A crooked zipper is much easier to correct while it is still clipped rather than fully stitched.
Step 10: Weave In the Ends and Finish the Pouch
Turn the pouch inside out.
Thread each remaining yarn tail onto a tapestry needle.
Weave the tail under several nearby stitches, reverse direction and pass it through another group of stitches.
Trim the remaining yarn close to the fabric without cutting the actual crochet stitches.
Inspect the inside and remove any loose yarn ends.
Turn the pouch right side out again.
Add your pencils and test the zipper.
Your crochet pencil pouch is complete.
Pattern Notes or Stitch Notes
Turning-chain rule
There is no turning chain after the pouch body begins. The project is worked continuously in a spiral.
Stitch count
After Round 1:
84 stitches around.
Maintain 84 stitches throughout Rounds 2–18.
Repeat pattern
The basic body repeat is:
1 single crochet in each stitch around.
Round notes
Use a locking stitch marker to identify the first stitch of each round.
Move the marker upward after completing each round.
Right side and wrong side
The outside surface is considered the right side.
Because the pouch is worked continuously without turning, the same side naturally remains facing outward.
Size adjustment notes
To make a longer pouch, add chains to the foundation.
To make a shorter pouch, remove chains.
For significant size changes, measure your foundation chain before beginning Round 1 rather than relying only on stitch count.
For a taller case, continue additional rounds before installing the zipper.
Common Beginner Mistakes
1. Making the foundation chain too tight
Problem: The bottom curls or feels shorter than the upper portion.
Fix: Remake the chain with looser tension or use a hook 0.5 mm larger for the foundation chain only.
2. Missing the first stitch after the marker
Problem: The stitch count slowly decreases and the pouch becomes narrower.
Fix: Place the stitch marker directly into the first stitch of every new round.
3. Adding accidental increases at the short ends
Problem: The pouch starts becoming wider or develops ruffles.
Fix: Remember that multiple stitches in one space are used only during Round 1. After that, crochet exactly one single crochet in every stitch.
4. Crocheting through only one loop by accident
Problem: An unexpected ridge appears on part of the pouch.
Fix: For the body rounds, insert the hook beneath both top loops of every stitch unless deliberately experimenting with a textured variation.
5. Pulling the yarn too tightly during a color change
Problem: One area of the pouch pinches inward.
Fix: Complete the first few stitches of the new color with normal tension. Do not pull the old yarn tail aggressively.
6. Losing track of the beginning of the round
Problem: Stripes start and finish in visibly different positions.
Fix: Keep a marker in the first stitch and change colors near that location.
7. Sewing the zipper unevenly
Problem: The zipper twists, waves or becomes difficult to close.
Fix: Center it carefully, clip both sides, test the zipper, then sew one side at a time.
How to Customize This Crochet Project
Change the yarn
For a sturdy everyday case, cotton is an excellent choice.
You can also use:
- Cotton-acrylic blends.
- Smooth recycled cotton.
- Light worsted yarn.
- Mercerized cotton for added stitch shine.
Avoid very fuzzy yarn for a first attempt because individual stitches become harder to identify.
Change the colors
Try:
- One solid color for a minimalist case.
- Two school colors.
- Rainbow stripes.
- Neutral cream and tan.
- Pastel combinations.
- Black and white.
- Scrap-yarn stripes.
For the cleanest appearance, plan your stripe sequence before starting.
Change the size
For a longer artist-pencil case, extend the foundation chain until it is approximately half an inch shorter than your desired finished length.
For crochet hooks, make a slightly longer version.
For makeup brushes, increase both length and height.
Add a different border
Before installing the zipper, you could add one decorative round of:
- Slip stitch.
- Crab stitch or reverse single crochet.
- Contrasting single crochet.
Remember that a thick decorative border can complicate zipper installation.
Change the texture
After mastering the basic version, experiment with:
- Back loop only single crochet.
- Moss stitch.
- Lemon peel stitch.
- Waistcoat stitch.
- Simple tapestry crochet motifs.
For a first pencil pouch, plain single crochet remains the easiest choice because its dense structure makes the pouch practical and the stitches easy to count.
Gift ideas and uses
This pouch can hold:
- School pencils.
- Pens and highlighters.
- Crochet hooks.
- Small sewing tools.
- Makeup brushes.
- Travel cables.
- Art supplies.
Pair it with a notebook or set of colored pencils for a handmade gift.
Finishing Instructions
Fastening off
Finish with one slip stitch after the final full round, cut the working yarn and pull the tail completely through.
Weaving in ends
Use a yarn needle to weave each tail through several stitches on the inside of the pouch. Reverse direction once for better security.
Blocking
Heavy blocking is usually unnecessary for this project.
Should the empty pouch appear slightly uneven:
- Lightly dampen it.
- Gently reshape it by hand.
- Lay it flat on a towel.
- Allow it to dry completely.
Do not stretch it aggressively because this can distort the zipper opening.
Washing and care
Always begin with the care instructions printed on the yarn label. The Craft Yarn Council’s care guidance also emphasizes following fiber-specific laundering information and standardized care symbols.
For a cotton pencil pouch with a sewn-in zipper, gentle hand washing and air drying are conservative choices unless your specific yarn and zipper manufacturer state otherwise.
Quick Printable-Style Summary
Skill level: Beginner to Easy
Finished size: Approximately 8½ × 3½ inches
Yarn: DK/light cotton yarn in three colors
Hook: 3.5 mm
Additional material: One 8-inch zipper
Stitches: Chain, single crochet, slip stitch
Starting method: Chain 42
Round 1: Work around both sides of the foundation chain to create 84 stitches total.
Rounds 2–18: Single crochet in each stitch around without turning or joining.
Stripe sequence:
- Rounds 1–6: Sage green.
- Rounds 7–8: Cream.
- Rounds 9–14: Sage green.
- Rounds 15–16: Terracotta.
- Rounds 17–18: Sage green.
Repeat: One single crochet in every stitch around.
Finishing: Slip stitch, fasten off, install the zipper, weave in ends and lightly reshape if necessary.
FAQ
Is this crochet pencil pouch pattern suitable for complete beginners?
Yes, provided you already know—or are ready to learn—how to chain and make a single crochet stitch. The most challenging section is the first round, where you crochet around both sides of the foundation chain. After that, the body is primarily repetitive single crochet.
Can I make the pencil pouch without a zipper?
Yes. You could make the body taller and add a flap with a button closure. Another option is to thread a drawstring through eyelets near the top, although that creates a different finished shape.
How much yarn do I need for one crochet pencil pouch?
For the dimensions in this tutorial, approximately 60–80 grams of DK cotton should be more than enough. Actual usage depends on yarn thickness, tension and customization.
Can I use worsted-weight yarn instead of DK yarn?
Yes, but the finished case will probably become larger and thicker unless you reduce the foundation-chain length and adjust the number of rounds.
Measure the actual chain before proceeding rather than relying only on the original stitch count.
Why is my crochet pencil pouch getting wider?
You are probably making accidental increases. After Round 1, work only one single crochet into each stitch. Continue checking that you maintain 84 stitches.
Why is the bottom of my pouch curling?
The foundation chain may be too tight, or your Round 1 stitches may be significantly looser than the chain. Try relaxing your foundation tension.
Do I need to line the pencil pouch?
No. Dense single crochet fabric is often sturdy enough for pencils and pens.
A fabric lining is optional and may be useful for very small objects or for a more polished interior.
Conclusion
This easy crochet pencil pouch is an excellent bridge between basic stitch practice and a genuinely useful finished accessory.
You begin with a simple chain, learn how to work around both sides of it, build the walls in continuous single crochet rounds, add a few stripes for personality, and finish the project with a practical zipper.
The result is small enough to complete in an afternoon but substantial enough to teach several techniques that transfer naturally to larger crochet pouches, cosmetic bags, hook cases and small handbags.
Save the tutorial before you begin, choose three yarn colors that work well together, and take extra time with the first round. Once that foundation is correct, the rest of the pouch becomes pleasantly repetitive.