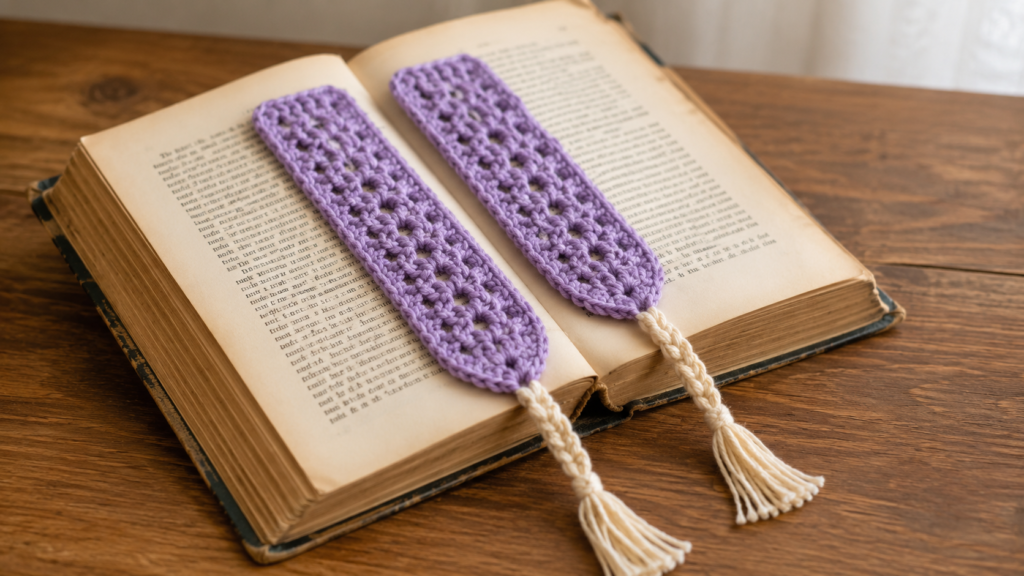
A crochet bookmark is one of the best small projects for beginners because it is quick, practical, and easy to gift. You do not need a lot of yarn, and you can practice neat rows, chain spaces, simple shaping, finishing, and blocking in one small project.
This tutorial will show you how to make a slim crochet bookmark with open spaces down the center, a woven contrast cord, and a braided tassel. The selected reference tutorial from Stardust Gold Crochet is a beginner bookmark pattern that uses rows, chain spaces, weaving, braiding, and finishing. It lists the project as beginner skill level and gives a finished measurement of about 6 inches tall by 1 inch wide.
This article is not a copy of the source pattern. It uses the selected tutorial only as a visual and educational reference, then creates a new original beginner-friendly version with fresh wording, new image prompts, and a clean blog structure.
What You’ll Learn
- How to choose yarn for a slim crochet bookmark.
- How to make a narrow foundation row.
- How to keep bookmark edges straight.
- How to create open chain spaces for weaving.
- How to shape a simple pointed end.
- How to make a long chain tail.
- How to weave a contrast cord through the bookmark.
- How to braid the tails into a tassel.
- How to block the bookmark so it lies flat.
- How to customize the colors and finishing.
Materials You’ll Need
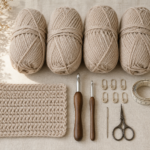
A bookmark should be thin enough to sit inside a book without damaging the pages. For that reason, smooth DK, sport, or light worsted yarn works better than bulky yarn. Cotton or cotton-blend yarn is especially good because it gives clear stitches and blocks flat.
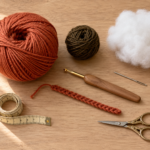
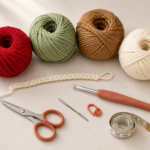
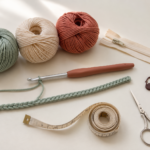
You will need:
- DK/light worsted cotton yarn for the main bookmark.
- A second color of cotton yarn for the woven accent.
- 3.0 mm–4.0 mm crochet hook.
- Yarn needle or darning needle.
- Scissors.
- Measuring tape.
- Stitch marker, optional.
- Blocking mat or clean towel.
- Rust-proof pins, optional.
- Spray bottle, optional.
The reference source uses a 3 mm crochet hook, darning needle, and scissors for its bookmark tutorial.
Crochet Abbreviations Used
This tutorial uses US crochet terms. The Craft Yarn Council maintains a crochet abbreviation reference and notes differences between US and UK terms, including US single crochet being UK double crochet.
- ch = chain
- sc = single crochet
- sl st = slip stitch
- st/sts = stitch/stitches
- rep = repeat
- sc2tog = single crochet two stitches together
- sc3tog = single crochet three stitches together
- ch-sp = chain space
- RS = right side
- WS = wrong side
Before You Start
A bookmark is small, but neatness matters. If your stitches are too loose, the bookmark may stretch. If your stitches are too tight, the edges may curl. Use a hook size that creates firm but flexible fabric.
Gauge is not critical for this project. The source tutorial also notes that gauge is not important for its bookmark. Still, make sure your bookmark is thin and flat enough to fit comfortably between book pages.
Choose two colors with strong contrast. For example:
- Lavender bookmark with cream woven cord.
- Sky blue bookmark with blush cord.
- Sage bookmark with ivory cord.
- Mustard bookmark with dusty pink cord.
Step-by-Step Crochet Tutorial
Step 1: Make a Narrow Foundation Row
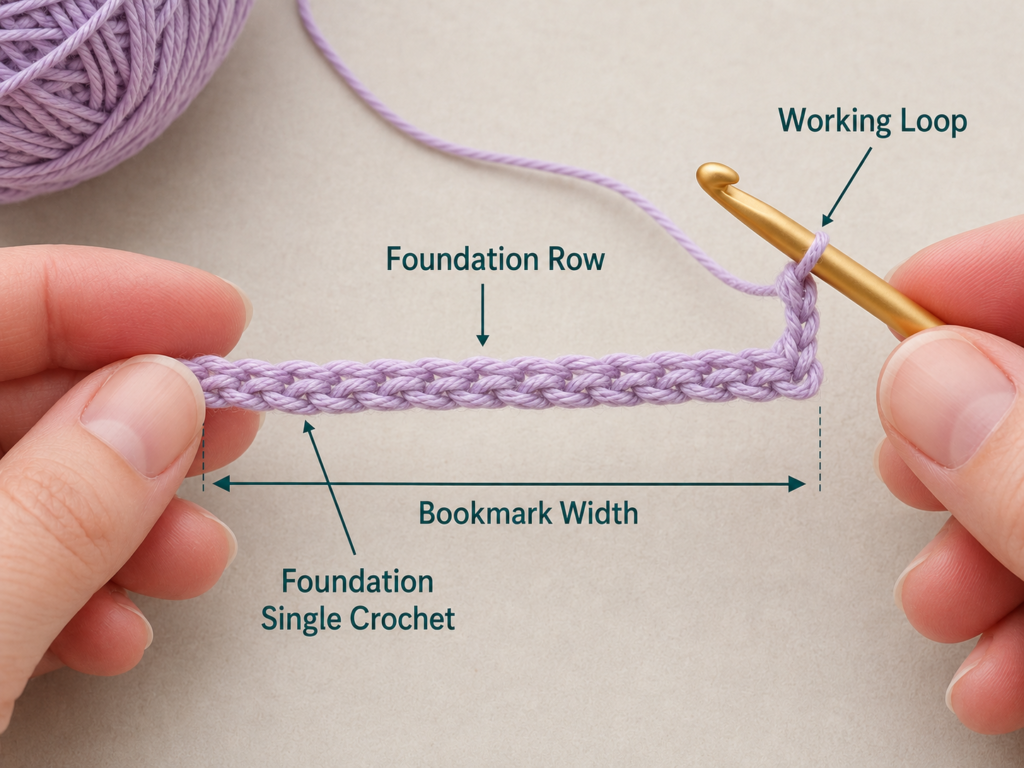
Start with your main yarn color. Make a short foundation row that is about 1 inch wide. You can use foundation single crochet if you already know it, or you can make a short chain and work single crochet back across it.
For a beginner-friendly bookmark, keep the width narrow. A bookmark that is too wide can feel bulky inside a book.
Beginner tip: Count your stitches at the end of this row. Your bookmark will be easier to keep straight if the width stays the same.
Common mistake to avoid: Do not make the foundation too wide. A slim bookmark is more practical.
Step 2: Work a Solid Row
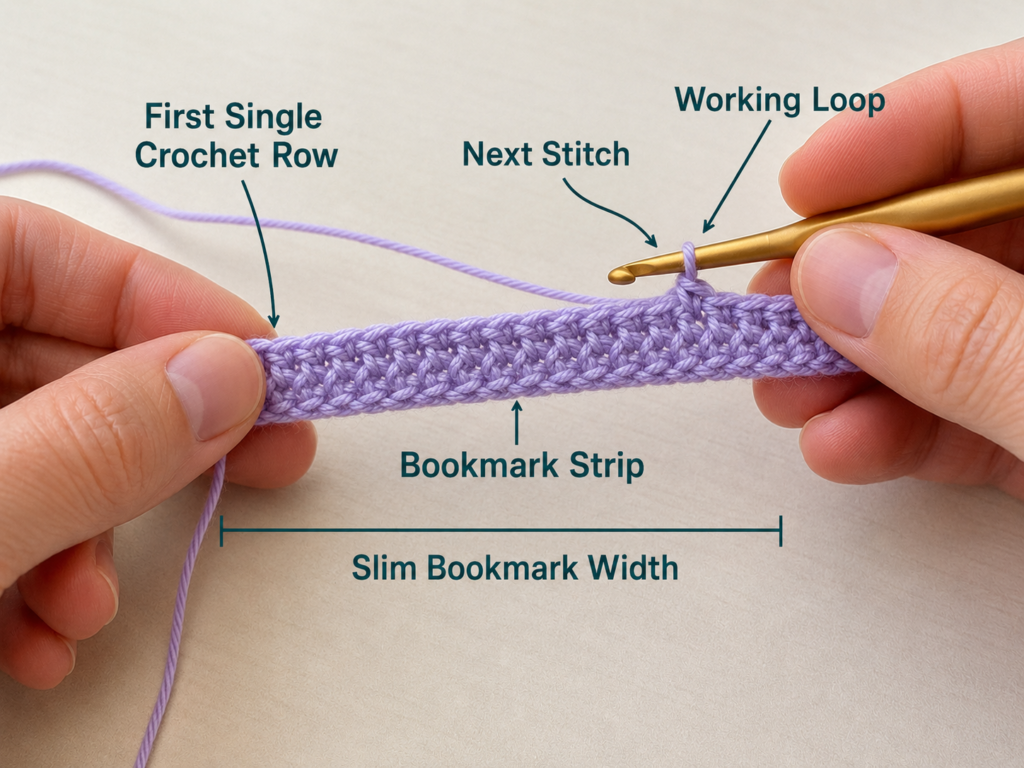
Chain 1 and turn. Work single crochet evenly across the row. This creates a stable section before you begin adding the open spaces.
Keep your tension relaxed and consistent. Since the bookmark is narrow, every stitch is visible.
Beginner tip: Place a stitch marker in the first stitch if you often miss edge stitches.
Common mistake to avoid: Do not count the turning chain as a stitch unless your pattern tells you to. The selected source also notes that turning chains do not count as stitches.
Step 3: Create the First Open Row
Now make the row that creates spaces for the woven cord. Work single crochet at the edge, then alternate small chain spaces and single crochet stitches across the row. The exact number of open spaces depends on your bookmark width, but the goal is to make two neat openings across the row.
These openings will later let you weave a contrast cord through the bookmark.
Beginner tip: Keep chain spaces small and even. Oversized holes can make the bookmark look messy.
Common mistake to avoid: Do not skip edge stitches. The edges need to stay firm.
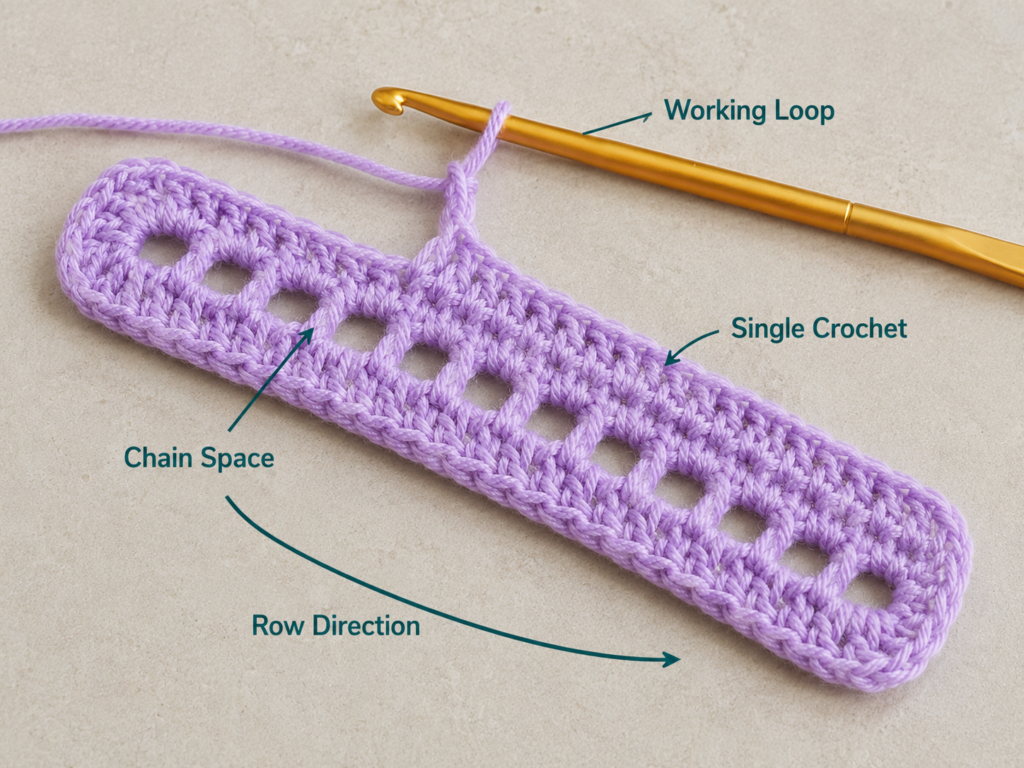
Step 4: Continue the Bookmark Body
Alternate solid rows with open chain-space rows until the bookmark reaches your preferred length. A good handmade bookmark length is usually around 6–7 inches, depending on book size and whether you want a long tassel.
The selected source works the bookmark in rows and includes repeated open sections before shaping the end.
Beginner tip: Lay the bookmark flat every few rows. If it starts leaning, check whether you are adding or missing edge stitches.
Common mistake to avoid: Do not pull the yarn tight at the edges. Tight edges can make the bookmark curve.
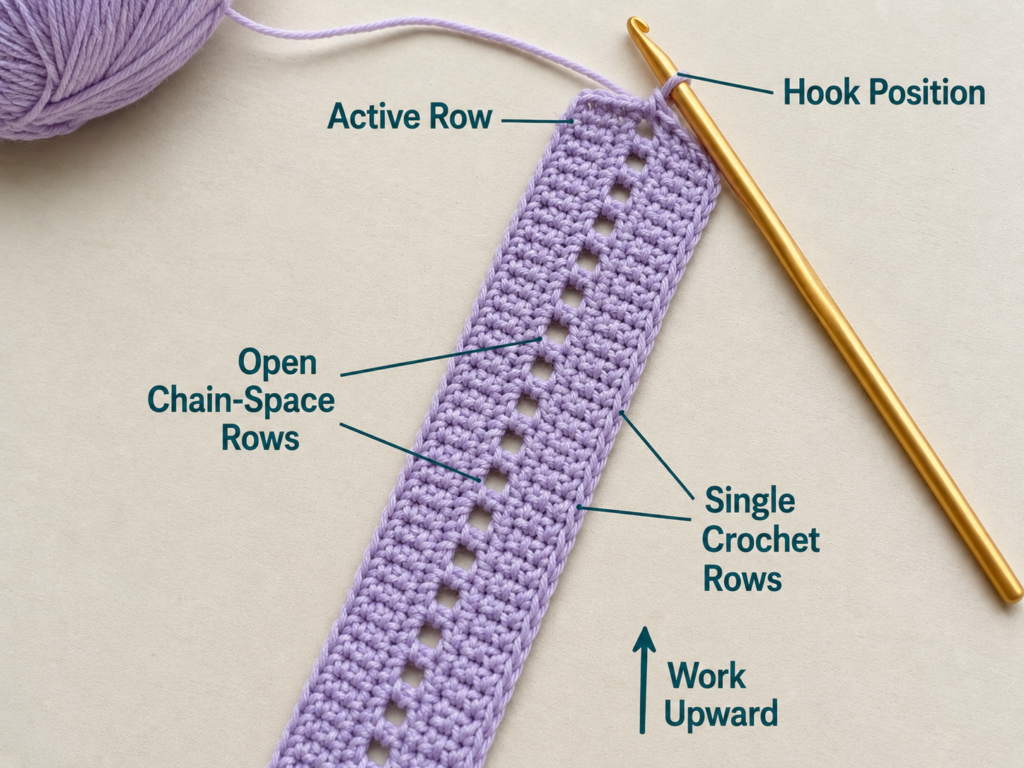
Step 5: Shape the Pointed End
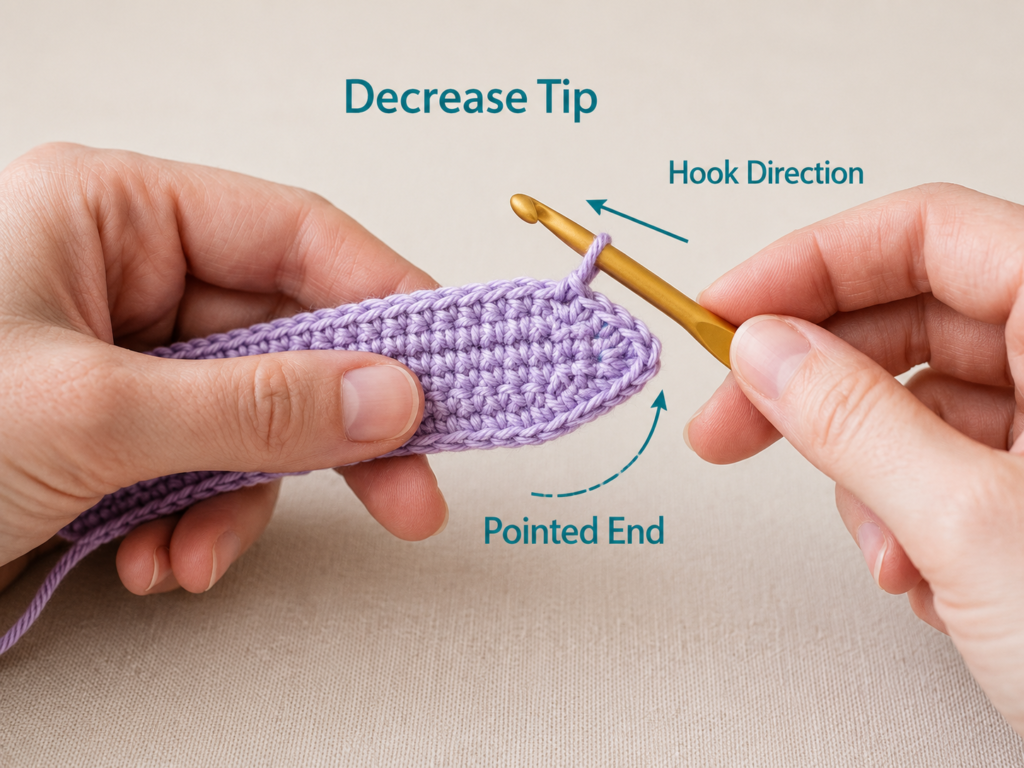
When the bookmark body is long enough, decrease at the end to form a soft point. Work a decrease at each side with one stitch in the middle, then finish with one final decrease row until the tip is narrow.
The point gives the bookmark a polished shape and creates a natural place for the long chain and tassel.
Beginner tip: Keep the decreases loose enough that the tip does not pucker.
Common mistake to avoid: Do not pull the final point too tight. A tight point can curl.
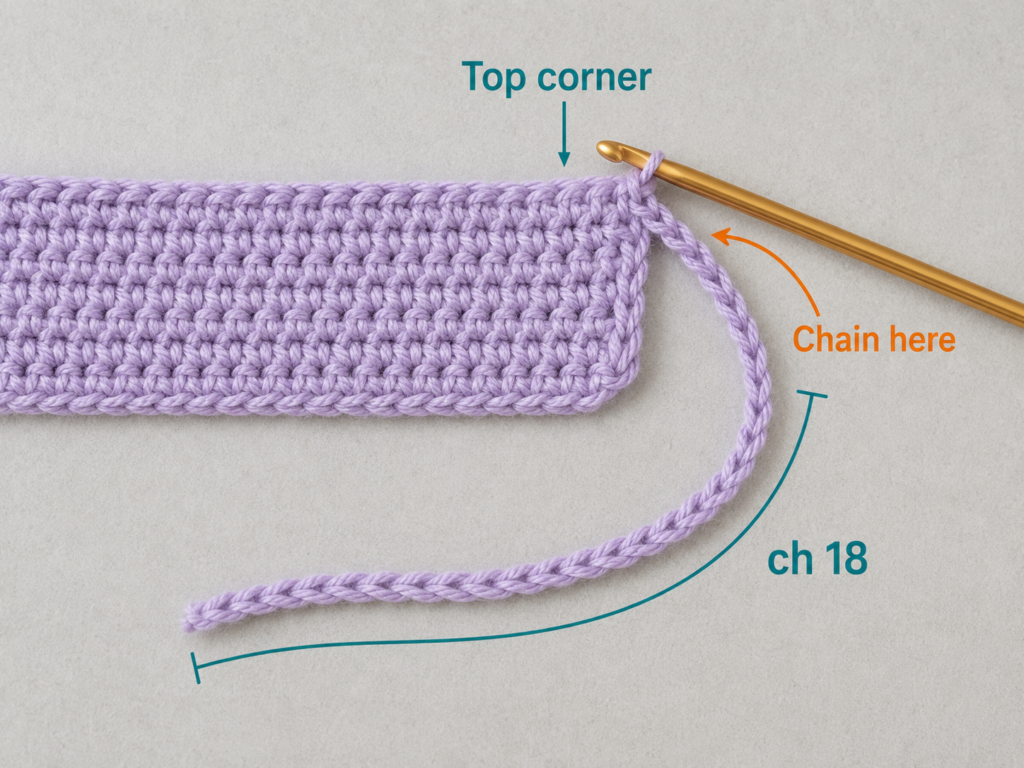
Step 6: Make the Long Chain Tail
Do not cut the yarn immediately. From the pointed end, chain a long tail. This chain becomes part of the hanging tassel and gives the bookmark a graceful finish when it is placed inside a book.
Make the chain long enough to hang outside the book, but not so long that it tangles.
Beginner tip: Keep the chain stitches even. Uneven chain tension shows clearly in a bookmark tassel.
Common mistake to avoid: Do not make the chain too short. It is easier to trim a tassel than to add length later.
Step 7: Make and Weave the Contrast Cord
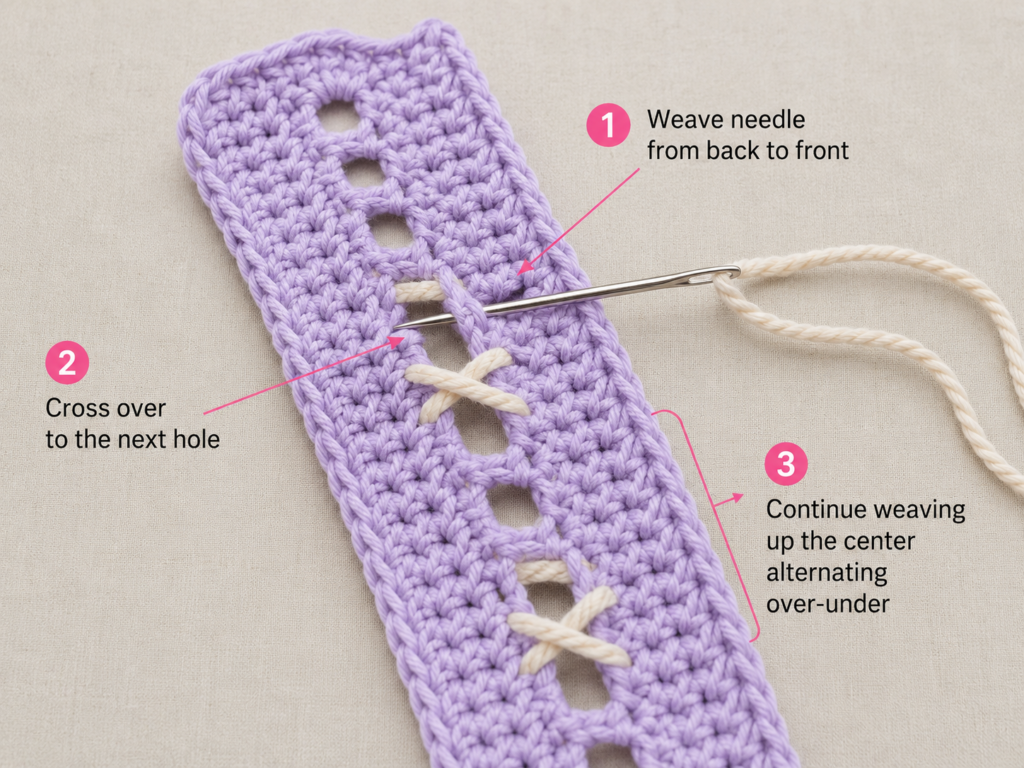
With your contrast color, make a long chain cord. Thread the cord onto a yarn needle. Starting near the bottom open spaces, weave the cord diagonally through the bookmark holes.
Work in one diagonal direction first. Then work back in the opposite direction to create small X shapes through the open spaces. The reference source describes weaving through the holes diagonally, then working the other side like lacing a shoe.
Beginner tip: Do not pull the woven cord too tightly. It should decorate the bookmark without shrinking it.
Common mistake to avoid: Do not skip random holes. Plan the woven path so the X shapes look even.
Step 8: Braid the Tails Into a Tassel
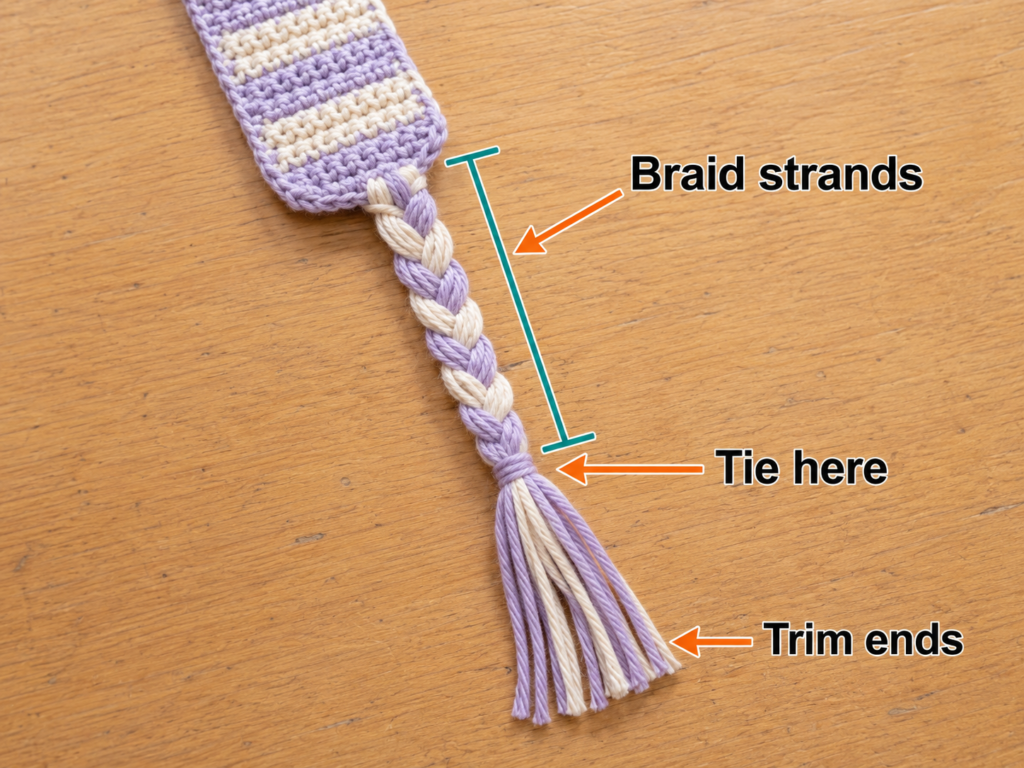
After the woven cord is in place, bring the tails together at the pointed end. Separate the strands into three groups and braid them. Tie the bottom securely, then trim the ends evenly.
The selected source includes a braided tail/tassel finishing process after the weaving step.
Beginner tip: Clip the top of the bookmark to a notebook or hold it under a small weight while braiding.
Common mistake to avoid: Do not braid too tightly. A very tight braid can twist the bookmark.
Pattern Notes or Stitch Notes
Turning chains should stay consistent. For this bookmark, the turning chain does not need to count as a stitch.
The open chain spaces should line up down the length of the bookmark so the woven cord can pass through neatly.
The bookmark body should stay narrow. A finished width around 1 inch is practical for most books.
The contrast cord should be decorative, not tight. Pulling too tightly can distort the bookmark.
The tassel should be secure but light. Heavy tassels can pull the bookmark out of smaller paperbacks.
Common Beginner Mistakes
- Missing edge stitches: Use stitch markers if your bookmark gets narrower.
- Pulling the chain spaces too tight: Small holes make weaving difficult.
- Making the bookmark too wide: A bulky bookmark can damage book pages.
- Weaving the contrast cord too tightly: This can make the bookmark curl.
- Skipping blocking: Blocking helps flatten the bookmark and show the stitch pattern.
- Making an uneven braid: Separate strands evenly before braiding.
- Using fuzzy yarn: Smooth yarn makes the bookmark thinner and neater.
How to Customize This Crochet Project
You can customize this bookmark with colors, yarn, length, border, and tassel style.
For a soft romantic look, use lavender and cream. For a coastal look, use sky blue and sand. For a fall reading gift, use mustard and burgundy. For a modern neutral bookmark, use cream and taupe.
You can make the bookmark shorter for paperbacks or longer for journals and planners. You can also skip the woven cord for a very simple version, or use three colors for a brighter braided tassel.
For border options, use a plain single crochet edge, a slip stitch edge, or a tiny picot edge. The source tutorial also mentions adding a picot stitch border at the bottom as a finishing detail.
This project makes a good handmade gift for readers, teachers, book club friends, students, and craft fair shoppers.
Finishing Instructions
Weave in all short ends with a yarn needle. Trim the tassel evenly. If the bookmark curls, lightly block it.
To block, mist the bookmark with water, smooth it flat, pin the edges gently, and let it dry completely. The Craft Yarn Council describes blocking as a way to let stitches settle and get the shape and drape you want.
Quick Printable-Style Summary
- Skill level: Beginner to easy
- Project type: Crochet bookmark
- Yarn: DK/sport cotton or smooth cotton-blend yarn
- Hook: 3.0 mm–4.0 mm
- Main stitches: Chain, single crochet, slip stitch, single crochet decrease
- Starting method: Short foundation row
- Repeat: Alternate solid rows with open chain-space rows
- Finishing: Shape pointed end, add chain tail, weave contrast cord, braid tassel, block flat
FAQ
Is this crochet bookmark pattern good for beginners?
Yes. It uses simple rows, single crochet, chain spaces, and basic finishing. The weaving step looks decorative, but it is easy once the open spaces are made.
What yarn is best for crochet bookmarks?
Smooth cotton or cotton-blend yarn works well because it creates a thin, flat bookmark. Avoid bulky or fuzzy yarn.
How wide should a crochet bookmark be?
A practical bookmark is usually about 1 inch wide. Wider bookmarks may feel bulky inside books.
Can I make this without the woven X design?
Yes. You can make the bookmark body and tassel only. The woven cord is decorative.
Why is my bookmark curling?
Your tension may be too tight, or the woven cord may be pulled too firmly. Light blocking usually helps.
Can I use thread instead of yarn?
Yes. Crochet thread creates a thinner, more delicate bookmark, but it may be harder for beginners to see the stitches.
Can I sell finished bookmarks from this tutorial?
You can sell finished bookmarks you make yourself, but do not copy or redistribute another designer’s original pattern text or images.
Conclusion
A crochet bookmark pattern is a perfect beginner project because it is small, useful, and easy to personalize. You can practice rows, chain spaces, decreases, weaving, braiding, and blocking without committing to a large project. Make one for yourself, then try a few color combinations for gifts, book clubs, teacher presents, or craft fair sets.