A handmade crochet pennant banner is one of those little projects that can change the feeling of an entire room. Hang one above a shelf, across a nursery wall, over a party table, or along a mantel, and a simple string of crocheted triangles becomes a cheerful piece of homemade decoration.
The nicest part? You don’t need complicated stitches or years of crochet experience to make one.
This easy crochet pennant banner pattern uses basic single crochet stitches to create solid triangle flags. Instead of sewing fabric together or working a complicated lace motif, you’ll crochet each triangle separately, give it a neat finish, and attach the flags to a long crocheted cord.
I particularly like this style for beginners because the solid fabric makes it easy to see your stitches. Each row becomes a little shorter than the last, gradually creating the familiar pointed pennant shape.
For this tutorial, we’ll make six small flags in soft, earthy colors. You can follow the same method to make a longer birthday garland, a colorful nursery decoration, a seasonal mantel banner, or a simple handmade gift.
By the end, you’ll know exactly how to crochet a triangle pennant, shape its sides, finish the edges, and join several flags into one continuous banner.
What You’ll Learn
This beginner-friendly crochet project will teach you how to:
- Make a foundation chain and work even single crochet rows.
- Shape a flat triangle using easy crochet decreases.
- Check your stitch counts as your pennant gets narrower.
- Add a simple contrasting border for a cleaner finish.
- Weave in ends and block small crochet decorations.
- Join individual flags with a crocheted hanging cord.
- Adjust the pattern for smaller or larger pennants.
If you’ve already made a simple crochet washcloth, you probably have most of the skills you need. If you’re completely new to crochet, this project is also a good reason to practice making chains and single crochet stitches.
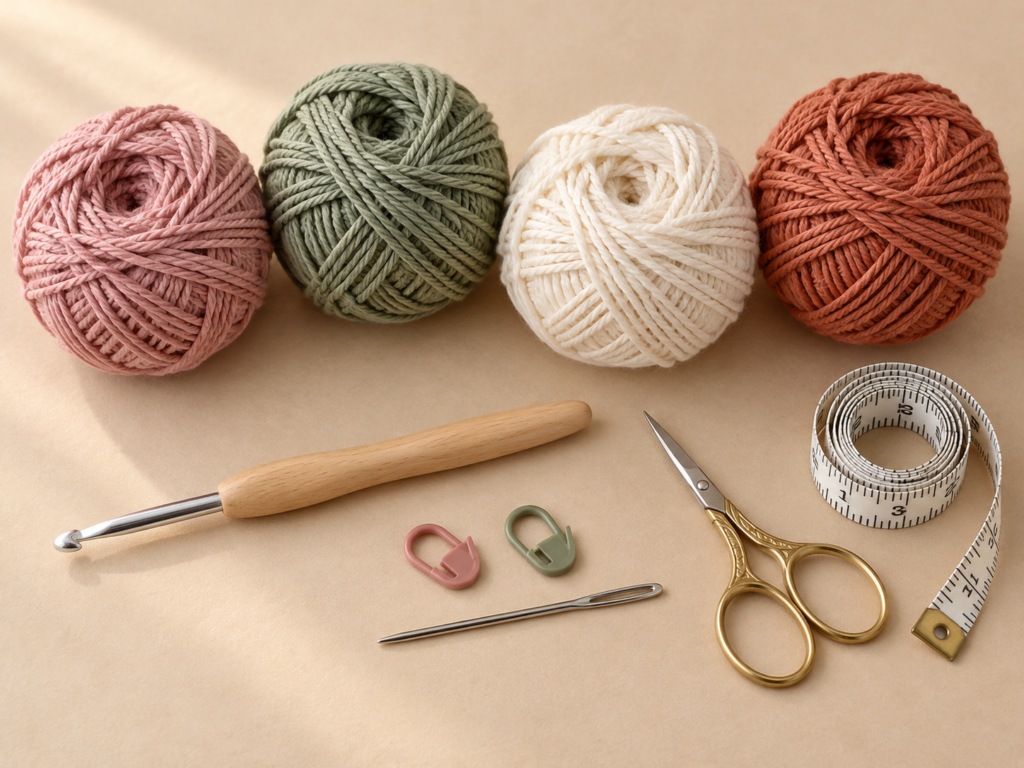
Materials You’ll Need
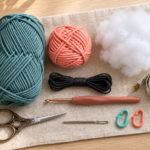
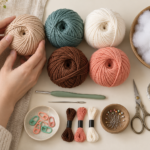
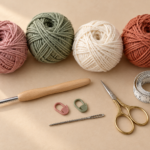
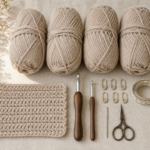
You won’t need much yarn for this project, which makes it a useful way to work through small amounts of leftover cotton.
| Material | Recommended Option |
|---|---|
| Yarn | DK (#3) cotton or cotton blend |
| Main colors | Dusty rose, sage green, muted terracotta |
| Edging and cord | Warm ivory |
| Hook | 4.0 mm |
| Yarn needle | Blunt-tip tapestry needle |
| Scissors | Small embroidery scissors |
| Stitch markers | 2 optional removable markers |
| Measuring tape | For checking dimensions and spacing |
| Blocking supplies | Foam mat and rustproof pins, optional |
For a six-pennant banner, allow approximately 60–100 grams of DK cotton across all colors, depending on your yarn, tension, border choice, and final dimensions. This is a planning estimate rather than a tested yarn requirement.
Cotton works especially well for decorative bunting because it has a pleasant texture, holds its shape, and usually produces crisp stitch definition.
A smooth cotton blend is another good choice if you prefer something slightly softer.
Crochet Abbreviations Used
This pattern uses US crochet terminology.
| Abbreviation | Meaning |
|---|---|
| ch | Chain |
| sc | Single crochet |
| sc2tog | Single crochet two together |
| sc3tog | Single crochet three together |
| sl st | Slip stitch |
| st / sts | Stitch / stitches |
| rep | Repeat |
| RS | Right side |
| WS | Wrong side |
In UK terminology, the US single crochet is called double crochet.
How to Make a Single Crochet
Insert your hook into the indicated stitch, yarn over, and pull up a loop. You should have two loops on your hook.
Yarn over again and pull through both loops.
That’s one single crochet.
How to Make a Single Crochet Two Together
This stitch is shortened to sc2tog.
- Insert your hook into the next stitch and pull up a loop.
- Insert your hook into the following stitch and pull up another loop.
- You should have three loops on the hook.
- Yarn over and pull through all three loops.
You’ve turned two stitches into one.
The important part is that the decrease uses two adjacent stitches. Don’t work into the same stitch twice.
How to Make a Single Crochet Three Together
The final row of this pattern uses sc3tog to create the pointed tip.
Insert your hook into the next stitch and pull up a loop. Do the same in each of the following two stitches. With four loops on your hook, yarn over and pull through all four loops.
Three stitches have become one.
Practicing these techniques on a little scrap of yarn before starting can make the triangle shaping feel much easier.
Before You Start
Skill level and finished size
This is a beginner project with one slightly more advanced technique: decreasing.
Using DK cotton and a 4.0 mm hook, a typical small pennant may measure approximately 10–12 cm (4–4¾ inches) across the top and 9–12 cm (3½–4¾ inches) from top to tip.
These are approximate planning dimensions, not verified measurements from a crocheted gauge sample. Your actual flag may be larger or smaller.
Gauge and tension
An exact gauge isn’t essential for decorative bunting, but consistent tension matters if you want all six flags to look alike.
Make your first pennant completely before making the rest.
Measure the width and height, then use that triangle as your reference.
If the stitches look loose or the sides feel floppy, try a slightly smaller hook. If the crochet fabric feels overly stiff and difficult to work, go up a hook size.
Understanding the triangle shape
We’ll begin at the widest part of the pennant.
The first row contains 21 single crochet stitches. Each shaping row then removes one stitch from each end, reducing the total by two.
Near the bottom, we’ll finish the remaining three stitches together to make a clean point.
This creates a solid crochet triangle with a straight upper edge.
How to keep the sides even
Count your stitches after every row.
Small counting errors are much easier to fix immediately than after you’ve completed the triangle.
You can also place removable stitch markers in the first and last stitch of the current row if you find the edges difficult to recognize.
Choosing your colors
For a six-flag banner, try:
- Two dusty-rose pennants.
- Two sage-green pennants.
- Two muted-terracotta pennants.
Use the same ivory edging and connecting cord on every triangle for a coordinated look.
You could also make every flag a different color, use just two alternating colors, or make a monochrome banner for a minimalist room.
Step-by-Step Crochet Tutorial
Step 1: Make the Foundation Chain
Start with your first yarn color. I’ll use dusty rose for the example.
Make a slip knot and place it on your 4.0 mm crochet hook.
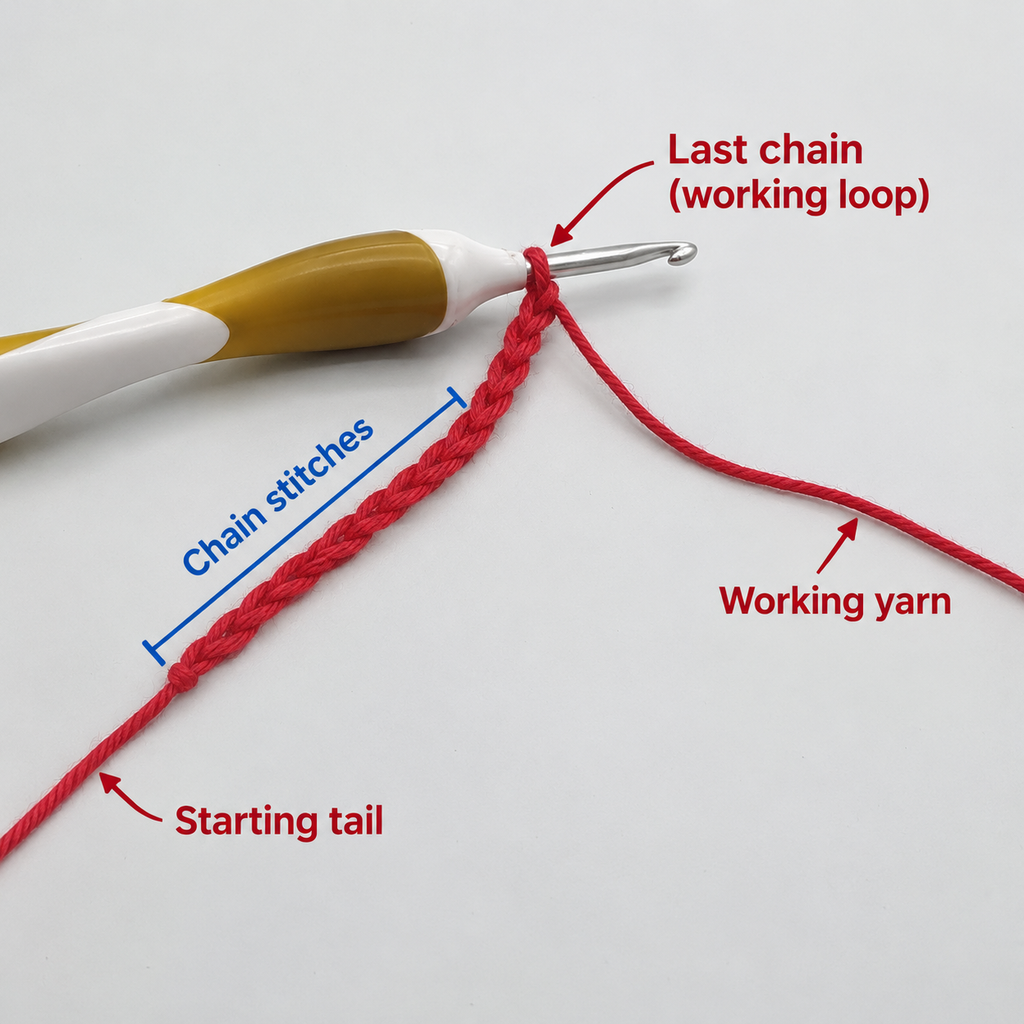
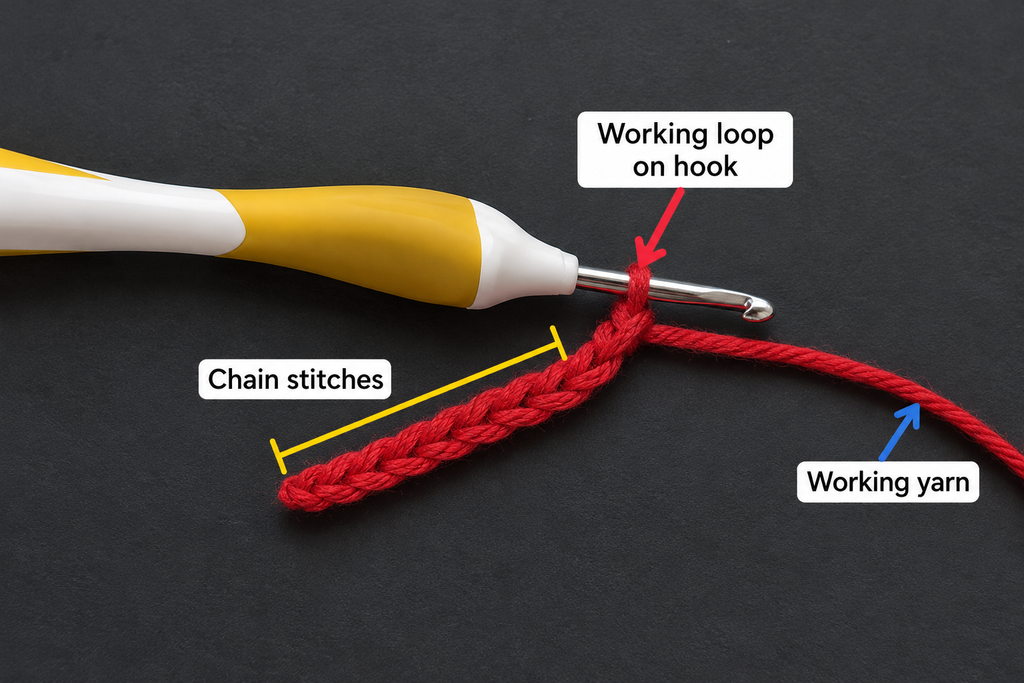
Now chain 22.
To make a chain stitch, yarn over and pull the yarn through the loop already on your hook.
Continue until you’ve made 22 chains.
Try not to pull the chains too tightly. You’ll need to work into them on the next row.
Lay the chain flat on your tabletop. It should be straight, with individual chain stitches visible.
Beginner tip: Count the V-shaped chains rather than the loops you happen to see on the hook. The working loop on your hook does not count as a chain.
Common mistake to avoid: Making a very tight foundation chain can cause the top of the pennant to draw inward. Relax your grip slightly, or make only the foundation chain with a 4.5 mm hook before switching back to 4.0 mm.
Step 2: Crochet the First Row
We’ll now turn the foundation chain into a solid row of single crochet stitches.
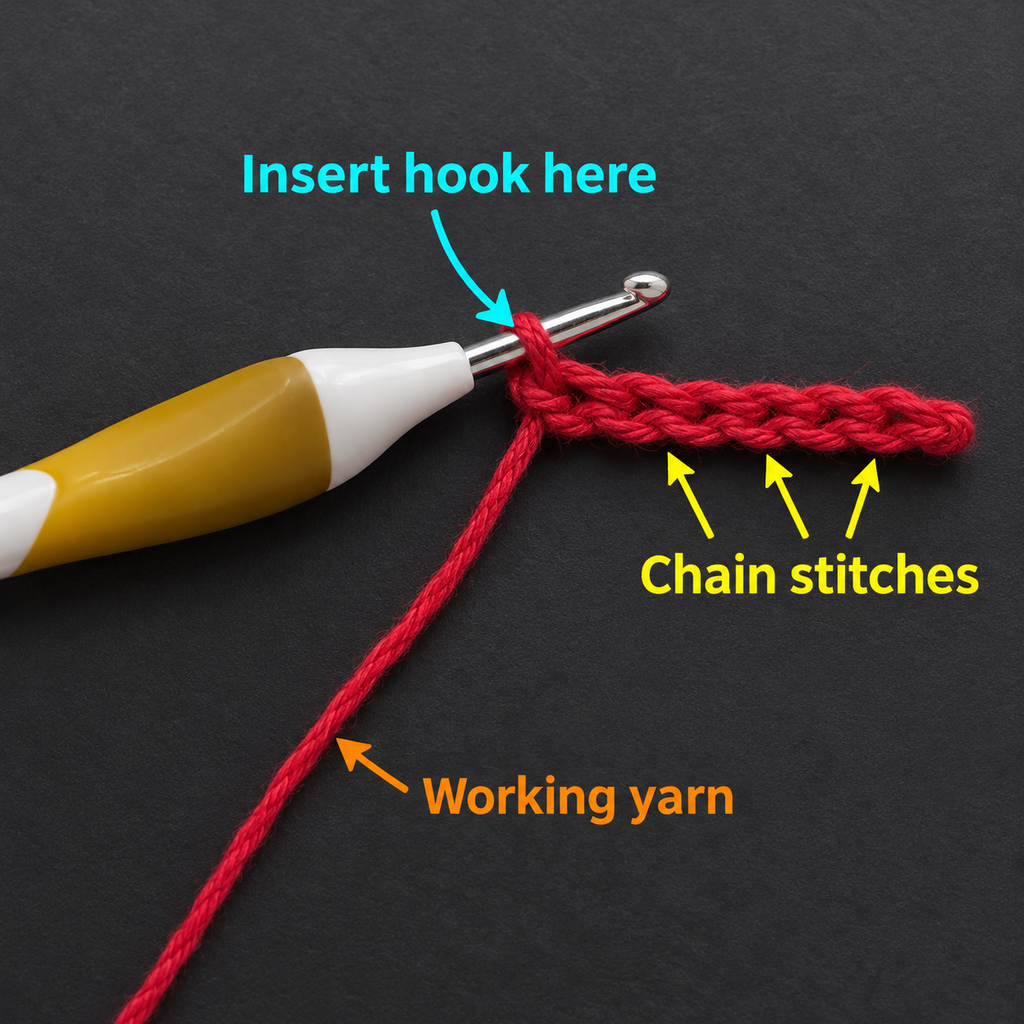
Insert your hook into the second chain from the hook.
Work one single crochet.
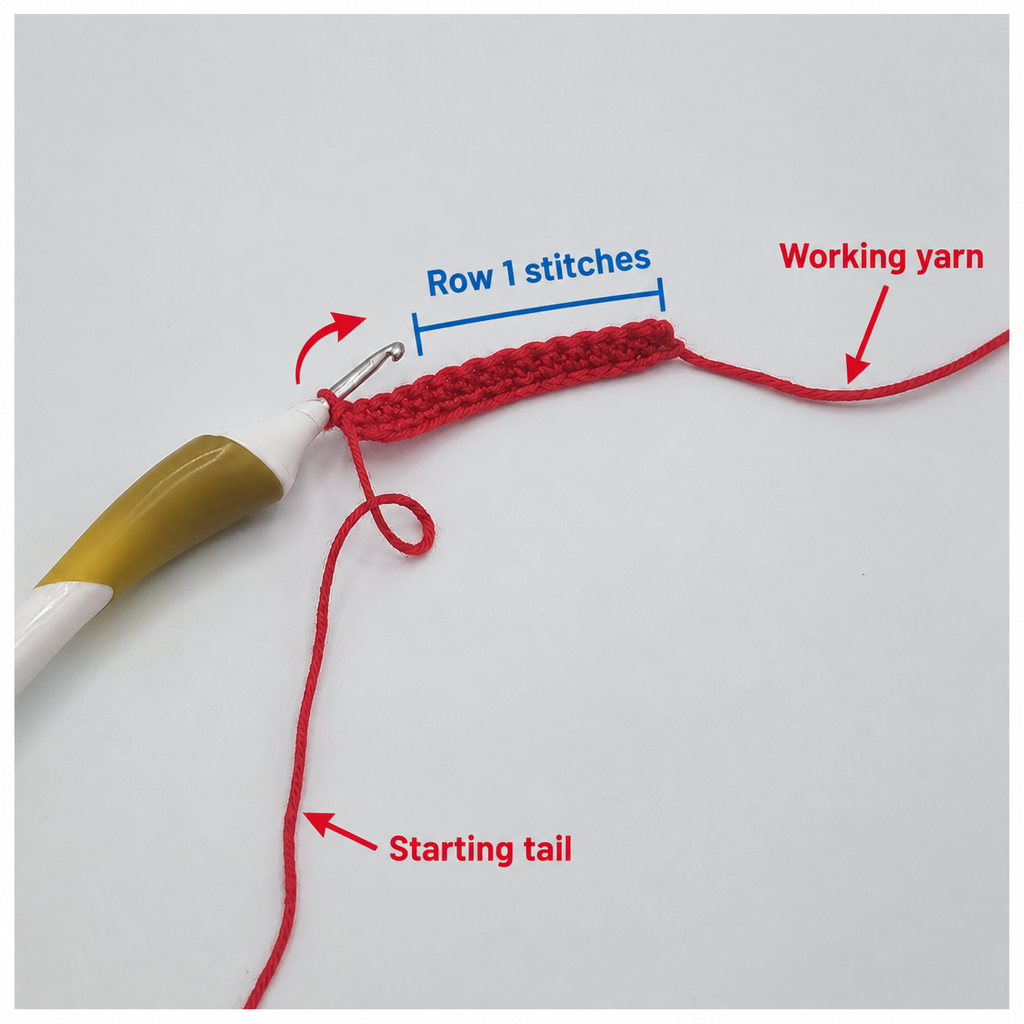
Continue working one single crochet into each remaining chain until you reach the end.
You should have 21 single crochet stitches.
Count them carefully.
Don’t count the loop currently sitting on your hook.
This first row forms the straight top of your pennant. The rest of the pattern will gradually narrow from this width.
Row 1: Sc in second ch from hook and in each remaining ch. (21 sts)
Beginner tip: If you have trouble finding where to insert the hook, turn the foundation chain slightly toward you and look for the back bumps or the two top strands of each chain. Choose one consistent insertion method.
Common mistake to avoid: Accidentally skipping the final foundation chain may leave you with only 20 stitches. Check the count before continuing.
Step 3: Make the First Decrease Row
Now we’re ready to shape the triangle.
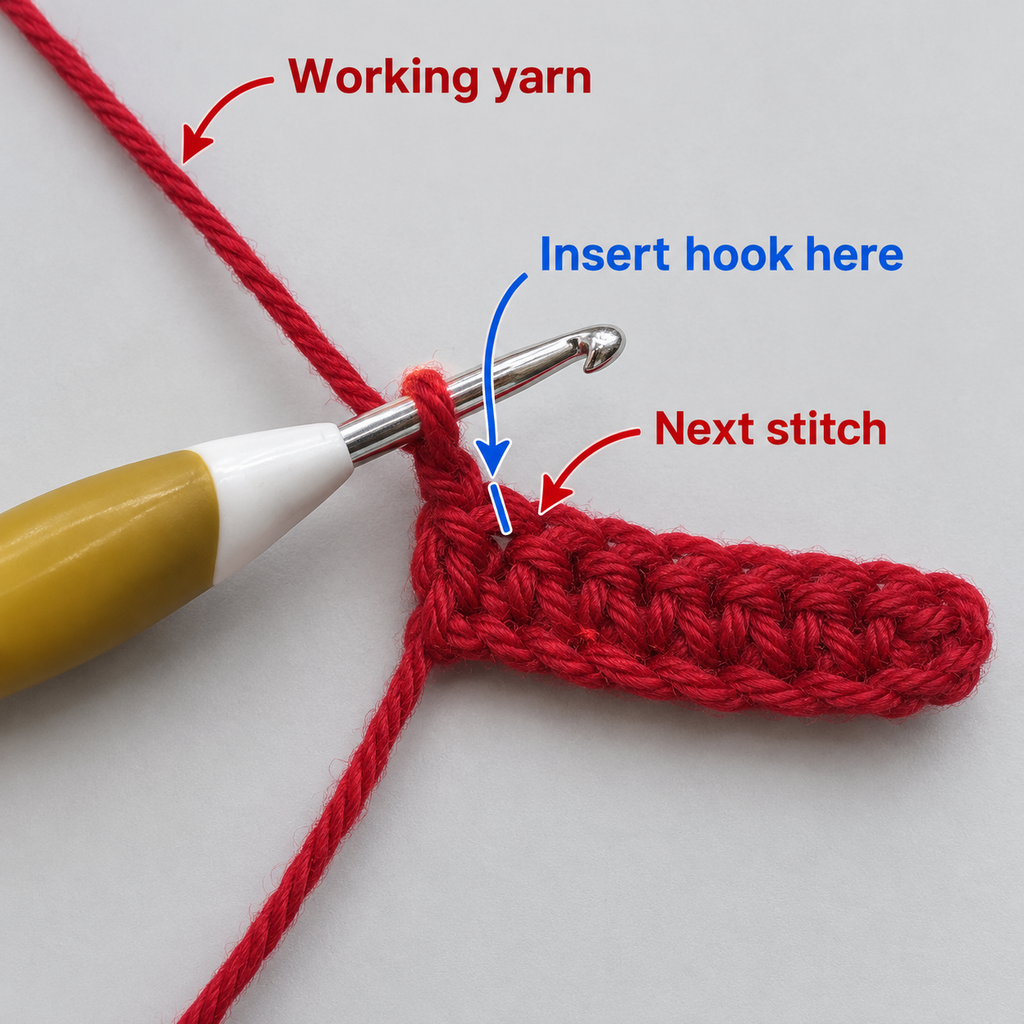
Chain one and turn your work.
The turning chain does not count as a stitch.
Work a sc2tog over the first two stitches.
Next, make one single crochet in each of the following 17 stitches.
When you reach the last two stitches, work another sc2tog.
You should have 19 stitches in total.
Row 2: Ch 1, turn. Sc2tog, sc in next 17 sts, sc2tog. (19 sts)
Look at the row you’ve just made.
It should be slightly narrower than the row underneath.
This is exactly what we want.
Both edges have decreased by one stitch, keeping the triangle reasonably symmetrical.
Beginner tip: Place a stitch marker in the first stitch after your initial decrease if you need help seeing where the shaping begins.
Common mistake to avoid: Don’t accidentally make a separate single crochet into a stitch that has already been included in your decrease.
Step 4: Continue Shaping the Triangle
Once you’ve finished Row 2, the rest of the main pattern follows a simple rule.
Each new row begins with a decrease, continues with ordinary single crochet stitches across the middle, and ends with another decrease.
You’ll keep removing two stitches per row.
Rows 3–6:
| Row | Instructions | Stitch Count |
|---|---|---|
| 3 | Ch 1, turn; sc2tog, sc 15, sc2tog | 17 |
| 4 | Ch 1, turn; sc2tog, sc 13, sc2tog | 15 |
| 5 | Ch 1, turn; sc2tog, sc 11, sc2tog | 13 |
| 6 | Ch 1, turn; sc2tog, sc 9, sc2tog | 11 |
When you’ve completed Row 6, your pennant should start looking distinctly triangular.
You’ll notice that the sides are beginning to slope inward.
Lay the piece on the table.
The original foundation row should still be the widest part, while the working row is now much shorter.
If one side seems considerably steeper than the other, check whether you accidentally skipped a stitch or made a decrease on only one end.
Beginner tip: After Row 3, count every completed row before making the next turning chain. Your stitch counts should always be odd numbers.
Common mistake to avoid: Don’t confuse a turning chain with a single crochet stitch. Counting it as a stitch can cause one edge to develop a bump.
Step 5: Check the Sloping Edges
Before making the smaller rows, it’s worth checking your triangle closely.
Hold the crochet fabric so the top foundation row is horizontal.
The left and right sides should taper inward.
Small irregularities are normal, especially when you’re still learning to make decreases.
However, you shouldn’t see large unexpected holes near the ends of the rows.
Check that:
- Each completed shaping row has two fewer stitches than the previous row.
- The stitches along the sides are fairly compact.
- The fabric lies reasonably flat.
- There are no unintentional gaps beside the decreases.
If the side edges look loose, pay attention to your tension during the next decrease.
Try drawing the working loop only tightly enough to sit comfortably on the hook.
There’s no need to pull hard.
Beginner tip: Smooth the triangle with your fingertips rather than stretching it aggressively. You’re checking the shape, not blocking the project yet.
Common mistake to avoid: Don’t add an extra stitch to make a slightly uneven edge look straighter. That can create a noticeable bump later.
Step 6: Work the Narrow Final Rows
Now let’s finish narrowing the triangle.
Continue using the same paired-decrease technique.
Rows 7–10:
| Row | Instructions | Stitch Count |
|---|---|---|
| 7 | Ch 1, turn; sc2tog, sc 7, sc2tog | 9 |
| 8 | Ch 1, turn; sc2tog, sc 5, sc2tog | 7 |
| 9 | Ch 1, turn; sc2tog, sc 3, sc2tog | 5 |
| 10 | Ch 1, turn; sc2tog, sc 1, sc2tog | 3 |
As you approach the tip, the rows become very short.
Take your time here.
With only a few stitches remaining, it’s easy to lose track of which loops belong to which stitch.
If you find yourself pulling the crochet hook through several loops awkwardly, stop and examine the stitch before continuing.
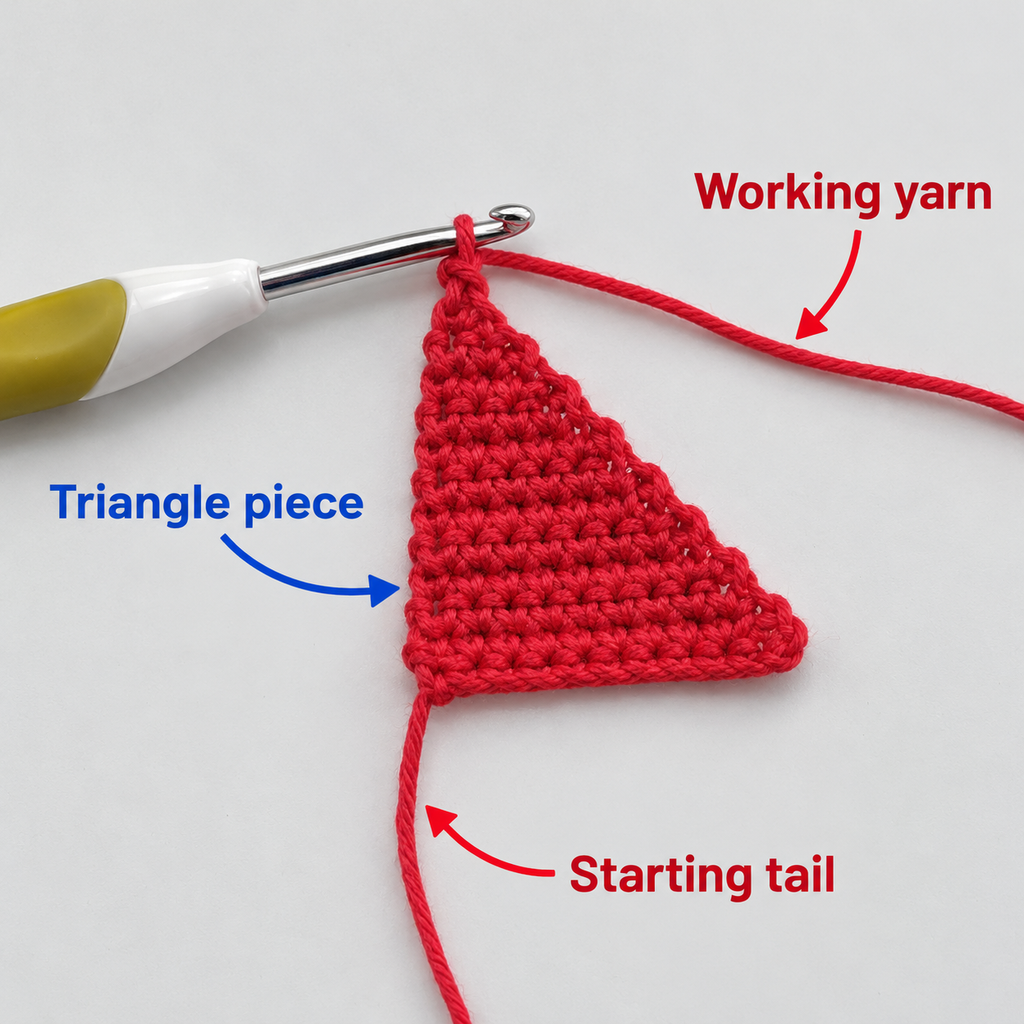
Your final three-stitch row should sit at the bottom of the triangle.
Beginner tip: The final rows are easiest to work when you keep the piece relaxed and support it with your opposite hand.
Common mistake to avoid: Avoid accidentally inserting the hook into the side of a decrease instead of the next true stitch.
Step 7: Finish the Point of the Triangle
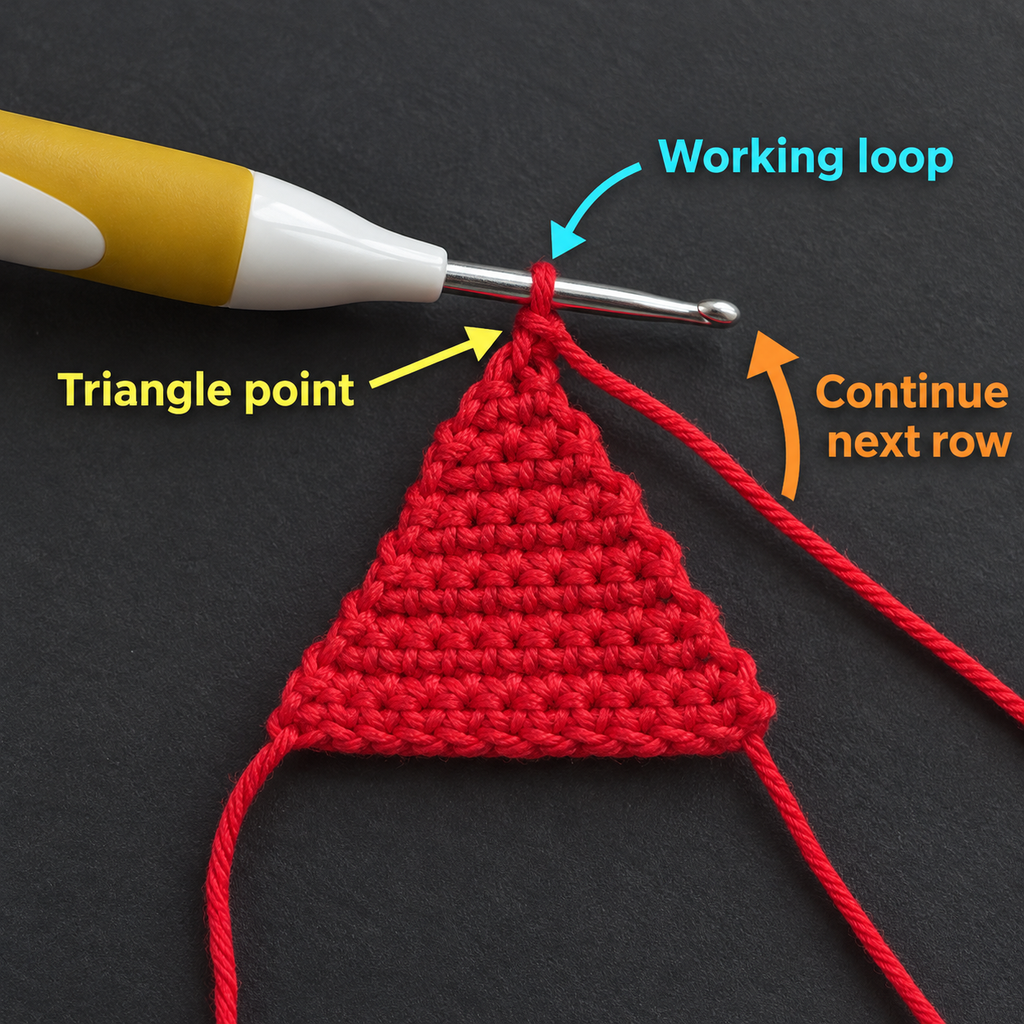
At the end of Row 10, you should have three stitches remaining.
Chain one and turn.
Work one sc3tog across all three stitches.
You should have a single stitch at the tip.
Row 11: Ch 1, turn. Sc3tog. (1 st)
Cut your yarn, leaving a tail of approximately 10–15 cm (4–6 inches).
Yarn over and pull the cut end all the way through the final working loop to secure it.
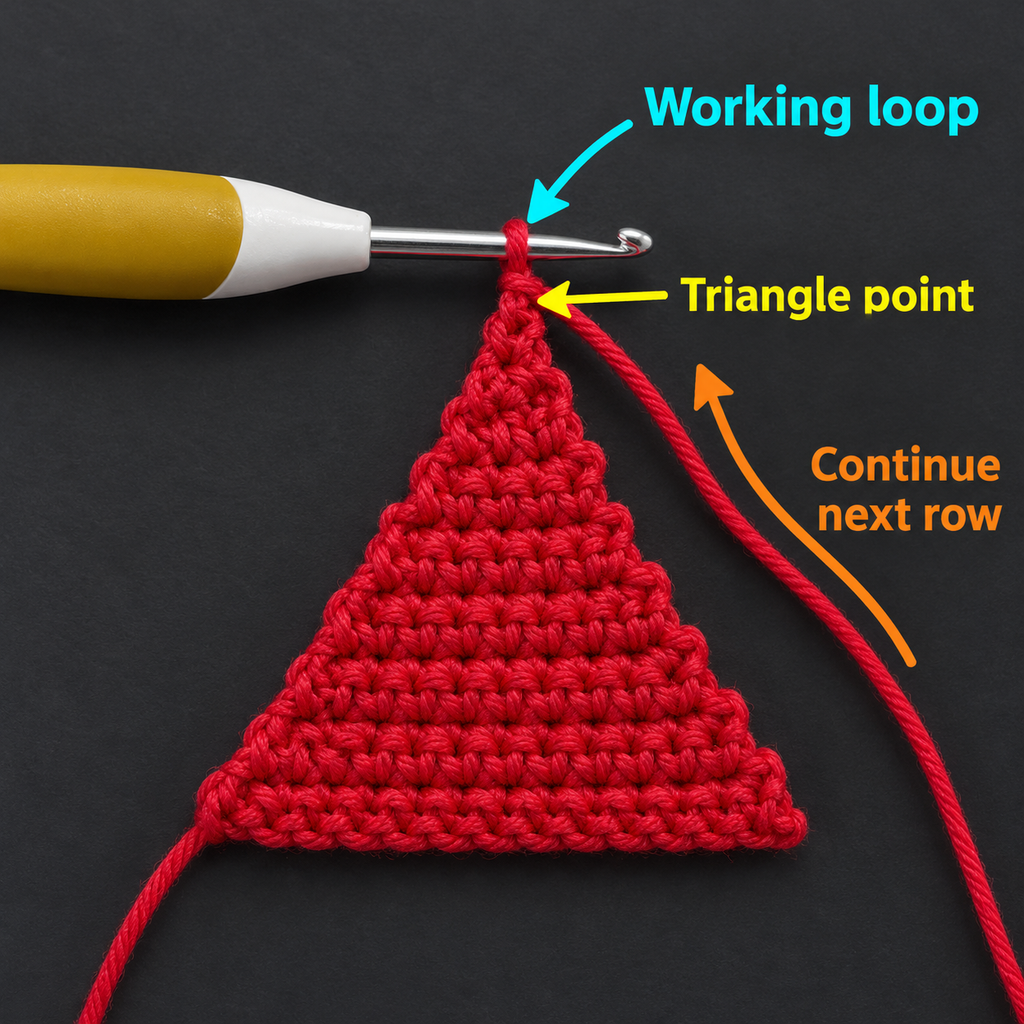
Your first crochet pennant is finished!
Lay it flat and check the shape.
You should have a straight top edge and two sides that narrow toward the bottom.
Don’t worry if the point is slightly rounded. Cotton stitches have their own thickness, and gentle blocking can help refine the shape.
Beginner tip: If the final decrease feels awkward, use your fingers to separate the tops of the three remaining stitches before inserting the hook.
Common mistake to avoid: Don’t cut the tail so short that it becomes difficult to weave securely into the fabric.
Step 8: Add a Simple Contrasting Border
This step is optional, but I think a narrow contrasting border gives the finished pennants a beautifully tidy appearance.
For the example, we’ll use warm-ivory cotton yarn.
With the straight top edge facing upward, attach your edging yarn near one upper corner.
Work down the first sloping side toward the point.
Insert your hook into a suitable side-edge loop or row-end space and make one single crochet.
Continue working roughly one single crochet into each row end.
Because these edges contain decreases, you may need to adjust your stitch placement slightly to avoid making the border too tight or too wavy.
At the bottom point, work three single crochets into the tip area to help the border turn around the corner.
Continue up the opposite sloping edge.
Finish with a slip stitch near the other upper corner, then fasten off.
Leave the straight top edge unbordered for now because we’ll attach the hanging cord there later.
Beginner tip: Work slowly around the bottom point. That small turn makes a noticeable difference to the finished shape.
Common mistake to avoid: Too many border stitches will cause rippling, while too few will pull the sides inward. If the edging doesn’t lie flat, undo that section and redistribute the stitches.
Step 9: Make the Remaining Pennants
Now that you’ve completed one flag, it’s time to make the rest.
For a six-flag garland, make five more triangles using the same instructions.
Use exactly the same hook size and the same yarn weight for every pennant.
You can change the color, but try not to change the thickness of the yarn unless you want intentionally different-sized flags.
I recommend crocheting all six triangles before assembling the garland.
That way, you can lay them out on the table, experiment with different color arrangements, and decide which order looks best.
For this version, arrange the flags as follows:
Dusty rose → Sage green → Terracotta → Dusty rose → Sage green → Terracotta.
Once the pennants are made, add the ivory border to each one.
If any flag is noticeably larger or smaller, compare its stitch count and gauge with the first triangle.
A small variation is usually fine for a handmade decoration.
Step 10: Crochet the Hanging Cord and Join the Flags
The connecting cord turns your individual triangle pieces into a proper crochet pennant banner.
For this version, we’ll make a continuous chain-and-single-crochet cord.
Use your ivory cotton yarn and the same 4.0 mm crochet hook.
Begin with 35 chains.
This becomes the first hanging tail.
Now take your first pennant and hold it with the right side facing you and its straight top edge ready to work into.
The top of the pennant contains 21 foundation-row stitches.
Work one single crochet into each of those 21 top-edge stitches, attaching the flag directly to the working cord.
Once you’ve attached the first flag, chain 12.
This creates the gap between flags.
Pick up your second pennant and work 21 single crochet stitches across its top edge.
Repeat the process until all six flags are attached.
After attaching the final pennant, chain 35 for the second hanging tail.
Fasten off and secure the end.
If you would like hanging loops instead of straight tails, fold the final portion of each end back on itself and sew it securely with your yarn needle.
You now have a continuous crochet garland!
Beginner tip: Keep the pennants facing the same direction as you join them. It’s easy to accidentally flip one flag so the wrong side faces outward.
Common mistake to avoid: Don’t twist the connecting cord between pennants. Lay the work flat after each flag is attached and check that the next one is oriented correctly.
Pattern Notes and Stitch Counts
Here is the complete triangle pattern in one place.
Crochet triangle pattern — make six
Foundation: Ch 22.
| Row | Pattern | Total Stitches |
|---|---|---|
| 1 | Sc in 2nd ch from hook and across | 21 |
| 2 | Ch 1, turn; sc2tog, sc 17, sc2tog | 19 |
| 3 | Ch 1, turn; sc2tog, sc 15, sc2tog | 17 |
| 4 | Ch 1, turn; sc2tog, sc 13, sc2tog | 15 |
| 5 | Ch 1, turn; sc2tog, sc 11, sc2tog | 13 |
| 6 | Ch 1, turn; sc2tog, sc 9, sc2tog | 11 |
| 7 | Ch 1, turn; sc2tog, sc 7, sc2tog | 9 |
| 8 | Ch 1, turn; sc2tog, sc 5, sc2tog | 7 |
| 9 | Ch 1, turn; sc2tog, sc 3, sc2tog | 5 |
| 10 | Ch 1, turn; sc2tog, sc 1, sc2tog | 3 |
| 11 | Ch 1, turn; sc3tog | 1 |
Fasten off.
Turning chain rules
The chain one at the beginning of each new row provides enough height for single crochet.
It does not count as a stitch.
Always work your first decrease into the first two actual stitches of the previous row.
Right side and wrong side
Because this triangle is worked back and forth in rows, the front and back will look very similar.
Choose whichever side you prefer as the right side, but keep that choice consistent for every flag.
The same applies when attaching the connecting cord.
Stitch-count check
The stitch counts form a predictable sequence:
21, 19, 17, 15, 13, 11, 9, 7, 5, 3, 1.
If your numbers don’t follow this sequence, stop and inspect your last row.
How to adjust the size
To make a wider triangle, start with an odd number of single crochet stitches and reduce the count by two on each following row.
For example, beginning with 27 single crochets requires 28 foundation chains and produces a wider, taller triangle using the same shaping method.
A smaller version can start with 15 single crochets, using 16 foundation chains.
Both versions finish by decreasing the last three stitches together.
The final height depends on your stitch gauge and row height.
Common Beginner Mistakes and How to Fix Them
1. The triangle looks uneven
One side may be sloping more sharply than the other.
This often happens when a decrease is missed or an extra stitch is worked near the edge.
Fix: Check your stitch count. Each shaping row should contain exactly two fewer stitches than the row before it.
2. The top edge curls or pulls inward
A tight foundation chain may cause the straight top edge to curl.
Fix: Work your foundation chain more loosely or use a slightly larger hook just for the starting chain. Gentle blocking may help after the flag is completed.
3. There are holes beside the decreases
Large gaps sometimes appear if the loops are pulled too high when making sc2tog.
Fix: Keep the working loop close to the hook shaft, and avoid excessively loose tension while forming the decrease.
4. The pennants are different sizes
Even with the same pattern, different yarn brands or changes in tension can affect the dimensions.
Fix: Use the same yarn weight and hook throughout. If consistency is particularly important, make all flags with the same yarn brand and fiber composition.
5. The border looks wavy
A wavy border usually contains too many stitches for the edge it surrounds.
Fix: Remove a few border stitches and space the remaining ones evenly along the side.
6. The flags twist on the connecting cord
If the connecting yarn is accidentally twisted while working across the next flag, the pennants may not hang neatly.
Fix: Lay your garland flat and check the alignment before securing each flag.
7. The ends start coming loose
Short yarn tails or insufficient weaving can allow the ends to work their way out.
Fix: Leave generous yarn tails and weave them through several stitches in different directions using a blunt yarn needle.
How to Customize Your Crochet Pennant Banner
One of the best features of this crochet project is how easily it adapts to different colors, sizes, and occasions.
Make a pastel nursery banner
Try pale blush, cream, soft sage, and light beige.
These colors create a gentle appearance that works well in neutral nursery decor.
Keep the border the same color on every flag for a coordinated finish.
Hang decorations well away from cribs, sleep spaces, and anywhere young children could reach the cord. Crochet garlands are decorative items, not toys.
Create birthday party bunting
For a birthday banner, use brighter colors such as coral, yellow, aqua, and lavender.
You can make ten or more pennants for a longer display.
Small crochet appliqués such as stars or flowers can be sewn to individual flags if you’d like extra detail.
Make a fall crochet garland
For autumn decorating, combine rust, mustard, forest green, and cream.
The warm colors pair particularly well with wooden shelves and natural home accessories.
Try a Christmas color palette
Use cranberry red, deep green, and ivory.
A matching cream border helps keep the design cohesive.
For a festive touch, you could sew a small crochet snowflake to one of the middle flags.
Change the stitch texture
The simple single crochet version is an excellent beginner option, but you can experiment after you’ve mastered it.
You might try stripes, alternating rows of different colors, or a more decorative edging.
If you change to a taller stitch such as double crochet, you’ll need to redesign the shaping instructions because the row height and decrease behavior will differ.
Make larger pennants
Use a longer starting chain and continue decreasing by two stitches per row.
For a much larger wall banner, consider using medium-weight (#4) yarn with a suitable hook.
Thicker yarn will generally produce bigger, more substantial flags.
Add letters to the pennants
Crochet letters or felt appliqués can turn a simple banner into a personalized party decoration.
Names, initials, or short celebratory words are good choices.
Secure any decorative additions carefully, especially if the banner will be used around children.
Finishing Instructions
A little finishing work helps the entire banner look more polished.
Weave in the yarn ends
Thread the yarn tail through a blunt yarn needle.
Pass the needle through several stitches on the back of the triangle.
Change direction and weave through another nearby section before trimming the excess yarn.
Repeat for all remaining tails.
Try to hide the ends inside stitches of the same color whenever possible.
Block the pennants
Blocking isn’t essential, but it can help your flags lie flatter and appear more uniform.
For cotton yarn, lightly dampen the flags using clean water, provided the yarn care instructions permit it.
Place the pennants on a suitable blocking mat.
Gently shape the top edge into a straight line and arrange the sides evenly.
Use rustproof pins if needed, keeping the pins away from children and pets.
Allow the pieces to dry completely before removing the pins.
If you’ve already attached the cord, you can still gently shape the flags, but blocking the separate triangles first is usually easier.
Check the final spacing
Lay the completed banner flat and examine the gap between every pair of flags.
Adjust the fabric gently so the pennants hang consistently.
The finished cord can be shortened or lengthened by changing the number of chains between flags in a future version.
Washing and care
Follow the washing instructions on your yarn label.
Cotton decorations may be suitable for gentle hand washing, but colorfastness and trim materials vary.
After washing, reshape each triangle and dry flat.
Avoid hanging the garland while it is wet, because the extra weight can stretch the cord.
Hanging the banner
Attach the two ends to secure wall hooks or other suitable supports.
Avoid open flames, heat sources, and locations where the garland may become tangled.
A lightweight crochet banner is especially attractive across a bookshelf, above a craft desk, or as part of seasonal wall decor.
Quick Printable-Style Pattern Summary
Easy Crochet Triangle Pennant Banner
Skill Level: Beginner / Easy
Yarn: DK cotton
Hook: 4.0 mm
Stitches: Chain, single crochet, sc2tog, sc3tog, slip stitch
Foundation: Chain 22
Row 1: 21 single crochets
Rows 2–10: Decrease once at both ends of every row
Row 11: Work the final three stitches together
Border: Optional single crochet edging around the two sloping sides
Quantity: Six triangles
Assembly: Chain 35, sc across first pennant’s 21 top-edge stitches, ch 12 between pennants, and continue until all six are attached; finish with ch 35
Finishing: Fasten off, weave in ends, block gently, and hang
Frequently Asked Questions
Is this crochet pennant banner pattern suitable for beginners?
Yes. It primarily uses chains and single crochet stitches, which are two of the first techniques most people learn.
The only additional skills are the paired decreases and the final three-stitch decrease. Both are manageable with a little practice.
How many crochet triangles do I need for a banner?
Six triangles make a small decorative garland, but you can make as many as you like.
For a wider mantel, doorway, or party table, consider eight to twelve pennants.
The number depends on the width of each flag, the spacing between them, and the length of the area you want to decorate.
What yarn is best for a crochet pennant banner?
DK cotton is an excellent choice because it offers clear stitch definition and tends to hold its shape well.
A cotton blend also works nicely.
Acrylic yarn is usable, especially for inexpensive seasonal decorations, but it may drape and stretch differently.
Can I make the crochet flags bigger?
Absolutely.
Increase your starting chain while keeping an odd number of single crochet stitches in the first row.
For example, you can chain 28 and make 27 single crochets in Row 1.
Continue decreasing by two stitches in each following row until three stitches remain, then work the final three together.
How do I keep crochet pennants from curling?
Use even tension, avoid making your foundation chain too tight, and check your decrease placement.
If your completed flags still curl, gentle blocking may help.
Cotton yarn is often a practical choice for achieving a neat, flat shape.
Can I crochet the entire banner in one piece?
Yes. Rather than sewing every triangle onto a separate cord, the method used here lets you crochet continuously across the top edges of the finished flags.
This creates a joined banner without needing to stitch each flag on afterward.
How do I make a crochet pennant banner for Christmas or Halloween?
Simply change the colors.
For Christmas, try red, green, and cream.
For Halloween, use orange, black, purple, and dark green.
You can also add small appliqués or seasonal embroidered details after finishing the flags.
Conclusion
A crochet pennant banner is a lovely project when you want something useful, decorative, and satisfying without taking on a large blanket or complicated garment.
Once you’ve made your first triangle, the next ones become much quicker. You’ll already know where the decreases belong, how to keep the sides even, and how to finish the point.
The final result is a handmade garland you can adapt for birthdays, nursery decorating, seasonal displays, craft rooms, or thoughtful gifts.
Save this crochet pennant banner pattern for your next quiet crafting afternoon, and experiment with a color combination that suits your home.
You might be surprised how much charm a handful of little crochet triangles can add to a room.