Have you ever wanted to crochet a tiny character that fits in your hand, has an adorable little face, and doesn’t require complicated stitches?
This crochet mascot plush pattern is a lovely place to begin.
In this step-by-step tutorial, we’ll make a small cat mascot with a rounded body, two tiny feet, short arms, pointed ears, and a curved tail. We’ll finish it with embroidered facial details and two optional decorative stripes.
The best part? The head and body are crocheted together, so you won’t need to sew two large pieces together. You’ll start by making the feet, connect them with a short chain, and gradually build the rest of the cat using simple single crochet stitches.
If you’ve already learned how to make a magic ring and single crochet, you have most of the skills you need.
This tutorial includes detailed round instructions, beginner tips, stitch counts, common mistakes, and 13 planned photo placements to help you follow the entire project.
What You’ll Learn
By making this mini crochet mascot, you’ll practice:
- Starting amigurumi pieces with a magic ring.
- Working single crochet in continuous rounds.
- Connecting two crocheted legs.
- Increasing stitches to shape a rounded body.
- Creating small openings for arms.
- Decreasing stitches to close a stuffed piece.
- Crocheting and attaching ears and a tail.
- Embroidering a cute face.
- Finishing a small plush with secure seams.
Project details
| Detail | Information |
|---|---|
| Skill level | Beginner / Advanced Beginner |
| Finished size | Approximately 4–5 inches (10–13 cm) |
| Estimated time | 3–5 hours |
| Yarn weight | Medium (#4) |
| Hook | 3.5 mm |
| Construction | Continuous rounds |
| Sewing required | Ears, tail, and decorative details |
| Main stitch | Single crochet |
| Terminology | US crochet terms |
The finished measurements are approximate and depend on your yarn, hook, and tension.
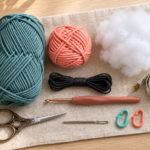
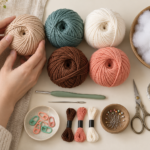
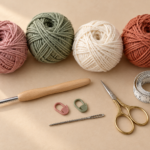
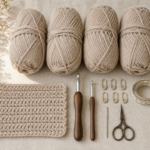
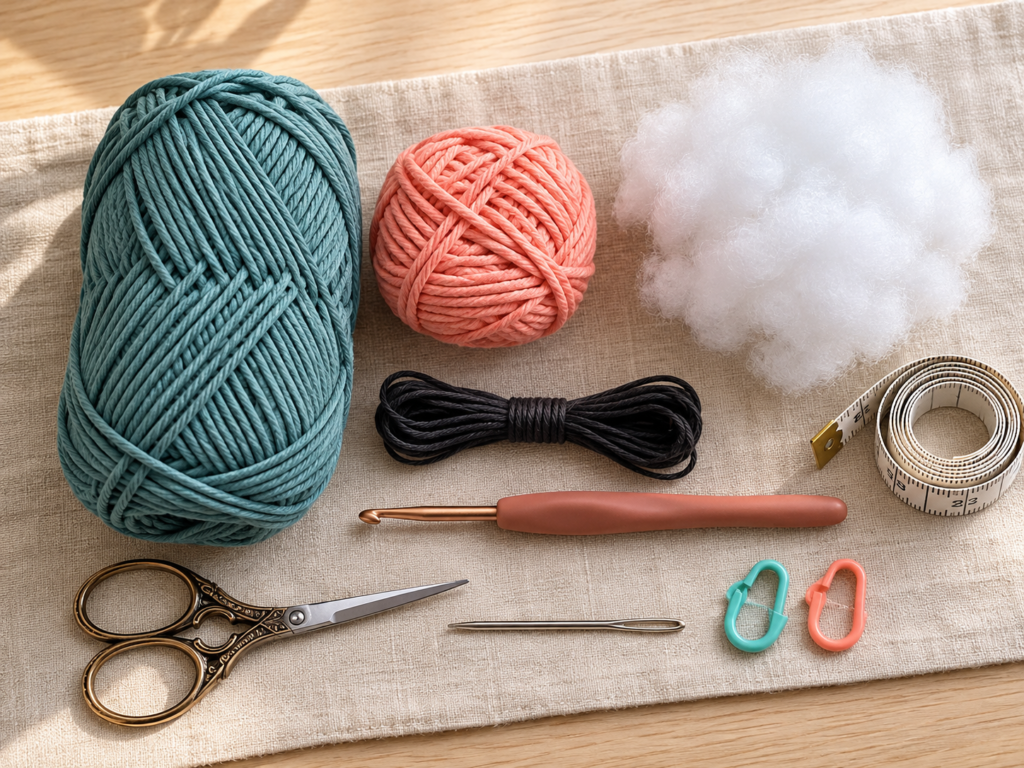
Materials You’ll Need
You don’t need a large collection of crochet supplies for this project.
Yarn
Choose a smooth, medium-weight cotton or cotton-acrylic blend.
For the photographed version, use:
- Approximately 35–50 g of dusty teal yarn for the cat.
- A small amount of pale coral yarn for the optional back stripes and cheeks.
- Charcoal or black embroidery floss for the eyes, nose, and whiskers.
Cotton-blend yarn is a practical choice because the stitches are easy to distinguish. It also helps small amigurumi pieces keep their shape.
Smooth yarn is easier to learn with than fluffy chenille because you can see where to insert your hook.
Crochet hook
Use a 3.5 mm crochet hook.
Amigurumi is usually worked more tightly than blankets or scarves. A relatively small hook helps create a dense fabric that keeps the stuffing inside.
If you see large gaps between your stitches, try a slightly smaller hook.
Other supplies
You’ll also need:
- Polyester fiberfill stuffing.
- Blunt tapestry needle.
- Small scissors.
- Locking stitch marker.
- Measuring tape.
- Sewing pins or removable stitch markers for positioning the ears.
- Optional second marker for identifying the front of the body.
You do not need plastic safety eyes, buttons, or glue for this design.
Crochet Abbreviations Used
This tutorial uses US crochet terminology.
| Abbreviation | Meaning |
|---|---|
| MR | Magic ring |
| ch | Chain |
| sc | Single crochet |
| sl st | Slip stitch |
| st / sts | Stitch / stitches |
| inc | Increase: 2 sc in the same stitch |
| dec | Decrease: crochet 2 stitches together |
| rep | Repeat |
| R | Round |
Important terminology note: A US single crochet is called a double crochet in UK terminology. Follow the US instructions throughout this project rather than mixing the two systems.
How to read the pattern
When you see:
(2 sc, inc) × 6
It means:
- Make one single crochet in each of the next two stitches.
- Make two single crochets in the following stitch.
- Repeat that sequence six times.
Each repeat produces four stitches, so six repeats produce 24 stitches.
Numbers in parentheses at the end of a round show the total number of stitches you should have.
For example:
R6: (2 sc, inc) × 6 (24)
The number 24 is your stitch count after completing that round.
Before You Start
Understand continuous rounds
Most of this cat is worked in a continuous spiral.
Unlike a traditional crochet circle, you won’t join every round with a slip stitch. Instead, you’ll keep crocheting into the next stitch.
Place a stitch marker into the first stitch of each round. When you reach that marker again, you have completed one round.
Move the marker into the first stitch of the new round.
This small habit will prevent many counting mistakes.
Keep your tension comfortable
Your stitches should be firm enough to hold stuffing without visible gaps, but not so tight that you struggle to insert the hook.
If your hands become tired, relax your grip and take a short break.
A comfortable, consistent tension is more useful than pulling every stitch as tightly as possible.
Practice increases and decreases
An increase creates two stitches from one stitch. It helps the fabric grow wider.
A decrease combines two stitches into one. It helps the fabric become narrower.
For a neat invisible decrease, insert your hook through the front loops of the next two stitches, yarn over, pull through both front loops, then yarn over and pull through the two loops on your hook.
This method makes the decreases less noticeable on the outside of the plush.
Learn to count your stitches
Look at the top of your crochet fabric.
Each single crochet has a small V-shaped top. Count these V shapes rather than the vertical bars on the side.
For example, when a round should contain 30 stitches, count all 30 before moving to the next round.
It’s much easier to fix a mistake immediately than after crocheting five additional rounds.
Check the right side
The outside of the cat should show neat V-shaped single crochet stitches.
Small amigurumi pieces sometimes curl inside out while you work. If that happens, gently turn the piece so the intended right side faces outward before stuffing.
Now you’re ready to begin.
Step-by-Step Crochet Mascot Plush Tutorial
Step 1: Crochet the Two Tiny Legs
We’ll begin with the feet.
Each leg is a short crocheted tube made from single crochet stitches.
Make two legs using dusty teal yarn.
Leg pattern
- R1: Make a magic ring and crochet 5 sc into the ring. (5)
- R2: Sc in every stitch around. (5)
- R3: Sc in every stitch around. (5)
- R4: Sc in every stitch around. (5)
After completing the first leg, fasten off and leave a short yarn tail.
Make the second leg in exactly the same way, but do not fasten off.
You’ll continue working from the second leg to connect both feet.
Check that both legs have the same number of rounds and approximately the same height.
They should look like two small tubes with rounded bottoms.
Beginner tip: Pull the magic ring closed firmly so there isn’t a hole at the bottom of either foot.
Common mistake to avoid: Accidentally adding an extra stitch when moving into the next round. Keep your stitch marker in place and check that every leg round contains five stitches.
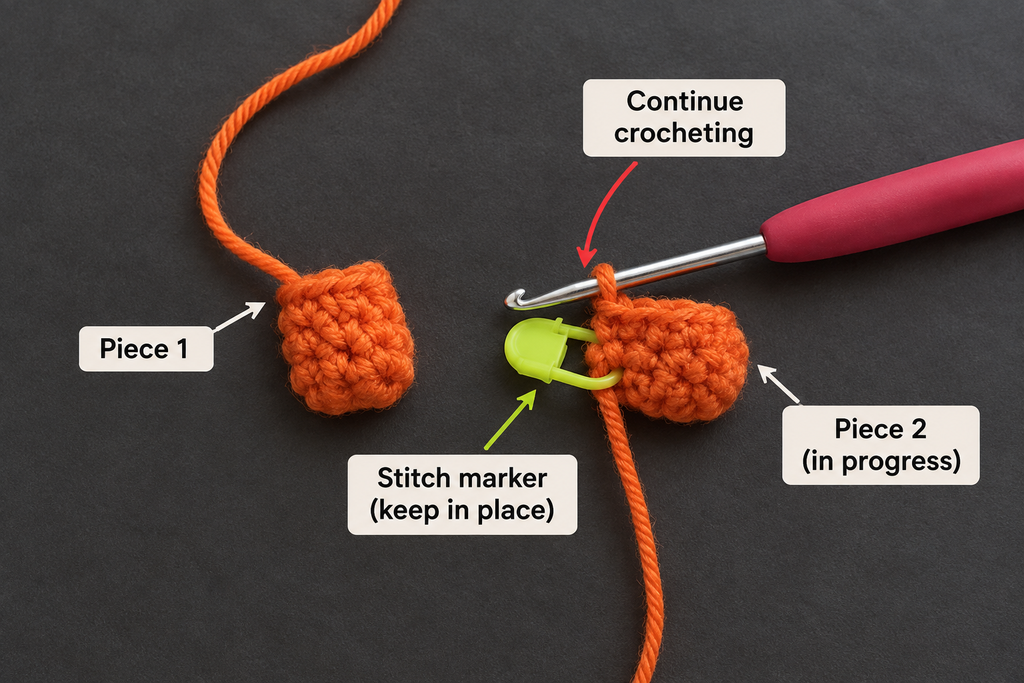
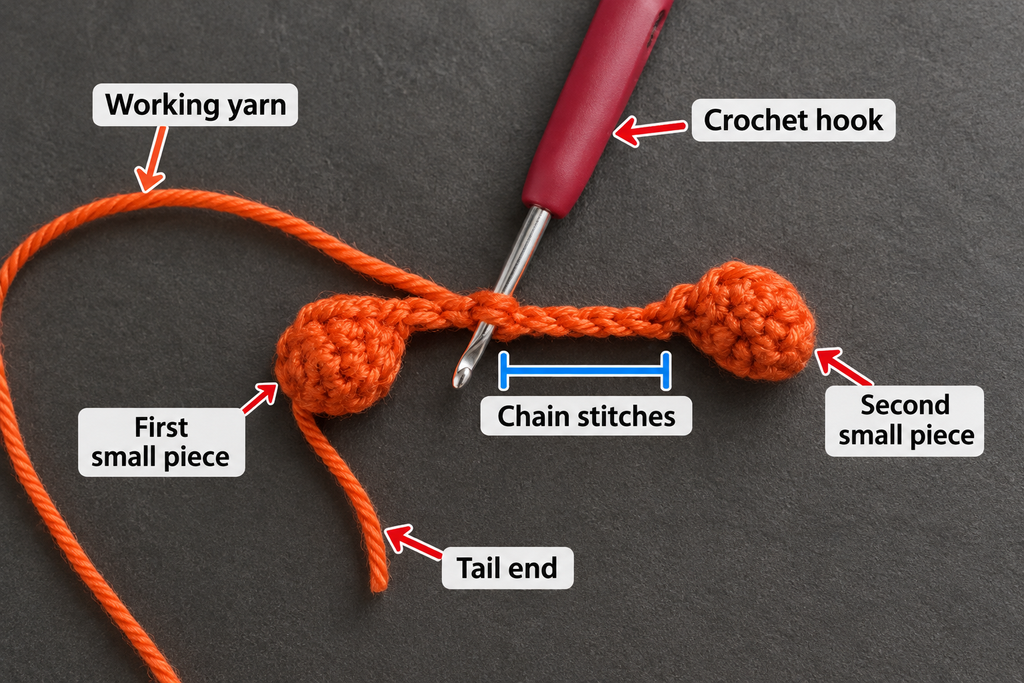
Step 2: Connect the Legs with a Chain
Next, we’ll join the two feet so they become one continuous piece.
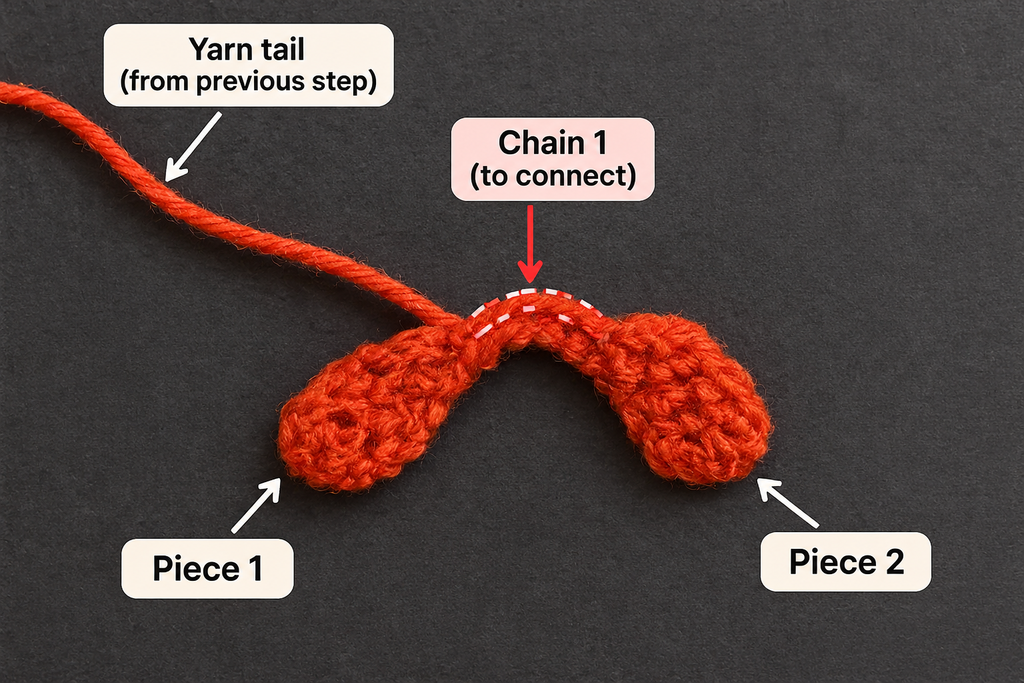
Hold both legs beside each other with their open ends facing upward.
The working yarn should still be attached to the second leg.
From the second leg:
- Chain 4.
- Bring the first leg close to the chain.
- Insert your hook into an available stitch on the first leg.
- Make a single crochet to connect the two pieces.
You should now have two feet connected by a short chain bridge.
Keep the legs pointing in the same direction. Make sure neither leg has twisted.
The four chains create the small space between the feet and provide the foundation for the bottom of the body.
Beginner tip: Lay the work flat on your table before joining. This makes it easier to see whether the feet are correctly positioned.
Common mistake to avoid: Twisting the chain before joining. A twisted bridge makes the lower body harder to shape evenly.
Step 3: Build the Lower Body
Now we’ll crochet around both feet and the connecting chain.
This creates an oval-shaped foundation that gradually becomes the cat’s rounded body.
Body pattern
R5: Starting with the first connecting single crochet from Step 2, work a total of:
- 5 sc around the first leg.
- 4 sc along one side of the connecting chain.
- 5 sc around the second leg.
- 4 sc along the opposite side of the same chain.
You should have 18 stitches at the end of the round.
Count carefully before continuing.
If you notice a small opening where the legs meet, don’t worry. You can close it later using one of the loose yarn tails.
R6: (2 sc, inc) × 6. (24)
R7: (3 sc, inc) × 6. (30)
The increases make the body wider than the feet.
R8–R13: Sc in every stitch around. (30 stitches per round)
You should now have a small cup-shaped body growing upward from the two legs.
The body may look slightly flat or narrow before stuffing. This is normal.
Keep the working yarn attached.
Beginner tip: Count the stitches after R6 and R7. These are important shaping rounds, and the following rounds depend on having the correct count.
Common mistake to avoid: Missing stitches on the underside of the chain bridge. Work into both sides of the foundation chain to complete the oval correctly.
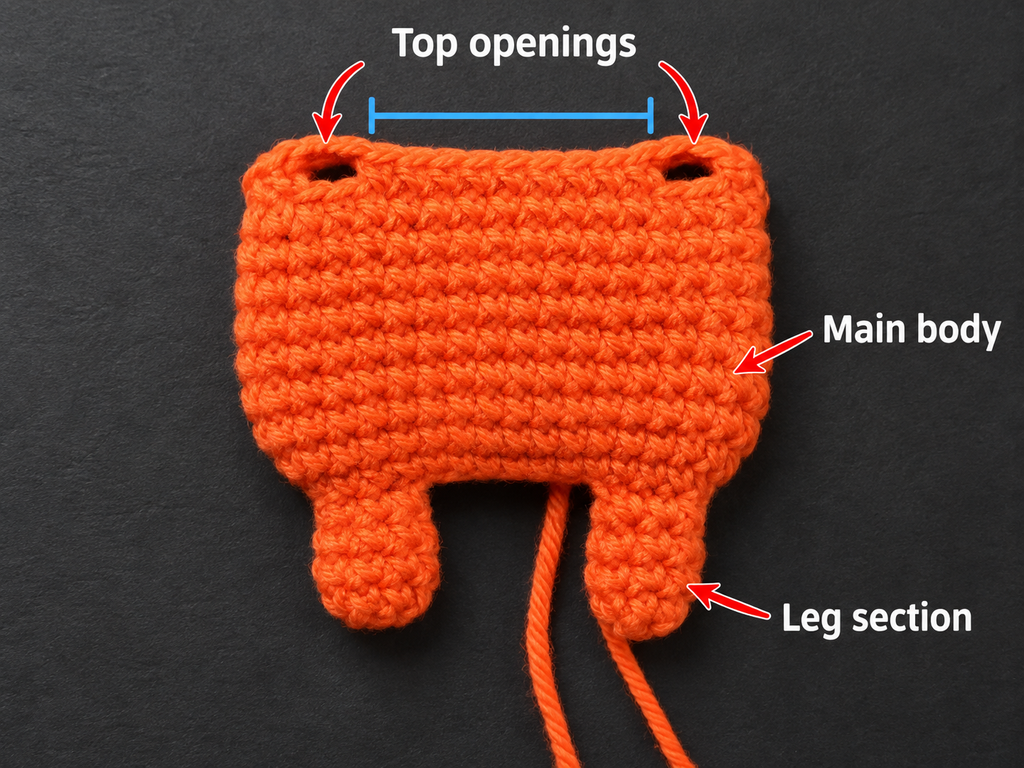
Step 4: Create the Arm Openings
Instead of making separate arms and sewing them on later, we’ll leave two small openings in the body.
After finishing R13, you should have 30 stitches.
R14:
- Sc in the next 6 stitches.
- Ch 2 and skip the next 2 stitches.
- Sc in the next 8 stitches.
- Ch 2 and skip the next 2 stitches.
- Sc in the final 12 stitches.
You should still have 30 stitches when counting the chain stitches as part of the round.
The two chain bridges create the upper edges of the arm openings.
Before continuing, check that the openings sit on opposite sides of the intended front of the cat. The exact placement can be adjusted by redistributing the plain single crochets while preserving 30 stitches and both two-stitch openings.
R15: Work one single crochet into each regular stitch and one single crochet into each chain stitch from R14. (30)
Don’t work into the skipped stitches underneath the bridges.
The two openings should remain visible.
Beginner tip: Put a removable marker beside each opening. You’ll be able to find them easily when it’s time to crochet the arms.
Common mistake to avoid: Accidentally crocheting into the skipped stitches below the chains. Doing that can close the openings.
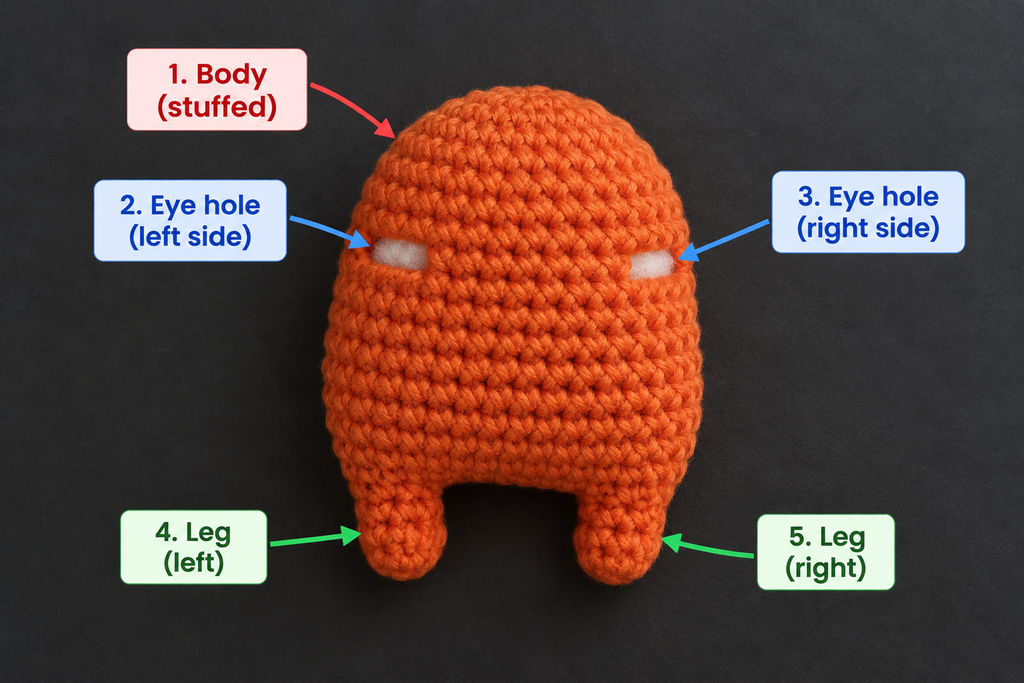
Step 5: Shape, Stuff, and Close the Body
Now we’ll complete the upper part of the mascot.
R16–R19: Sc in every stitch around. (30 stitches per round)
These rounds add height above the arms and create space for the face.
At this point, the body should resemble a small rounded pouch with two feet.
Before decreasing, begin adding polyester fiberfill.
Use small amounts of stuffing at a time.
Push a little stuffing down into each foot first, then fill the center of the body.
Try to distribute the stuffing evenly.
The cat should feel softly firm, not stretched.
Continue shaping:
- R20: (3 sc, dec) × 6. (24)
- R21: (2 sc, dec) × 6. (18)
- R22: (1 sc, dec) × 6. (12)
- R23: Dec × 6. (6)
Pause after R21 if you need to add more stuffing.
When only six stitches remain, cut the yarn, leaving a tail of approximately 15 cm.
Thread the tail onto a tapestry needle.
Pass the needle through the front loops of the six remaining stitches, then pull gently to close the opening.
Secure the yarn and hide the tail inside the body.
Beginner tip: Use small pieces of stuffing rather than pushing one large ball inside. This helps prevent lumps.
Common mistake to avoid: Overstuffing the body. If the crochet stitches stretch apart and the filling becomes visible, remove a little stuffing before closing.
Step 6: Find the Correct Armhole Stitches
Before making the arms, examine one of the openings.
You’ll notice a small gap with crochet stitches around its edges.
The opening is bordered by the two chain stitches above, the two skipped stitches below, and the side edges.
We want to work six single crochet stitches evenly around this opening.
Use your hook to gently identify each available loop.
Don’t pull hard or stretch the fabric.
If the opening looks too small, gently shape it with your fingers.
It should be large enough to insert your hook and work around the edge.
Beginner tip: Work slowly around the opening. This part is easier when you rotate the body rather than twisting your wrist.
Common mistake to avoid: Inserting your hook too deeply through several layers of the stuffed body. Work into the opening’s edge loops, not through the stuffing.
Step 7: Crochet the Two Arms
Now we’ll make the little arms directly from the openings.
Attach dusty teal yarn at one corner of the first armhole.
Arm pattern — make two
R1: Work 6 sc evenly around the opening. (6)
A useful distribution is two stitches along the upper chain edge, two along the lower edge, and one at each side.
R2: Sc in every stitch. (6)
R3: Sc in every stitch. (6)
R4: Sc in every stitch. (6)
R5: Dec × 3. (3)
Fasten off, leaving a short yarn tail.
Thread the tail through the remaining loops, pull closed, and hide the end inside the arm.
Repeat for the second arm.
These arms are intentionally short. They should look like tiny rounded paws extending from the sides of the body.
You can leave them unstuffed, which usually works well at this size.
If you prefer slightly fuller arms, add a very small amount of fiberfill before the final decrease round.
Beginner tip: Make the first arm completely before starting the second. You can then use it as a visual reference to match the length.
Common mistake to avoid: Making one arm longer than the other. Count the rounds carefully so both sides match.
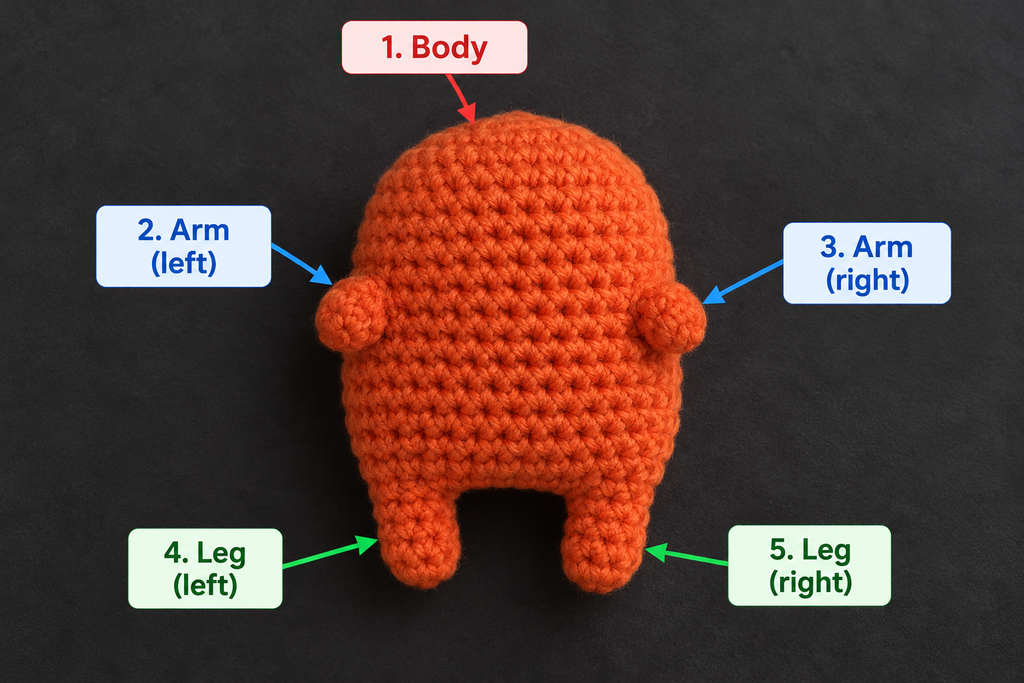
Step 8: Make the Ears and Tail
Our mascot is beginning to look like a character, but it still needs ears and a tail.
Crochet the ears
Make two ears using dusty teal yarn.
- R1: 4 sc in a magic ring. (4)
- R2: Inc in every stitch. (8)
- R3: (1 sc, inc) × 4. (12)
- R4: Sc in every stitch. (12)
Fasten off, leaving a long tail for sewing.
Do not stuff the ears.
Flatten each ear gently between your fingers.
The closed magic-ring end becomes the tip, while the wider open end becomes the base.
Position the ears on opposite sides of the rounded top of the cat.
Don’t sew them on immediately. Use pins or stitch markers to check their placement first.
Crochet the tail
The tail is a narrow tube.
- R1: 5 sc in a magic ring. (5)
- R2–R10: Sc in every stitch around. (5)
Fasten off and leave a long tail for sewing.
There is no need to stuff this small tail.
Once attached, you can curve it slightly by making a small securing stitch along the inside of the bend.
Beginner tip: Make both ears before sewing either one on. Comparing the two pieces makes it easier to keep them symmetrical.
Common mistake to avoid: Stuffing the ears too firmly. They should stay relatively flat so they sit neatly against the head.
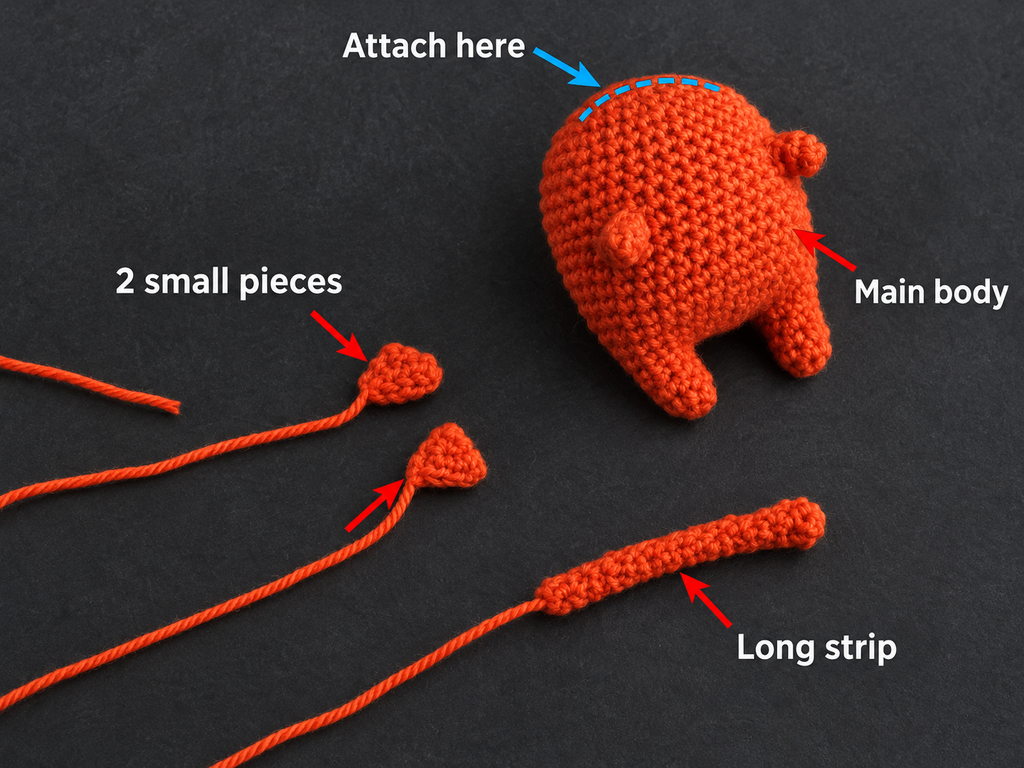
Step 9: Add Two Decorative Stripes
This step is optional, but it gives the mascot a little extra personality.
We’ll make two short coral-colored strips for the back.
Using pale coral yarn:
Make two strips.
- Chain 14.
- Insert your hook into the second chain from the hook.
- Work one slip stitch into each remaining chain.
- You should have 13 slip stitches.
- Fasten off, leaving a long tail for sewing.
The strips should look like two narrow bands.
Lay them across the back of the cat before attaching them.
If they are too long, shorten them by removing a few stitches. If they are too short, add a few chains.
Try to make both strips the same length.
Beginner tip: Keep your slip stitches slightly loose. Very tight slip stitches can make the strips curl.
Common mistake to avoid: Pulling the yarn tightly while making the foundation chain. This can make the decorative bands uneven.
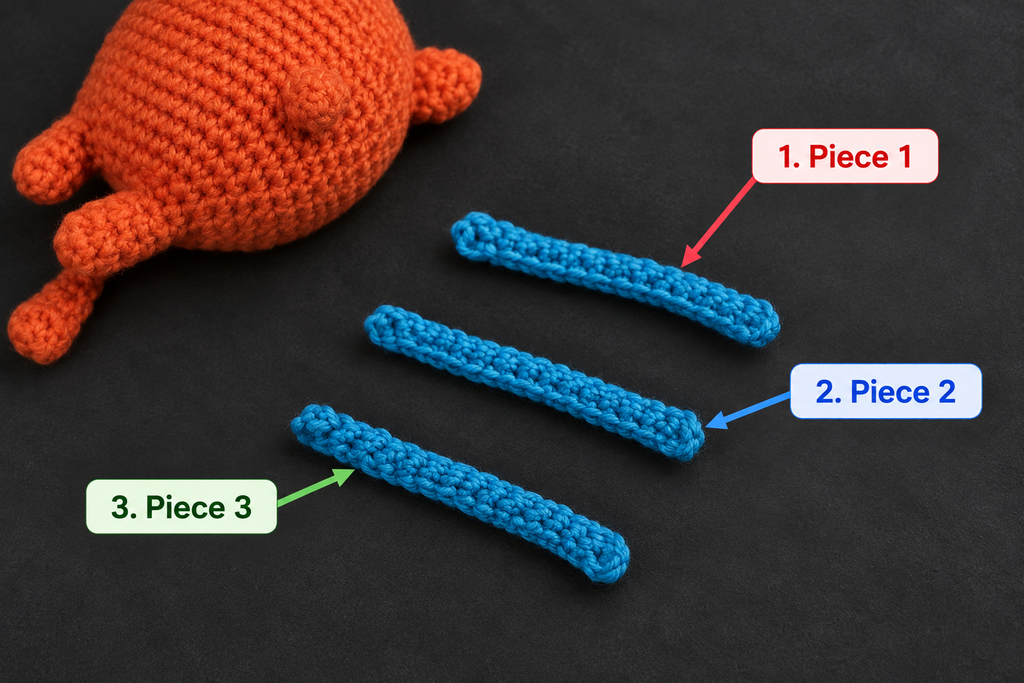
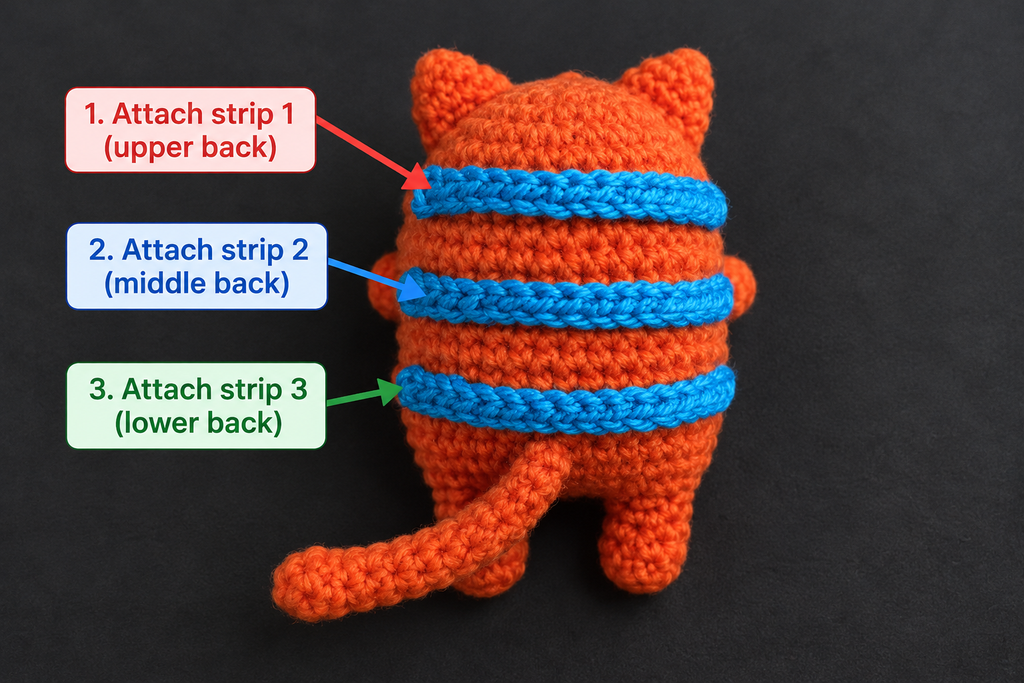
Step 10: Attach the Ears, Tail, and Stripes
Now we’ll assemble the remaining parts.
Start with the ears.
Place one ear near each upper corner of the head, approximately around the upper shaping rounds.
Make sure both ears point upward and are spaced evenly.
Thread the long yarn tail onto a tapestry needle.
Sew along the flattened base of the first ear, catching both the ear edge and the surface stitches of the head.
Repeat with the second ear.
Next, attach the tail to the lower back of the cat, around the lower-body rounds.
Check that the tail sits in the center of the back.
Use small, firm stitches around its base.
Finally, position the two coral stripes horizontally across the back, approximately around R11 and R16.
Sew them down using their yarn tails and small stitches in matching yarn.
Avoid leaving loose loops.
Once everything is attached, gently shape the ears and tail with your fingers.
Beginner tip: Check the position of every piece before sewing. Move it until the overall shape looks balanced.
Common mistake to avoid: Using only one loose stitch to attach a piece. Sew securely along the attachment edge so it cannot pull away easily.
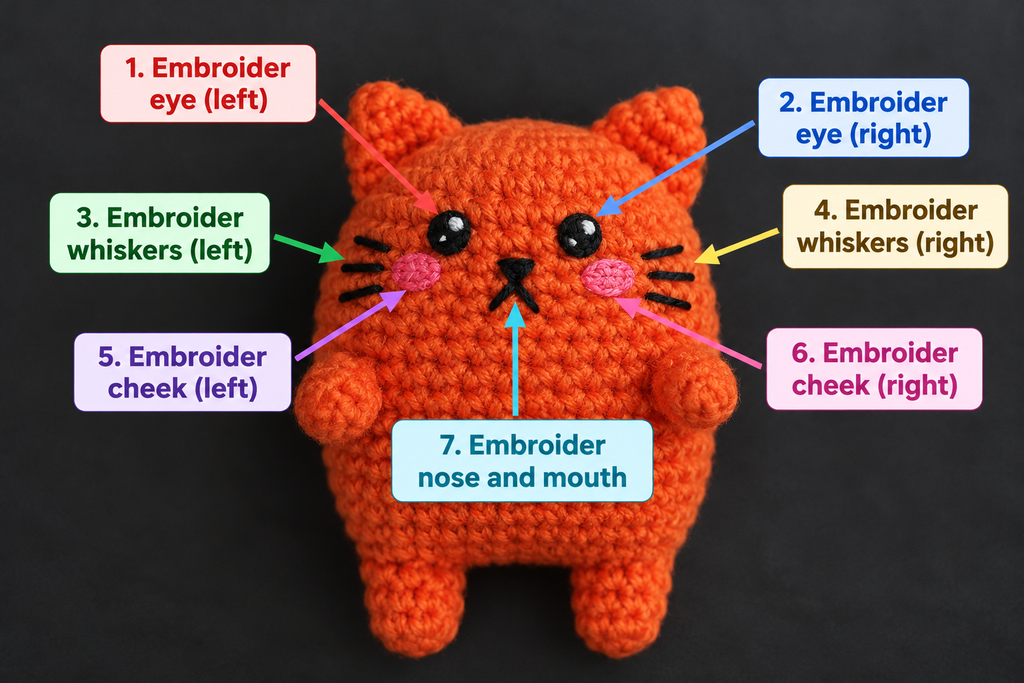
Step 11: Embroider the Cat’s Face
This is one of the most enjoyable parts of the project.
A few small stitches can completely change the personality of your mascot.
We’ll make a simple embroidered face using charcoal or black embroidery floss.
Position the eyes
First, find the center of the front of the cat.
The face should sit above the arms.
A useful starting point is around R17–R18, but adjust the position based on your finished shape.
Mark two eye positions approximately five stitches apart.
Use a tapestry or embroidery needle to make two small rounded eyes with several short stitches.
Try to keep the eyes symmetrical.
Make the nose
Below the eyes, embroider a tiny V-shaped nose.
Use two diagonal stitches that meet at the bottom.
A small nose often looks cuter than a large one on a miniature mascot.
Add whiskers
Make two short whiskers on each side of the face.
Keep the whiskers approximately the same length.
For a softer expression, angle the outer whiskers slightly upward.
Add optional cheeks
Using pale coral yarn or embroidery floss, add one or two small stitches beneath each eye.
These create a gentle blush effect.
Secure all embroidery tails by weaving them through several stitches inside the fabric and burying them in the stuffed body.
Beginner tip: Use removable markers to preview the eye positions before stitching. Even a one-stitch difference can change the expression.
Common mistake to avoid: Pulling embroidery stitches too tightly. This can create dents in the stuffed face.
Pattern Notes and Stitch Counts
Main body stitch-count guide
| Round | Stitch count | Purpose |
|---|---|---|
| Leg R1–R4 | 5 per leg | Create the feet |
| Body R5 | 18 | Join the legs |
| R6 | 24 | First body increase |
| R7 | 30 | Second body increase |
| R8–R13 | 30 | Build lower body |
| R14 | 30 | Form arm openings |
| R15–R19 | 30 | Build upper body |
| R20 | 24 | Begin closing |
| R21 | 18 | Continue shaping |
| R22 | 12 | Narrow opening |
| R23 | 6 | Final closure |
Turning chains
There are no turning chains for the main body.
The body is crocheted in continuous rounds.
The four-chain bridge between the legs is a foundation connection, not a turning chain.
Right side and wrong side
Keep the right side of the single crochet fabric facing outward.
The wrong side should remain inside the plush, against the stuffing.
Repeat pattern
The straight body rounds repeat one single crochet in every stitch.
Only the shaping rounds use increases and decreases.
Size adjustments
Changing yarn weight is the easiest way to adjust the size.
Thicker yarn and a suitable larger hook will generally produce a larger mascot.
Thinner yarn and a smaller hook will produce a smaller one.
Keep the same stitch counts when changing yarn size.
Common Beginner Mistakes and How to Fix Them
1. The magic ring has a hole
This usually happens when the starting loop isn’t pulled closed firmly.
Fix: Pull the yarn tail gently but firmly after completing the first round. If a small hole remains, use the tail to close it with a few stitches before hiding the end.
2. The stitch count keeps changing
Accidental increases often happen at the beginning or end of a round.
Fix: Place a stitch marker into the first stitch and count every completed round. If a round contains too many or too few stitches, undo that round and correct it before continuing.
3. Stuffing is showing between the stitches
This means the fabric is too loose or the piece has been overstuffed.
Fix: Use a slightly smaller hook or remove some stuffing. Aim for firm, even stitches without excessive tension.
4. One foot is longer than the other
This usually means the legs contain different numbers of rounds.
Fix: Count the rounds on both legs before joining them. They should match exactly.
5. The arm openings disappear
This happens when you accidentally crochet into the skipped stitches underneath the chain bridges.
Fix: On the next round, work into the chain stitches across the top of each opening. Leave the skipped stitches below untouched.
6. The ears look uneven
Small differences in stitch count, tension, or sewing position can make the ears look mismatched.
Fix: Make both ears using the same yarn and hook. Compare their shapes before sewing, then pin them into position.
7. The face looks crooked
An embroidered eye or nose may be slightly off-center.
Fix: Mark the facial positions before stitching. Look at the cat from the front and check the spacing between the eyes and nose.
8. The plush looks lumpy
Large pieces of stuffing can create bumps.
Fix: Remove the stuffing if the opening is still accessible, separate it into smaller pieces, and redistribute it evenly.
How to Customize Your Crochet Mascot Plush
One of the nicest things about a simple amigurumi pattern is how easily you can change its appearance.
Try different yarn colors
Dusty teal is only one option.
You could make a cream cat with brown ears, a lavender cat with pink cheeks, or a charcoal cat with pale gray stripes.
Choose two or three colors that work well together.
Change the facial expression
Small changes make a big difference.
Straight embroidered eyes create an alert expression. Curved closed eyes make the mascot look sleepy.
You can also add a tiny smiling mouth beneath the nose.
Make a larger mascot
Use thicker yarn and a hook that creates firm, closely spaced stitches.
Keep the same round counts to preserve the basic proportions.
Remember that the finished size and yarn quantity will change.
Make a smaller mascot
Use thinner cotton yarn and a smaller hook.
Miniature versions can be used as decorations, though they require more careful stitching.
Add a small scarf
Crochet a narrow strip using chains and single crochet rows.
Wrap it around the mascot’s neck area and secure it with stitching if the project is intended to be handled.
Avoid long, loose scarves on toys intended for children.
Try different decorative details
Instead of back stripes, you could add embroidered dots, a small heart on the belly, or contrasting ear tips.
For a three-dimensional toy, sewn embroidery is generally more practical than a traditional flat-project border.
Gift and display ideas
A finished crochet mascot can become a desk companion, a handmade gift, a shelf decoration, or a collectible character.
You could also make a group of matching mascots in different colors.
Finishing Instructions
Before calling your project complete, check every part carefully.
Secure all yarn ends
Thread loose ends onto a tapestry needle and weave them through several stitches.
Hide the tails inside the body where possible.
Trim any remaining yarn neatly.
Check the stuffing
Gently squeeze the mascot.
The body should feel evenly filled, with no obvious hard lumps or empty areas.
If the feet seem uneven, massage the stuffing carefully toward the bottoms.
Shape the ears and tail
Adjust the ears so they point upward.
Curve the tail slightly if desired.
Avoid pulling hard on the sewn connections.
Check the attachments
Gently inspect the ears, tail, stripes, and embroidered details.
Nothing should be loose or easily pulled away.
Washing and care
Follow the care instructions on your yarn label.
For a small handmade plush, gentle spot cleaning or careful handwashing is often preferable.
Use cool water and mild detergent when suitable for the yarn.
Avoid aggressive rubbing or wringing.
Press out excess water with a clean towel, reshape the plush, and allow it to dry completely.
Toy safety
For young children, avoid plastic safety eyes, buttons, beads, and glued decorations. Embroidered features remove some detachable-part risks, but do not automatically make a handmade toy safe or compliant.
Check every seam and attachment, and follow applicable toy-safety requirements if the item will be sold or given to a child.
Quick Printable-Style Pattern Summary
Project: Mini Cat Crochet Mascot Plush
Skill level: Beginner / Advanced Beginner
Yarn: Medium-weight cotton or cotton-acrylic blend.
Hook: 3.5 mm.
Additional materials: Stuffing, tapestry needle, scissors, stitch marker, embroidery floss.
Main stitches: Magic ring, chain, single crochet, increase, decrease, slip stitch.
Starting method: Make two small legs, beginning with five single crochet stitches in a magic ring.
Body construction: Join the legs with four chains, work around the foundation, increase to 30 stitches, and crochet the body in continuous rounds.
Arm construction: Create two chain openings in the body and crochet short arms directly into them.
Shaping: Decrease gradually from 30 to 6 stitches while stuffing the body.
Finishing: Crochet and sew on two ears and a tail, add optional decorative stripes, embroider the face, and secure all ends.
Estimated time: 3–5 hours.
Frequently Asked Questions
1. Is this crochet mascot plush pattern suitable for beginners?
Yes, it’s designed for beginners who already know how to make a magic ring and single crochet.
The main body uses simple continuous rounds, and the shaping relies on basic increases and decreases.
The most challenging parts are joining the legs and crocheting into the small arm openings.
If you’re new to amigurumi, practice those techniques with leftover yarn before starting the full project.
2. What is the best yarn for a crochet mascot plush?
Smooth cotton or cotton-acrylic blend yarn is a good choice.
It provides clear stitch definition and helps the toy hold its shape.
Medium-weight yarn is comfortable for many beginners.
Fluffy chenille can produce a very soft plush, but it makes stitches harder to see, especially when you’re learning.
3. Can I make this crochet plush without sewing?
The main head and body are worked together, and the arms are crocheted directly into the body.
However, you’ll still need to sew on the ears, tail, and optional decorative stripes.
This reduces the amount of assembly compared with patterns that use separate heads, bodies, arms, and legs.
4. How do I make my crochet mascot plush bigger?
Use thicker yarn and an appropriately sized hook.
For example, a bulky yarn can produce a noticeably larger version of the same design.
You can usually keep the stitch counts unchanged, although the finished size will depend on the yarn and tension.
Make sure the stitches remain tight enough to contain the stuffing.
5. Why does my amigurumi have holes between the stitches?
Visible holes usually come from loose tension, an oversized hook, or too much stuffing.
Try using a smaller hook or working with slightly firmer tension.
Add stuffing gradually rather than forcing a large amount into the body.
If you’re using very fluffy yarn, the spaces may be harder to evaluate, so check the fabric carefully as you work.
6. Can I use safety eyes instead of embroidered eyes?
Plastic safety eyes can be used on some decorative amigurumi intended for older users, but they can detach and create choking hazards.
For this tutorial, embroidered eyes are the preferred option.
If you are making toys for children, review the applicable safety standards rather than assuming any eye attachment method is automatically safe.
7. How long does it take to crochet a small mascot plush?
An experienced crocheter may complete a simple mini mascot in a few hours.
A beginner may need three to five hours or longer, especially when learning how to join the legs and create the arm openings.
There’s no need to rush.
Taking time to count stitches and position the details carefully will usually produce a neater finished project.
Conclusion
Making a small crochet mascot is a wonderful way to practice amigurumi while creating something with its own personality.
This mini cat combines simple stitches with a few useful construction techniques, including joining legs, shaping a stuffed body, crocheting arms directly into openings, and adding embroidered facial details.
Once you’ve completed your first mascot, try another version with different colors, a new facial expression, or a small handmade accessory.
Save this crochet mascot plush pattern for your next creative afternoon, and enjoy building your own collection of tiny crocheted characters.