A tiny handmade cheerleader has a special kind of personality. The little sneakers, flared skirt, cheerful ponytail, and fluffy pom-poms make her instantly recognizable, even before you choose your favorite team colors.
If you have been looking for a crochet cheerleader doll pattern that does not require complicated wire frames or advanced doll-making techniques, this project is a manageable place to begin.
We will make a small amigurumi doll using simple single crochet rounds, then give her an easy cheerleading uniform, a textured skirt, yarn hair, embroidered facial features, and two miniature pom-poms.
Most of the doll uses the same techniques: make a magic ring, increase to widen the fabric, work even rounds, decrease to shape it, and sew the pieces together. The skirt introduces double crochet, but you can practice that stitch before attaching it to the body.
This tutorial is designed for someone who already knows the basics of holding a crochet hook and making a single crochet. You do not need experience making dolls, and the finished project can be personalized with school, club, or team colors.
Pattern note: This is a new, independently written small-doll design. The measurements are approximate, and a finished physical sample has not been independently test-crocheted. Check the stated stitch counts as you work and adjust fit before permanent assembly.
What You’ll Learn
By the end of this tutorial, you will know how to:
- Crochet a rounded amigurumi head with smooth increases and decreases.
- Make a small, stable torso with a built-in cheerleading top.
- Crochet matching arms, legs, and integrated shoes.
- Add a gently flared skirt using simple double crochet increases.
- Create a fitted yarn hair cap and high ponytail.
- Embroider a friendly face without plastic safety eyes.
- Make colorful miniature cheerleader pom-poms.
- Stuff, position, and sew the doll pieces together securely.
The project is divided into separate parts so you can complete one piece at a time and check its shape before moving forward.
Materials You’ll Need
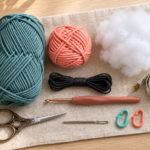
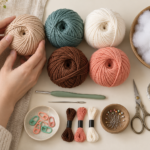
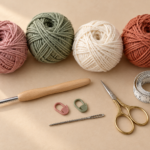
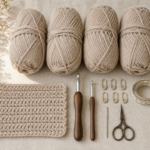
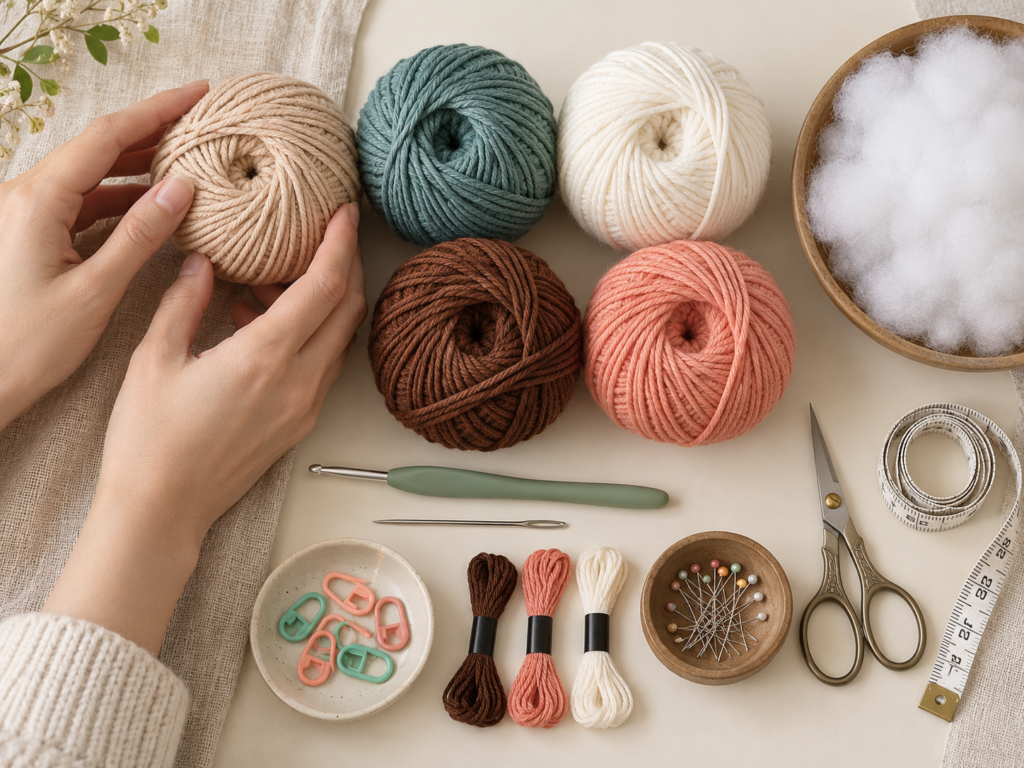
For this crochet cheerleader doll, choose smooth yarn in DK weight, category 3. Cotton makes the stitches easy to see and holds its shape well. A cotton-acrylic blend is also suitable if you prefer a softer finish.
| Material | Suggested Amount or Size |
|---|---|
| Warm beige yarn | 30–40 g for head, neck, arms, and legs |
| Muted teal yarn | 20–30 g for the uniform and skirt |
| Chestnut brown yarn | 15–20 g for hair |
| Warm white yarn | 10–15 g for shoes and trim |
| Coral yarn | Small amount for bow and pom-poms |
| Crochet hook | 3.0 mm |
| Polyester fiberfill | Approximately 15–25 g |
| Yarn needle | Blunt-tip tapestry needle |
| Stitch markers | 2 removable markers |
| Scissors | Small sharp craft scissors |
| Black embroidery thread | For eyes and mouth |
| Measuring tape | Optional but helpful |
| Sewing pins | Optional for checking alignment |
You may use any skin tone, hair color, or uniform combination. The important thing is to keep the yarn weight consistent so the head, body, and accessories remain proportionate.
For a small amigurumi doll, a hook that creates dense fabric matters more than the exact yarn brand. If you can see obvious gaps between your stitches, try a hook 0.5 mm smaller.
Crochet Abbreviations Used
This tutorial uses US crochet terminology.
| Abbreviation | Meaning |
|---|---|
| MR | Magic ring |
| ch | Chain |
| sc | Single crochet |
| dc | Double crochet |
| sl st | Slip stitch |
| st / sts | Stitch / stitches |
| inc | Increase: 2 single crochets in one stitch |
| dec | Invisible single crochet decrease |
| BLO | Back loop only |
| FO | Fasten off |
| rnd | Round |
| rep | Repeat |
In UK terminology, a US single crochet is a UK double crochet, and a US double crochet is a UK treble crochet.
When you see an instruction such as (3 sc, inc) × 6, make three single crochets and then one increase. Repeat that sequence six times.
The number in parentheses at the end of a round tells you how many stitches you should have.
Before You Start
Understand the basic amigurumi method
Most pieces are crocheted in continuous spiral rounds. You do not join each round with a slip stitch unless the instructions specifically say to.
Place a stitch marker in the first stitch of every round. When you reach the marker again, remove it, crochet the first stitch of the next round, and replace it.
This simple habit prevents one of the most common beginner mistakes: accidentally adding or losing stitches while crocheting a small circular piece.
How tight should the stitches be?
Your stitches should be firm enough to keep the stuffing inside, but not so tight that pulling the hook through them hurts your hands.
A little stretch is normal. Large holes between stitches are not ideal for stuffed toys.
As a starting point, make a small six-round practice sphere. Add a little stuffing and check whether the fabric remains dense.
Gauge and finished size
Exact gauge is less important than matching the size of your pieces. With DK yarn and a 3.0 mm hook, this pattern is intended to create a doll approximately 17–20 cm tall.
If you use thicker yarn, the doll will grow larger. If you use thinner yarn with an appropriately smaller hook, the doll will become smaller.
Try not to switch yarn thickness halfway through the project.
Right side and wrong side
The outside of your amigurumi should show neat, rounded single crochet stitches. If your work starts curling inside out, gently turn it right side out before stuffing.
The working yarn should generally emerge from the rear of the work as you crochet in your usual direction.
How to prevent an uneven doll
Count every shaping round. Make matching arms and legs from the same notes and tension, and compare their lengths before fastening off.
Leave generous sewing tails where instructed. It is much easier to adjust assembly with long yarn tails than with tiny ends that disappear into the fabric.
Step-by-Step Crochet Tutorial
Step 1: Start the Crochet Doll Head
We begin with the head because it introduces almost every essential amigurumi technique used throughout the project.
Take your beige yarn and make a magic ring. Work six single crochet stitches into the ring, then pull the yarn tail gently until the opening closes.
Do not pull so hard that the stitches become impossible to work into.
Head pattern — beige yarn
| Round | Instructions | Stitch Count |
|---|---|---|
| 1 | 6 sc in MR | 6 |
| 2 | inc × 6 | 12 |
| 3 | (1 sc, inc) × 6 | 18 |
| 4 | (2 sc, inc) × 6 | 24 |
| 5 | (3 sc, inc) × 6 | 30 |
| 6 | (4 sc, inc) × 6 | 36 |
| 7–12 | sc in every stitch | 36 |
At the end of Round 6, the work should form a relatively flat circle. Over the next rounds, the sides will gradually curl upward, creating a shallow bowl.
This is exactly what we want. Those straight rounds give the doll’s head enough depth before we begin decreasing.
Beginner tip: Place your stitch marker in the very first single crochet of each round, rather than in the magic ring or working loop.
Common mistake to avoid: Do not count the loop currently on your hook as a completed stitch. Only count stitches that have already been worked into the fabric.
Step 2: Shape, Stuff, and Close the Head
Now the head needs to curve inward to create a smooth rounded shape.
This is where you will practice invisible decreases.
For an invisible decrease, insert the hook under the front loop of the next stitch, then under the front loop of the following stitch. Yarn over, pull through both front loops, yarn over again, and complete the single crochet.
The technique removes one stitch without creating the noticeable bump that sometimes appears with an ordinary decrease.
Continue the head:
| Round | Instructions | Stitch Count |
|---|---|---|
| 13 | (4 sc, dec) × 6 | 30 |
| 14 | (3 sc, dec) × 6 | 24 |
| 15 | (2 sc, dec) × 6 | 18 |
| 16 | (1 sc, dec) × 6 | 12 |
| 17 | dec × 6 | 6 |
Before working Round 16, stop and stuff the head.
Add small pieces of polyester fiberfill instead of one large lump. Spread the stuffing toward the sides with your fingers or a blunt tool. This helps avoid a pointed or uneven shape.
The head should feel rounded and resilient, not rock-hard.
After Round 17, fasten off, leaving a long tail. Thread the tail through the front loops of the six remaining stitches and pull gently to close the opening.
Secure the yarn and retain a sufficiently long tail for attaching the head to the neck.
We will embroider the face later, when the head orientation and hairstyle can be checked.
Beginner tip: Finish stuffing before the opening becomes too small.
Common mistake to avoid: Overstuffing can stretch the fabric and make the decrease rounds appear as little holes. Remove a small amount if the stitches look strained.
Step 3: Crochet the Body and Cheerleading Top
Our cheerleader will have a teal top built directly into her body. This eliminates the need for a separate removable shirt.
The body is worked upward from the waist to the shoulders and neck.
Begin with teal yarn and a magic ring.
Body pattern — teal yarn unless otherwise noted
| Round | Instructions | Stitch Count |
|---|---|---|
| 1 | 6 sc in MR | 6 |
| 2 | inc × 6 | 12 |
| 3 | (1 sc, inc) × 6 | 18 |
| 4 | (2 sc, inc) × 6 | 24 |
| 5 | BLO sc around | 24 |
| 6–9 | sc around | 24 |
| 10 | (2 sc, dec) × 6 | 18 |
| 11–12 | sc around | 18 |
| 13 | (1 sc, dec) × 6 | 12 |
| 14 | sc around | 12 |
| 15 | Change to beige, sc around | 12 |
| 16 | sc around | 12 |
The back loops used in Round 5 leave an exposed ring of front loops. We will return to those loops when it is time to add the skirt.
Keep the torso firmly stuffed, but do not let fiberfill push through the fabric. Add extra stuffing around the upper body so the neckline does not collapse under the head.
Fasten off, leaving a tail for assembly. The neck opening remains open until the head is attached.
The neckline can be strengthened without wire by making several firm sewing passes through the head and neck during assembly.
Beginner tip: Mark one stitch in Round 5 with a contrasting piece of yarn so you can locate the skirt attachment ridge later.
Common mistake to avoid: Working through both loops on Round 5 removes the exposed loop ridge. If this happens, undo the round and repeat it through the back loops only.
Step 4: Crochet the Legs and Little Sneakers
The doll needs two matching legs. To avoid complicated footwear assembly, we will work the white sneakers directly into each leg using color changes.
Make two identical pieces.
Start at the shoe with white yarn. The shoe is intentionally simple, with a slightly rounded shape.
Leg pattern — make two
| Round | Instructions | Stitch Count |
|---|---|---|
| 1 | With white, 6 sc in MR | 6 |
| 2 | inc × 6 | 12 |
| 3 | BLO sc around | 12 |
| 4 | sc around | 12 |
| 5 | (2 sc, dec) × 3 | 9 |
| 6 | Change to beige, sc around | 9 |
| 7–14 | sc around | 9 |
The shoe section will create a compact, rounded foot shape. Use your fingers to gently push a little extra stuffing toward the front of the shoe.
After Round 14, stuff the leg lightly. Flatten the top opening so that the front and back stitches align, then close the opening with four single crochets worked through both layers, leaving the remaining stitch aligned within the seam.
Fasten off with a long sewing tail.
Place both legs side by side and compare their lengths. If one is visibly longer, check your tension and stitch count before assembly.
To make the shoes look more like sneakers, you can embroider a small teal stripe across each white shoe.
Pin the legs to the underside of the torso, spacing them evenly to either side of its center. Sew them securely through the flattened upper edges.
Beginner tip: Use very small quantities of stuffing in the legs. Overstuffed legs can become stiff and difficult to position.
Common mistake to avoid: Attaching both legs at different angles. Pin them first and check from the front and side before sewing.
Step 5: Crochet Two Small Arms
The arms are made separately and sewn to the shoulders.
For this design, we will position them slightly upward to create a classic cheering pose.
Begin each arm with beige yarn.
Arm pattern — make two
| Round | Instructions | Stitch Count |
|---|---|---|
| 1 | 6 sc in MR | 6 |
| 2–8 | sc around | 6 |
| 9–10 | Change to teal, sc around | 6 |
You do not need to make separate fingers. A simple rounded hand is more durable and better suited to a beginner amigurumi project.
Stuff the lower half of each arm very lightly. Leave the upper end mostly unstuffed so it can flatten neatly against the shoulder.
Press the opening together and close it using three single crochet stitches through both layers.
Fasten off, leaving enough yarn for sewing.
Pin the arms just below the neckline. Their upper edges should sit slightly behind the front of the torso.
Angle them outward and upward, then sew across the flattened ends.
For a natural look, avoid pulling the arms directly vertical unless you want the doll to appear to be celebrating a victory.
Beginner tip: Try several arm positions with pins. A small change in shoulder angle can completely change the doll’s expression.
Common mistake to avoid: Making the arms too stiff. If you add too much stuffing near the shoulders, the arms will not sit neatly against the torso.
Step 6: Crochet the Cheerleader Skirt
The little skirt is what makes the simple doll body look like a cheerleading uniform.
Instead of constructing a complicated garment with separate panels, this design uses an easy flared shape attached directly to the exposed loops left at Round 5 of the body.
The work begins at the waist and travels downward.
Hold the body with its neck pointing upward and its bottom facing downward. Attach teal yarn to an exposed front loop at the waist.
Skirt pattern
For joined rounds, the starting chain does not count as a stitch. Join each round to its first actual double crochet.
| Round | Instructions | Stitch Count |
|---|---|---|
| 1 | Ch 2, dc in each exposed waist loop, join | 24 |
| 2 | Ch 2, (3 dc, 2 dc in next st) × 6, join | 30 |
| 3 | Ch 2, dc around, join | 30 |
| 4 | Ch 2, (4 dc, 2 dc in next st) × 6, join | 36 |
| 5 | Ch 2, dc around, join | 36 |
| 6 | Change to white, ch 1, sc around, join | 36 |
Fasten off and weave in the ends on the wrong side of the skirt.
The repeated increases in Rounds 2 and 4 create the gentle flare. The resulting shape resembles a classic cheerleading skirt without requiring advanced pleat construction.
If you would like stronger-looking pleats, sew several short vertical decorative lines along the skirt using a slightly darker teal yarn. Keep the embroidery loose so it does not pull the skirt inward.
You can also use white or coral for the final round to match your chosen team palette.
Beginner tip: Spread the increases evenly around the skirt. This produces a balanced flare rather than having the fabric gather heavily in one area.
Common mistake to avoid: Accidentally crocheting the next round into the starting chain. Make sure the first and last double crochet stitches are correctly identified when joining.
Understanding the skirt increases
A double crochet increase means working two double crochets into the same stitch.
When the skirt has 24 stitches, an increase placed after every three ordinary stitches adds six new stitches around the round, bringing the total to 30.
The next increase round adds another six stitches, giving the skirt 36 stitches at its widest point.
This gradual shaping is important. If you add too many stitches at once, the skirt may ruffle or become wavy. If you add too few, it may hang straight downward instead of flaring.
If the skirt curls upward, first check that you have worked the correct stitch count. Then gently shape the fabric with your fingers.
Avoid aggressive stretching, especially if using cotton yarn.
Step 7: Crochet the Hair Cap and Add a Ponytail
A cheerleader doll is not complete without a fun hairstyle.
For this version, we will make a fitted crochet hair cap and attach a simple ponytail made from individual yarn strands.
This method is easier than crocheting dozens of separate curls.
Hair cap pattern — chestnut-brown yarn
| Round | Instructions | Stitch Count |
|---|---|---|
| 1 | 6 sc in MR | 6 |
| 2 | inc × 6 | 12 |
| 3 | (1 sc, inc) × 6 | 18 |
| 4 | (2 sc, inc) × 6 | 24 |
| 5 | (3 sc, inc) × 6 | 30 |
| 6 | (4 sc, inc) × 6 | 36 |
| 7–9 | sc around | 36 |
Fasten off with a long sewing tail.
Place the cap on the head and make sure it fits neatly. The edge should sit above the forehead and cover the crown.
If the cap feels too short, add one more round of 36 single crochets. Avoid extending it so far that it covers most of the face.
Pin the cap and sew around its edge with matching brown yarn.
Add the ponytail
Cut approximately 24–36 strands of brown yarn, each about 18–22 cm long.
Fold several strands in half, insert your hook under a stitch near the upper back of the hair cap, draw the folded center through, and pull the loose ends through the loop.
Repeat this process in a small cluster to create the ponytail.
Once you have enough strands, gather them gently and tie them with a separate brown yarn strand. Cover the tie with a small coral bow.
Trim the ends to the length you like.
For a softer ponytail, use fewer strands. For a fuller hairstyle, add more, but keep the yarn securely attached.
Beginner tip: Attach the hair in small sections and check the hairstyle from the front before adding more strands.
Common mistake to avoid: Making the ponytail too heavy. Excess yarn can pull the head backward and make a small stuffed doll difficult to balance.
Step 8: Make the Cheerleader Pom-Poms
These miniature pom-poms are the easiest part of the project, and they instantly turn your doll into a cheerleader.
For this version, use coral and warm-white yarn.
You do not need a special pom-pom maker. A small piece of cardboard is enough.
Make the first pom-pom
Cut a cardboard strip approximately 3–4 cm wide.
Wrap both yarn colors around the cardboard about 25–35 times in total. The exact amount depends on how full you want the pom-pom to appear.
Slide a separate length of yarn beneath the bundle and tie it firmly around the middle.
Carefully remove the yarn bundle from the cardboard.
Cut through the loops at both ends using sharp scissors. Fluff the loose strands with your fingers and trim them gradually into a rounded shape.
Make the second pom-pom the same way.
Aim for a finished diameter of approximately 2–3 cm, proportional to the doll’s hands.
Leave a long, secure center tie on each pom-pom. You can use this yarn to sew the pom-poms directly to the hands.
Beginner tip: Trim gradually. It is easy to remove more yarn, but impossible to put it back once cut.
Common mistake to avoid: A loose center tie allows strands to fall out. Pull the knot very firmly and reinforce it before attaching the accessory.
Step 9: Embroider the Doll’s Face
Before permanently attaching the head to the body, choose which side will be the front.
Use the ponytail position to establish the back of the head.
For a friendly embroidered face, use black embroidery thread to stitch two small curved eyes across the lower half of the head.
Position the eyes symmetrically, around the level of original head Rounds 9–10, adjusting their spacing according to how the head actually looks.
Start with two or three small stitches per eye. Keep the eyes simple.
Add a short curved smile a few rounds beneath them using dark brown or coral embroidery thread.
You can make small eyebrows with a single stitch each if you prefer a more expressive face.
Avoid pulling the thread too tightly. Tight facial embroidery can create deep dents in the head.
If you want gentle cheek color, use a tiny amount of textile-safe fabric pigment, although it is completely optional.
Embroidered features are preferable to removable plastic eyes for this simplified doll, particularly when making a gift for a household with young children. All features must still be sewn securely.
Beginner tip: Temporarily mark the eye positions with small pieces of contrasting yarn before embroidering.
Common mistake to avoid: Embroidering the eyes too high can make the forehead look unusually small after the hair cap is attached.
Step 10: Assemble the Crochet Cheerleader Doll
With the individual pieces complete, it is time to bring your little cheerleader together.
This stage is easier if you work on a flat surface with plenty of light.
First, pin the head to the neck. Check that the face is centered above the uniform.
Use the long yarn tail and tapestry needle to sew the base of the head firmly to the neckline. Work around the neck at least twice, taking small, secure stitches through the head and body.
The head should not wobble when gently moved.
Next, check that the legs are centered beneath the body and sewn securely. Adjust any uneven angles before securing their final yarn tails.
Position both arms in a raised cheering pose, with the hands pointing slightly outward.
Sew the shoulders firmly to the torso, ensuring that the stitches pass through the actual crochet fabric rather than only superficial yarn fibers.
Finally, attach the two pom-poms to the hands. Use the center tie tails to pass securely through the hands several times, then knot and bury the ends inside the fabric.
For a finishing detail, sew a tiny coral bow to the ponytail using matching yarn.
You may also embroider a small white V shape on the front of the teal uniform to create a sporty neckline.
Use embroidery rather than beads, sequins, or other detachable accessories for a child-oriented doll.
Beginner tip: Always check the overall shape from the front and side before tightening and hiding the sewing tails.
Common mistake to avoid: Hiding yarn ends before assembly is complete can make small adjustments much harder.
Pattern Notes and Stitch Counts
A good crochet doll pattern becomes much easier to follow when you understand the purpose of each increase and decrease.
The head expands from 6 to 36 stitches over six rounds, remains even for six more rounds, then decreases until it closes.
The torso begins with a 24-stitch waist circumference, narrows toward the shoulders, and finishes with a small beige neck.
The skirt is worked separately from the reserved waist loops and gradually expands from 24 to 36 double crochet stitches.
The arms and legs are simple tubes, which means they are easier to adjust than complicated jointed pieces.
Important stitch rules
- Continuous spiral rounds do not need turning chains or joins.
- Joined skirt rounds use a starting chain that does not count as a stitch.
- Every increase adds exactly one stitch to the round.
- Every decrease removes exactly one stitch.
- The head’s final closure should be sewn firmly before assembly.
- Matching pieces should have the same stitch count and number of rounds.
- The doll has no special designated right-side or wrong-side garment construction beyond keeping neat stitch faces outward.
If your doll looks slightly different from the example dimensions, that does not necessarily mean anything is wrong. Yarn texture and tension naturally influence the finished shape.
However, if one leg is noticeably longer or the skirt becomes dramatically asymmetrical, stop and verify the stitch counts before continuing.
Common Beginner Mistakes and How to Fix Them
| Common Problem | Why It Happens | Easy Fix |
|---|---|---|
| Head looks pointed | Stuffing concentrated at the top or uneven decreases | Redistribute stuffing and shape gently |
| Holes show between stitches | Hook too large or loose tension | Try a smaller hook and use firm, even stitches |
| Skirt curls or waves excessively | Incorrect increases or inconsistent tension | Recount stitches and correct the increase distribution |
| Arms look uneven | Different round counts or stuffing amounts | Compare both pieces before attaching |
| Head wobbles | Neck seam not sufficiently reinforced | Sew several additional firm passes through the neckline |
| Hair looks bulky | Too many strands concentrated in one spot | Remove some strands and spread attachment points |
| Pom-poms lose strands | Center knot is not secure | Retie tightly and stitch the center directly to the hand |
The most useful habit is to inspect your work after every shaping section. A tiny error in Round 3 is easy to fix immediately but may become much harder to correct after several additional rounds.
For beginners, stitch markers are especially useful when crocheting small beige pieces, where the stitch tops can become difficult to distinguish under artificial light.
How to Customize Your Crochet Cheerleader Doll
One of the best things about this project is that you can make it look completely different without changing the overall construction.
Try different team colors
A navy-and-gold uniform creates a classic school cheerleader look. Red and white feels bright and traditional, while lavender and cream produces a softer handmade gift aesthetic.
Use the main team color for the torso and skirt, then add contrasting edging, shoe details, and accessories.
Experiment with hairstyles
The same basic hair cap can support a short bob, a low ponytail, two pigtails, or a simple braided hairstyle.
For braids, divide the attached yarn strands into three sections, braid them gently, and tie the ends with matching yarn.
Make the skirt longer
For an extra-long skirt, add one or two additional rounds of double crochet before working the white border.
Keep the stitch count even during these added rounds unless additional flare is needed.
A slightly longer skirt may look more like a dress, while a shorter skirt emphasizes the classic cheerleading silhouette.
Change the doll’s size
To make a larger doll, use thicker yarn and a matching smaller-than-label hook that still creates dense amigurumi fabric.
Avoid increasing the number of stitches arbitrarily unless you are comfortable redesigning proportions. Changing yarn size is a simpler approach for beginners.
Add extra texture
Try a contrasting surface slip stitch around the hem or small embroidered vertical skirt details.
For a more detailed collectible doll, you could later experiment with crocheted cuffs, tiny socks, or a separate outfit. Those additions are optional and are not necessary for completing this beginner version.
Handmade gift ideas
A personalized cheerleader doll could be a graduation keepsake, cheer-team gift, sports-themed shelf decoration, or small handmade surprise for a coach or teammate.
For a gift intended for a child, prioritize durable stitching, securely attached accessories, and age-appropriate construction over decorative extras.
Finishing Instructions
Once the doll is completely assembled, check every join carefully.
Gently tug the hands, feet, and hair to make sure the stitched attachments feel secure. Do not pull hard enough to damage the fabric, but do confirm that small pieces are not loosely attached.
Thread remaining yarn tails into the doll using a tapestry needle. Pass each tail through the stuffed body, bring it out at a distant point, gently tension the yarn, and trim close to the surface so the end retracts into the fabric.
For loose yarn hair ends, trim conservatively to maintain an even shape.
Should you block an amigurumi doll?
Usually, no.
Stuffed amigurumi dolls generally do not require blocking. The stuffing gives them their shape.
If the skirt looks uneven, you can lightly dampen the hem with clean water and shape it by hand, allowing it to air-dry completely.
Avoid soaking the entire doll simply to correct a small skirt issue.
Washing and care
Hand-washing is the safest general approach for a handmade stuffed doll.
Use cool water and a mild detergent compatible with the chosen yarn. Gently squeeze the fabric instead of twisting it.
Press between clean towels to remove excess water, reshape the doll, and let it air-dry thoroughly in a ventilated area.
Always follow the yarn manufacturer’s care instructions, and be aware that heavily stuffed toys can take a long time to dry fully.
Toy safety
A handmade doll is not automatically safe for babies or toddlers. Yarn hair, bows, and pom-pom strands can detach and pose hazards, even when sewn carefully. This version should be treated as a decorative or supervised-use item unless its construction has been appropriately assessed for the intended child’s age. Do not add wire, pins, detachable beads, or other sharp or loose components.
Quick Printable-Style Pattern Summary
Crochet Cheerleader Doll
Confident beginner
| Finished size | Approx. 17–20 cm |
| Estimated time | 6–9 hours |
| Yarn | DK cotton or cotton blend |
| Hook | 3.0 mm |
| Main stitches | sc, dc, ch, sl st |
| Starting method | 6 sc in magic ring |
| Construction | Head, torso, two legs, two arms, skirt, hair, pom-poms |
| Repeat | Two matching arms, two legs, two pom-poms |
| Finishing | Stuff, embroider, sew, secure ends |
Copy quick pattern summary
Frequently Asked Questions
1. Is this crochet cheerleader doll pattern suitable for beginners?
Yes, for a confident beginner who already knows how to make a magic ring, single crochet, and basic increases and decreases. A complete first-time crocheter may want to practice making a simple amigurumi ball before starting the doll.
2. How much yarn do I need for a crochet cheerleader doll?
For the small DK-weight version described here, approximately 100–130 g of yarn across all colors should provide a reasonable allowance, with the main beige and teal colors using the most. Actual consumption depends on tension, hairstyle, and pom-pom fullness.
3. Can I make the cheerleader doll without safety eyes?
Yes. This design specifically uses embroidered eyes and a stitched smile. Embroidery gives you control over the doll’s expression and avoids hard plastic eye components.
However, securely embroidered features alone do not establish that a toy is suitable for every age group.
4. How do I stop my crochet doll from falling over?
A small amigurumi doll with narrow feet and a relatively large head may not stand independently. This pattern is designed primarily as a soft seated or supported doll.
For display, lean the doll against a small cushion or use a suitable external stand. Avoid adding loose weights or wire to a doll intended for children.
5. Can I make removable cheerleader clothes?
Yes, but that requires a modified pattern. This beginner design has the top incorporated into the body and the skirt crocheted directly onto the waist. A removable outfit needs a separate bodice, openings or closures, and careful fit adjustments.
6. Why does my crochet skirt ruffle too much?
Too many increases can cause the hem to ripple. Count every stitch and confirm that the skirt moves from 24 to 30 and then to 36 stitches at the specified rounds.
If your stitch counts are correct, a softer yarn or looser double crochet tension may also produce more movement. You can experiment with a slightly smaller hook for the skirt.
7. What is the best yarn for amigurumi dolls?
Smooth cotton yarn is an excellent choice because it offers clear stitch definition and a firm structure. Cotton-acrylic blends can provide slightly more softness while remaining relatively easy to crochet.
For beginners, avoid highly textured novelty yarn until you are comfortable seeing and counting small stitches.
Conclusion
A handmade cheerleader doll is a rewarding way to practice amigurumi shaping while creating something playful and personal.
The rounded head, simple body, little sneakers, and flared skirt are all built with basic crochet skills. Once the ponytail and pom-poms are added, the doll takes on her own cheerful character.
Try the pattern in your favorite school or team colors, experiment with different hairstyles, or make a small collection of matching cheerleaders.
Save this crochet cheerleader doll pattern so you can return to the stitch counts and image steps as you work. If you enjoy making small characters, a crochet ballerina doll or a mini amigurumi girl would be a natural next project.